该笔记学习b站视频制作而成:Spring Security6
一. Spring Security 基本功能
1. 概述
官方文档
Spring Security 是 Spring家族中的一个安全管理框架它提供了更丰富的功能如身份验证、授权、防御常见攻击
- 身份验证:验证谁正在访问系统,判断用户使是否为合法用户
- 授权:用户在进行身份验证后系统会控制谁能访问哪些资源,这个过程叫授权。也就是权限管理,给不同权限的用户提供不同的功能
- 防御常见的攻击
- CSRF
- HTTP Headers
- HTTP Requests
2. 身份验证基础案例
官方代码实例
导入先关依赖,这里用到的依赖有Spring Web、Spring Security和Thymeleaf。Spring Boot版本是3.2.0,JDK的版本是17
1
2
3
4
5
6
7
8
9
10
11
12
13
14
15
16
17
18
19
20
21
22
23
24
25
26
27
28
29
| <dependencies>
<dependency>
<groupId>org.springframework.boot</groupId>
<artifactId>spring-boot-starter-security</artifactId>
</dependency>
<dependency>
<groupId>org.springframework.boot</groupId>
<artifactId>spring-boot-starter-thymeleaf</artifactId>
</dependency>
<dependency>
<groupId>org.springframework.boot</groupId>
<artifactId>spring-boot-starter-web</artifactId>
</dependency>
<dependency>
<groupId>org.thymeleaf.extras</groupId>
<artifactId>thymeleaf-extras-springsecurity6</artifactId>
</dependency>
<dependency>
<groupId>org.springframework.boot</groupId>
<artifactId>spring-boot-starter-test</artifactId>
<scope>test</scope>
</dependency>
<dependency>
<groupId>org.springframework.security</groupId>
<artifactId>spring-security-test</artifactId>
<scope>test</scope>
</dependency>
</dependencies>
|
创建一个controller
1
2
3
4
5
6
7
8
| @Controller
public class IndexController {
@GetMapping("/")
public String index(){
return "Index";
}
}
|
创建一个html放在templates下
1
2
3
4
5
6
7
8
9
| <html xmlns:th="https://www.thymeleaf.org">
<head>
<title>Hello Security!</title>
</head>
<body>
<h1>Hello Security</h1>
<a th:href="@{/logout}">Log out</a>
</body>
</html>
|
启动项目并访问8080端口
可以看到访问8080端口时会自动跳转到Login页面,这个页面是Spring Security自带的
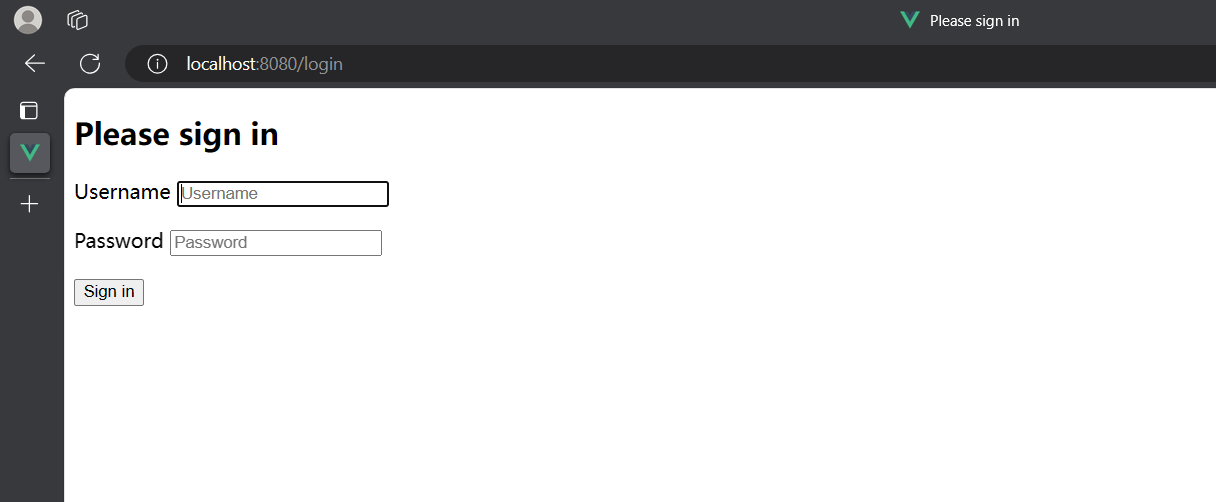
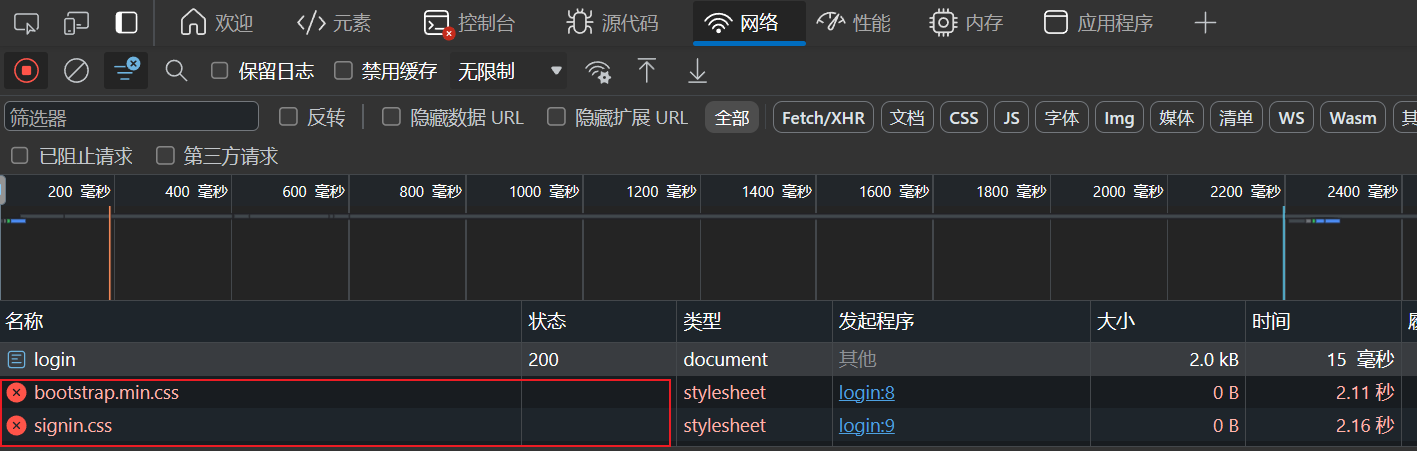
这里由于没有使用梯子,有css样式没有加载出来
默认的用户名是user,用户密码随机生成并打印在控制台上

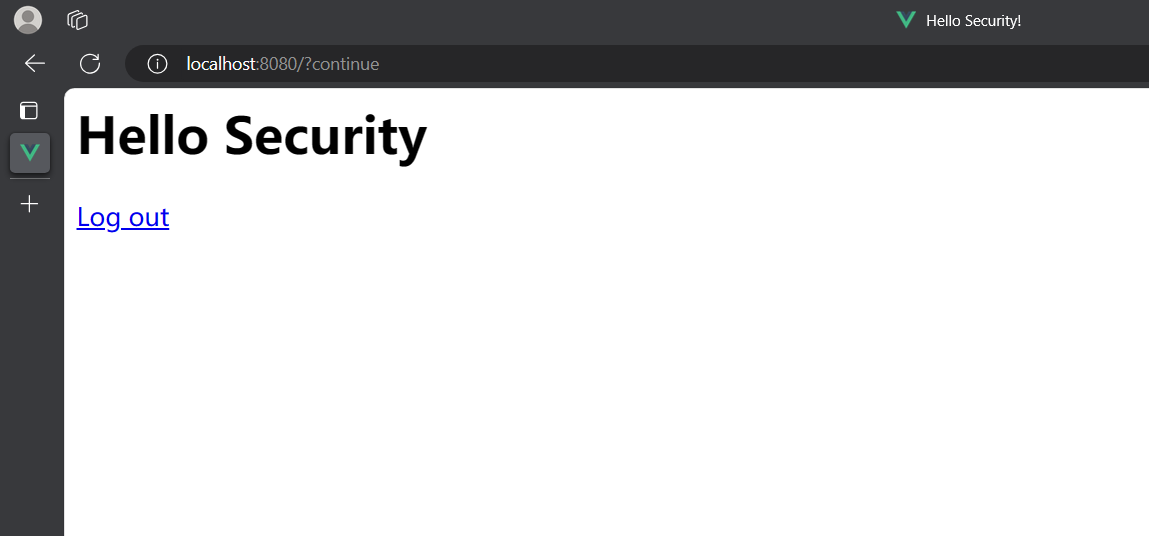
登录后就是刚刚添加的index页面
点击Log out可以退出
Spring Security默认做了许多
- 保护应用程序URL,要求对应用程序的任何交互进行身份验证
- 程序启动时生成一个默认的用户”user”
- 生成一个默认的随机密码,并打印在控制台上
- 生成默认的登录表单和注销页面
- 提供基于表单的登录和注销流程
- 对于Web请求,重新定向到登录页面
- 对于服务请求,返回401未授权
3. SecurityProperties
SecurityProperties是Spring Security框架中的一个类,在这个类中定义了一些Security相关的属性,例如登录时的默认用户“user”和随机生成的密码
1
2
3
4
5
6
7
8
9
10
11
12
13
14
15
16
17
18
19
20
21
22
23
24
25
26
27
28
29
30
31
32
33
34
35
36
37
38
39
40
41
42
43
44
45
46
47
48
49
50
51
52
53
54
55
56
57
58
59
60
61
62
63
64
65
66
67
68
69
70
71
72
73
74
75
76
77
78
79
80
81
82
83
84
85
86
| @ConfigurationProperties(
prefix = "spring.security"
)
public class SecurityProperties {
public static final int BASIC_AUTH_ORDER = 2147483642;
public static final int IGNORED_ORDER = Integer.MIN_VALUE;
public static final int DEFAULT_FILTER_ORDER = -100;
private final Filter filter = new Filter();
private final User user = new User();
public SecurityProperties() {
}
public User getUser() {
return this.user;
}
public Filter getFilter() {
return this.filter;
}
public static class Filter {
private int order = -100;
private Set<DispatcherType> dispatcherTypes = EnumSet.allOf(DispatcherType.class);
public Filter() {
}
public int getOrder() {
return this.order;
}
public void setOrder(int order) {
this.order = order;
}
public Set<DispatcherType> getDispatcherTypes() {
return this.dispatcherTypes;
}
public void setDispatcherTypes(Set<DispatcherType> dispatcherTypes) {
this.dispatcherTypes = dispatcherTypes;
}
}
public static class User {
private String name = "user";
private String password = UUID.randomUUID().toString();
private List<String> roles = new ArrayList();
private boolean passwordGenerated = true;
public User() {
}
public String getName() {
return this.name;
}
public void setName(String name) {
this.name = name;
}
public String getPassword() {
return this.password;
}
public void setPassword(String password) {
if (StringUtils.hasLength(password)) {
this.passwordGenerated = false;
this.password = password;
}
}
public List<String> getRoles() {
return this.roles;
}
public void setRoles(List<String> roles) {
this.roles = new ArrayList(roles);
}
public boolean isPasswordGenerated() {
return this.passwordGenerated;
}
}
}
|
我们可以通过自定义配置在application.properties中来定义用户名和密码
设置好的用户名和登录密码会替换掉SecurityProperties类中的,控制台也不再打印密码
1
2
| spring.security.user.name=zheng
spring.security.user.password=123456
|
二. 自定义配置
1. 基于内存的用户认证
创建一个config类
1
2
3
4
5
6
7
8
9
10
11
12
13
14
15
16
17
| @Configuration
@EnableWebSecurity
public class WebSecurityConfig {
@Bean
public UserDetailsService userDetailsService() {
InMemoryUserDetailsManager manager = new InMemoryUserDetailsManager();
manager.createUser(
User.withDefaultPasswordEncoder().username("user").password("password").roles("USER").build()
);
return manager;
}
}
|
启动应用程序
这时候在application.properties配置的用户名和密码生效,需要使用config类中的用户名和密码
2. 基于内存的用户认证流程
- 程序启动时:
- 创建
InMemoryUserDetailsManger对象
- 创建
User对象,封装用户名和密码
- 使用
InMemoryUserDetailsManager将User存入内存中
- 校验用户
- Spring Security自动使用
InMemoryUserDetailsManager的loadUserByUsername方法从内存中获取User对象
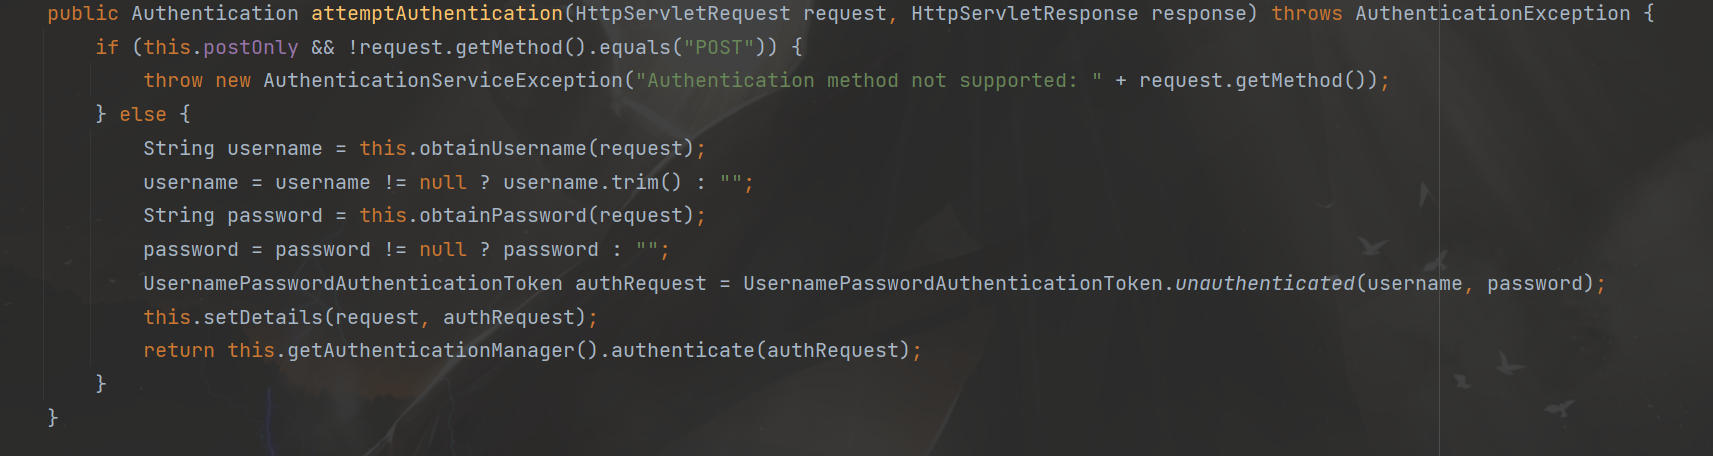
- 在
UsernamePasswordAuthenticationFilter过滤器中的attemptAuthentication方法中将用户输入的用户名、密码和内存中获取到的用户信息进行比对,进行用户认证
3. 基于数据库的数据流
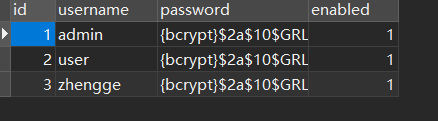
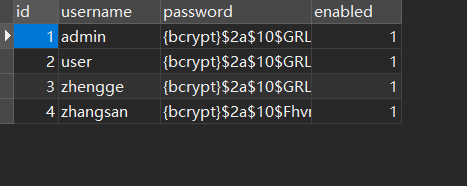
创建数据库
1
2
3
4
5
6
7
8
9
10
11
12
13
14
15
16
17
18
19
|
CREATE DATABASE `security-demo`;
USE `security-demo`;
CREATE TABLE `user`(
`id` INT NOT NULL AUTO_INCREMENT PRIMARY KEY,
`username` VARCHAR(50) DEFAULT NULL ,
`password` VARCHAR(500) DEFAULT NULL,
`enabled` BOOLEAN NOT NULL
);
CREATE UNIQUE INDEX `user_username_uindex` ON `user`(`username`);
INSERT INTO `user` (`username`, `password`, `enabled`) VALUES
('admin', '{bcrypt}$2a$10$GRLdNijSQMUvl/au9ofL.eDwmoohzzS7.rmNSJZ.0FxO/BTk76klW', TRUE),
('user', '{bcrypt}$2a$10$GRLdNijSQMUvl/au9ofL.eDwmoohzzS7.rmNSJZ.0FxO/BTk76klW', TRUE),
('zhengge', '{bcrypt}$2a$10$GRLdNijSQMUvl/au9ofL.eDwmoohzzS7.rmNSJZ.0FxO/BTk76klW', TRUE);
|
引入依赖
1
2
3
4
5
6
7
8
9
10
11
12
13
14
15
16
17
18
19
20
21
22
23
24
25
26
27
28
| <dependency>
<groupId>mysql</groupId>
<artifactId>mysql-connector-java</artifactId>
<version>8.0.30</version>
</dependency>
<dependency>
<groupId>com.baomidou</groupId>
<artifactId>mybatis-plus-boot-starter</artifactId>
<version>3.5.4.1</version>
<exclusions>
<exclusion>
<groupId>org.mybatis</groupId>
<artifactId>mybatis-spring</artifactId>
</exclusion>
</exclusions>
</dependency>
<dependency>
<groupId>org.mybatis</groupId>
<artifactId>mybatis-spring</artifactId>
<version>3.0.3</version>
</dependency>
<dependency>
<groupId>org.projectlombok</groupId>
<artifactId>lombok</artifactId>
</dependency>
|
配置数据源
1
2
3
4
5
6
7
|
spring.datasource.driver-class-name=com.mysql.cj.jdbc.Driver
spring.datasource.url=jdbc:mysql://localhost:3306/security-demo
spring.datasource.username=root
spring.datasource.password=020427
mybatis-plus.configuration.log-impl=org.apache.ibatis.logging.stdout.StdOutImpl
|
创建实体类
1
2
3
4
5
6
7
8
9
| @Data
public class User {
@TableId(value = "id", type = IdType.AUTO)
private Integer id;
private String username;
private String password;
private Boolean enabled;
}
|
创建mapper层
1
2
3
4
5
6
7
8
9
| package com.zheng.securitydemo.mapper;
import com.baomidou.mybatisplus.core.mapper.BaseMapper;
import com.zheng.securitydemo.entiry.User;
import org.apache.ibatis.annotations.Mapper;
@Mapper
public interface UserMapper extends BaseMapper<User> {
}
|
创建对应的xml文件
1
2
3
4
5
| <?xml version="1.0" encoding="UTF-8"?>
<!DOCTYPE mapper PUBLIC "-//mybatis.org//DTD Mapper 3.0//EN" "http://mybatis.org/dtd/mybatis-3-mapper.dtd">
<mapper namespace="com.zheng.securitydemo.mapper.UserMapper">
</mapper>
|
创建service层
1
2
3
4
5
6
7
8
| package com.zheng.securitydemo.service;
import com.baomidou.mybatisplus.extension.service.IService;
import com.zheng.securitydemo.entiry.User;
public interface UserService extends IService<User> {
}
|
1
2
3
4
5
6
7
8
9
10
11
| package com.zheng.securitydemo.service.ServiceImpl;
import com.baomidou.mybatisplus.extension.service.impl.ServiceImpl;
import com.zheng.securitydemo.entiry.User;
import com.zheng.securitydemo.mapper.UserMapper;
import com.zheng.securitydemo.service.UserService;
import org.springframework.stereotype.Service;
@Service
public class UserServiceImpl extends ServiceImpl<UserMapper, User> implements UserService {
}
|
创建controller层
1
2
3
4
5
6
7
8
9
10
11
12
13
| @RestController
@RequestMapping("/user")
public class UserController {
@Autowired
public UserService userService;
@GetMapping("/list")
public List<User> getList() {
return userService.list();
}
}
|
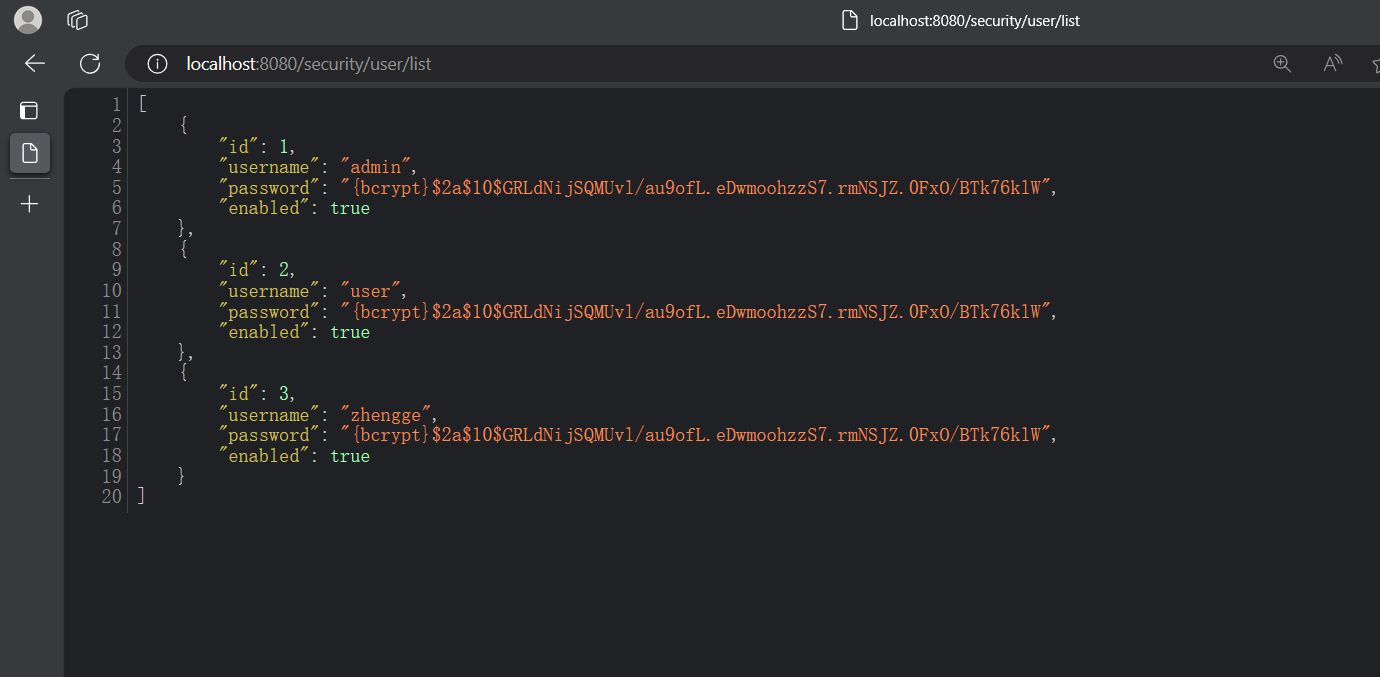
测试
登录后再访问/user/list,可以查询出刚刚数据库表中的数据
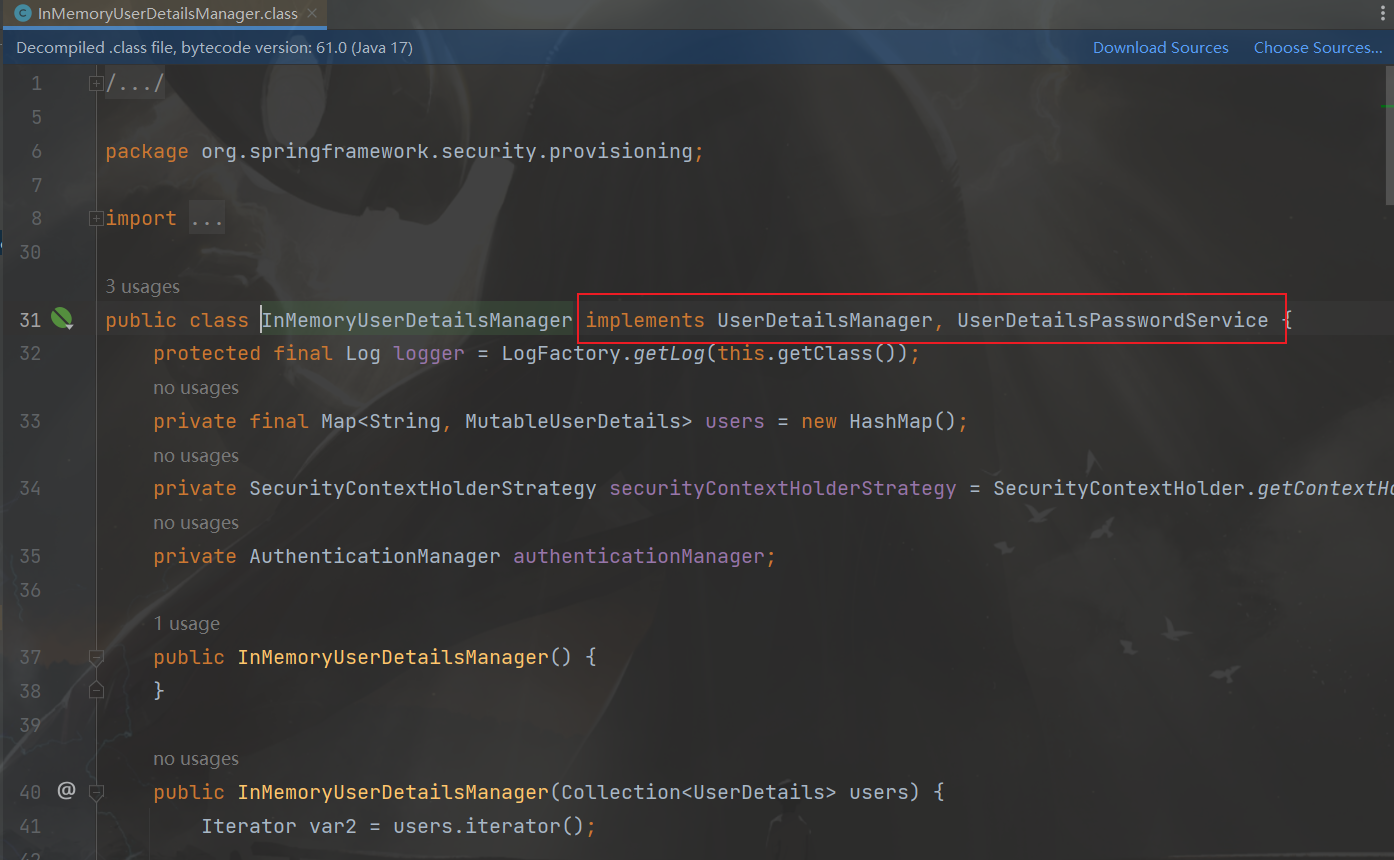
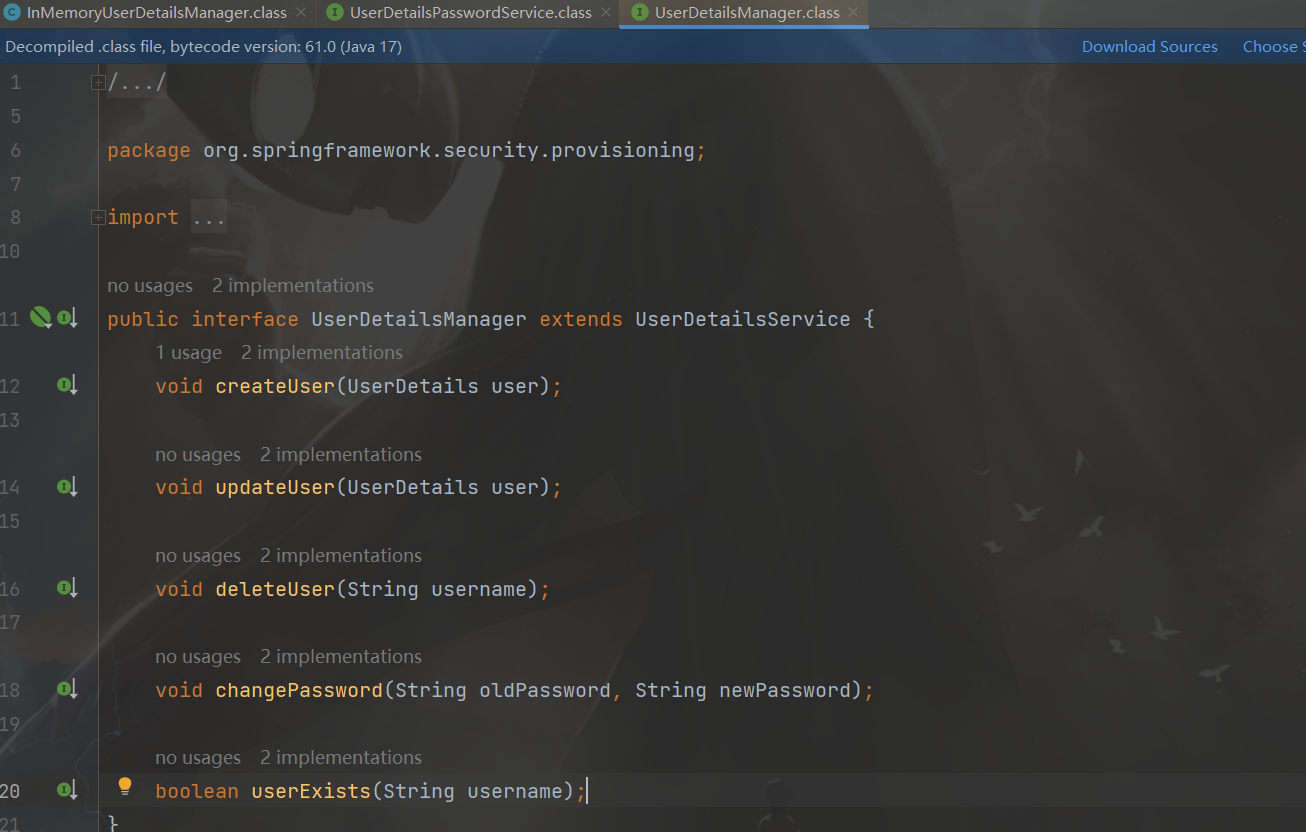
4. 基于数据库的用户认证流程分析
可以看见基于内存的用户信息管理器是实现了UserDetailsManager接口和UserDetailsPasswordService接口,同时在UserDetailsManager接口中声明了创建user的相关方法。所以要创建基于数据库的用户认证,需要创建一个类DBUserDetailsManger来实现UserDetailsManager接口和UserDetailsPasswordService接口,充当用户信息管理器的身份
流程
- 程序启动时:
- 创建
DBUserDetailsManger类的对象,实现UserDetailsManager接口和UserDetailsPasswordService接口
- 校验用户
- Spring Security自动使用
DBUserDetailsManger的loadUserByUsername方法从数据库中获取User对象
- 在
UsernamePasswordAuthenticationFilter过滤器中的attemptAuthentication方法中将用户输入的用户名、密码和内存中获取到的用户信息进行比对,进行用户认证
5. 基于数据库的用户认证实现
创建DBUserDetailsManger类并实现UserDetailsManager接口和UserDetailsPasswordService接口
用户登录验证的流程在loadUserByUsername方法中实现
1
2
3
4
5
6
7
8
9
10
11
12
13
14
15
16
17
18
19
20
21
22
23
24
25
26
27
28
29
30
31
32
33
34
35
36
37
38
39
40
41
42
43
44
45
46
47
48
49
50
51
52
53
54
55
56
57
58
59
60
61
62
63
64
65
66
67
68
69
70
71
72
73
74
75
76
77
78
79
80
81
| package com.zheng.securitydemo.config;
import com.baomidou.mybatisplus.core.conditions.query.QueryWrapper;
import com.zheng.securitydemo.entiry.User;
import com.zheng.securitydemo.mapper.UserMapper;
import jakarta.annotation.Resource;
import org.springframework.security.core.GrantedAuthority;
import org.springframework.security.core.userdetails.UserDetails;
import org.springframework.security.core.userdetails.UserDetailsPasswordService;
import org.springframework.security.core.userdetails.UsernameNotFoundException;
import org.springframework.security.provisioning.UserDetailsManager;
import java.util.ArrayDeque;
import java.util.Collection;
@Component
public class DBUserDetailsManager implements UserDetailsManager, UserDetailsPasswordService {
@Resource
private UserMapper userMapper;
@Override
public UserDetails updatePassword(UserDetails user, String newPassword) {
return null;
}
@Override
public void createUser(UserDetails user) {
}
@Override
public void updateUser(UserDetails user) {
}
@Override
public void deleteUser(String username) {
}
@Override
public void changePassword(String oldPassword, String newPassword) {
}
@Override
public boolean userExists(String username) {
return false;
}
@Override
public UserDetails loadUserByUsername(String username) throws UsernameNotFoundException {
QueryWrapper<User> wrapper = new QueryWrapper<User>();
wrapper.eq("username", username);
User user = userMapper.selectOne(wrapper);
if (user == null) {
throw new UsernameNotFoundException(username);
} else {
Collection<GrantedAuthority> authorities = new ArrayDeque<>();
return new org.springframework.security.core.userdetails.User(
user.getUsername(),
user.getPassword(),
user.getEnabled(),
true,
true,
true,
authorities
);
}
}
}
|
测试,把config中UserDetailsService的代码注释掉,然后启动程序
输入数据库中的账号密码然后登录成功
6. Spring Security的默认配置
在Spring Security中有以下默认配置,默认的登录页面开启也是在这里
1
2
3
4
5
6
7
8
9
10
11
12
13
14
| @Bean
public SecurityFilterChain filterChain(HttpSecurity http) throws Exception {
http.authorizeRequests(authorize ->
authorize.anyRequest()
.authenticated())
.formLogin(withDefaults())
.httpBasic(withDefaults());
return http.build();
}
|
7. 添加用户功能实现
在UserController中添加方法
1
2
3
4
| @PostMapping("/add")
public void add(@RequestBody User user){
userService.saveUserDetails(user);
}
|
在UserServiceImpl实现中添加方法
1
2
3
4
5
6
7
8
9
10
11
12
13
14
| @Resource
private DBUserDetailsManager dbUserDetailsManager;
@Override
public void saveUserDetails(User user) {
UserDetails userDetails = org.springframework.security.core.userdetails.User
.withDefaultPasswordEncoder()
.username(user.getUsername())
.password(user.getPassword())
.build();
dbUserDetailsManager.createUser(userDetails);
}
|
修改DBUserDetailsManager中的createUser方法
1
2
3
4
5
6
7
8
9
10
11
12
|
@Override
public void createUser(UserDetails userDetails) {
User user = new User();
user.setUsername(userDetails.getUsername());
user.setPassword(userDetails.getPassword());
user.setEnabled(true);
userMapper.insert(user);
}
|
测试
引入swagger依赖
1
2
3
4
5
6
|
<dependency>
<groupId>com.github.xiaoymin</groupId>
<artifactId>knife4j-openapi3-jakarta-spring-boot-starter</artifactId>
<version>4.1.0</version>
</dependency>
|
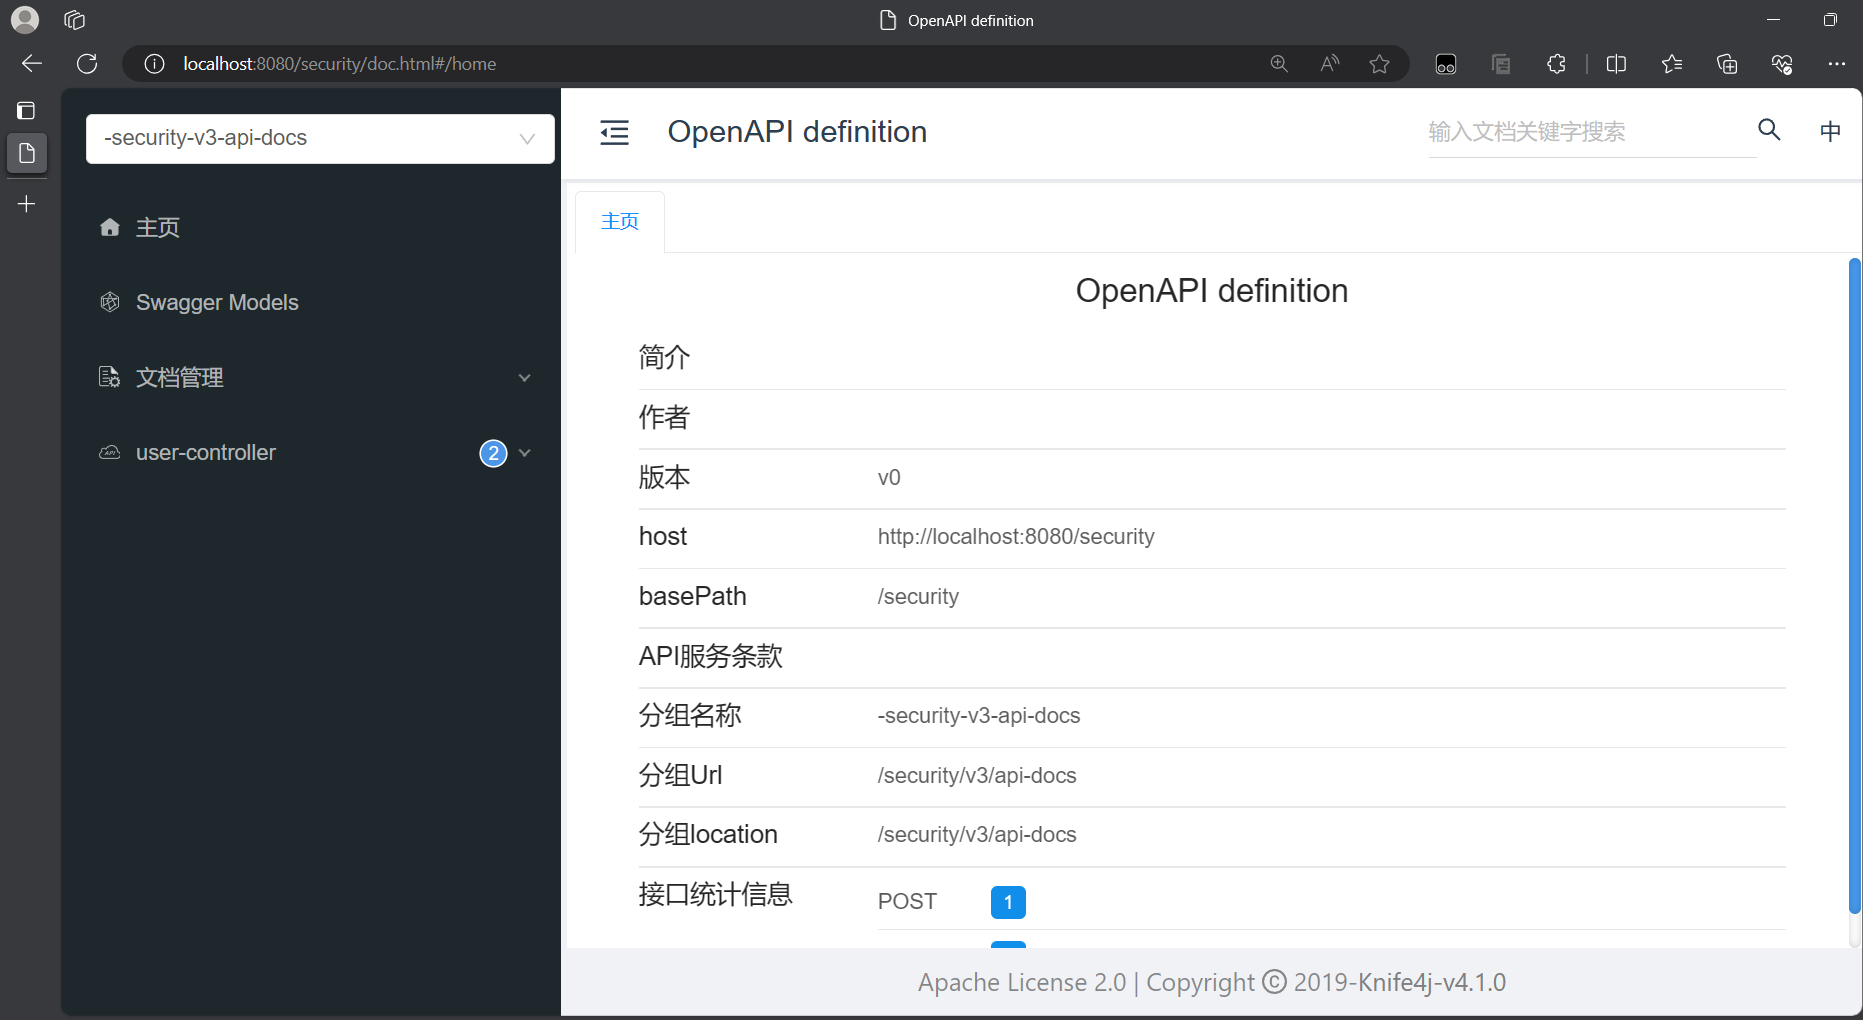
启动项目并登录,然后进入doc.html页面
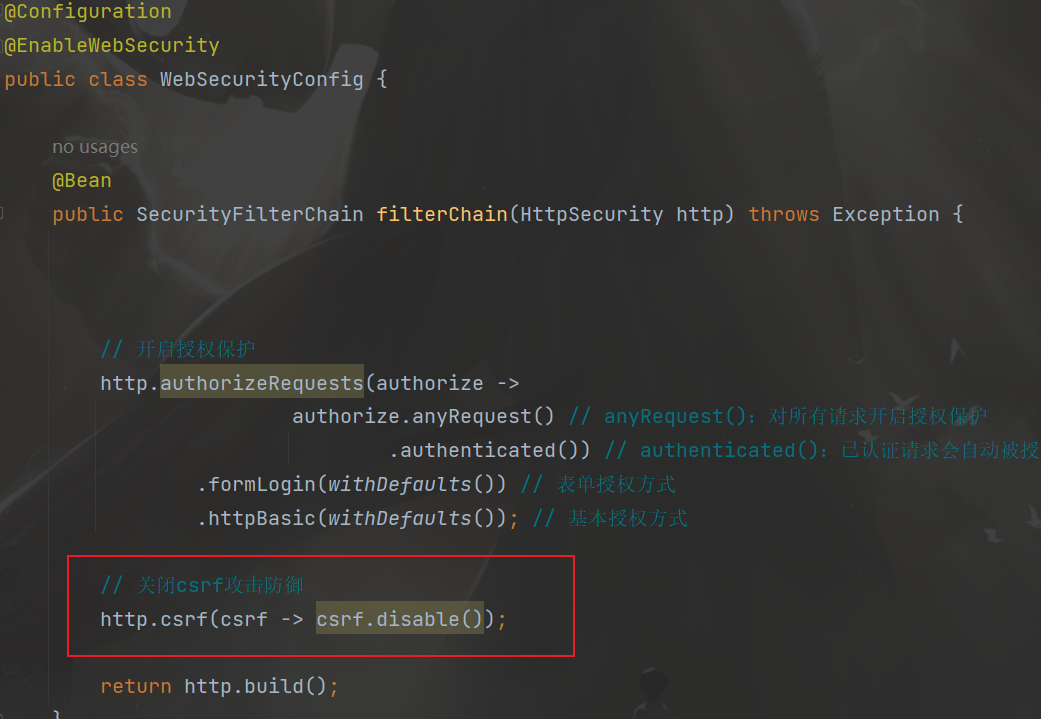
由于没有编写前端,无法向后端传递csrf验证,所以先关闭csrf防御
在上面的默认配置filterChain中添加一下代码
1
2
|
http.csrf(csrf -> csrf.disable());
|
重新启动项目,进行调试
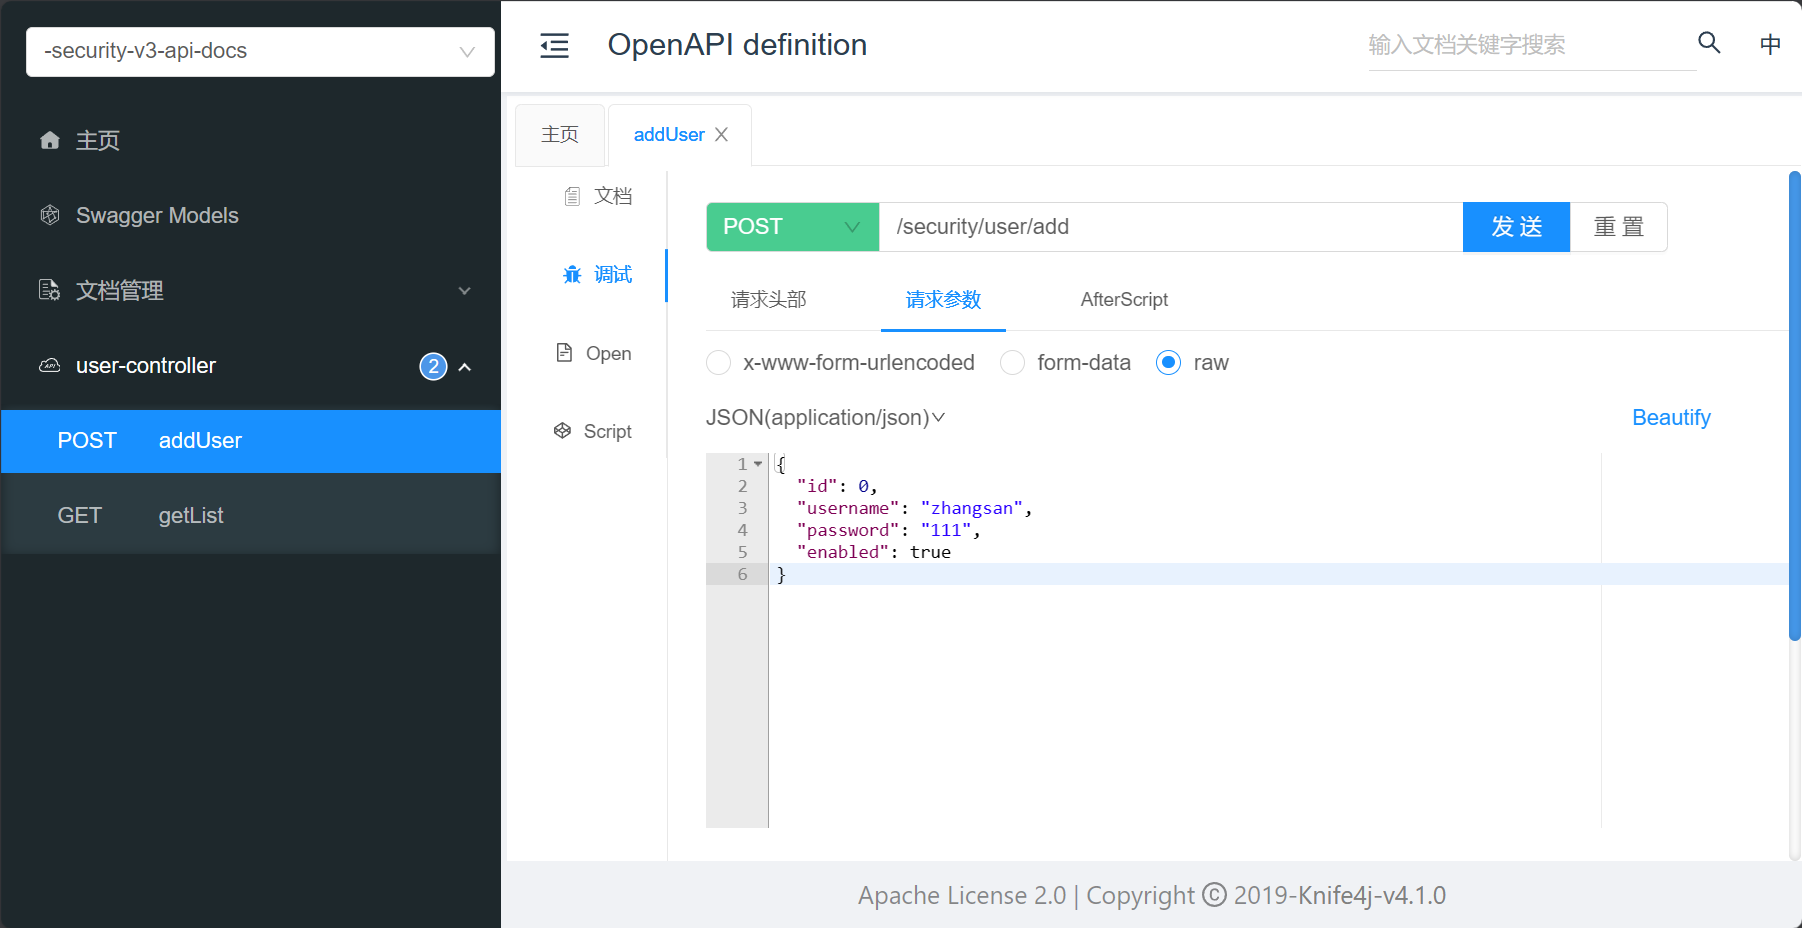
发送请求后刷新数据库,可以看到zhangsan已经添加到数据库中
删除,修改用户的过程和添加大致一样
8. 密码加密算法
明文密码:
最初,密码以明文形式存储在数据库中。但是恶意用户可能会通过SQL注入等手段获取到明文密码,或者程序员将数据库数据泄露的情况也可能发生。
Hash算法:
Spring Security的PasswordEncoder接口用于对密码进行单向转换,从而将密码安全地存储。对密码单向转换需要用到哈希算法,例如MD5、SHA-256、SHA-512等,哈希算法是单向的,只能加密,不能解密。
因此,数据库中存储的是单向转换后的密码,Spring Security在进行用户身份验证时需要将用户输入的密码进行单向转换,然后与数据库的密码进行比较。
因此,如果发生数据泄露,只有密码的单向哈希会被暴露。由于哈希是单向的,并且在给定哈希的情况下只能通过暴力破解的方式猜测密码。
彩虹表:
恶意用户创建称为彩虹表的查找表。
彩虹表就是一个庞大的、针对各种可能的字母组合预先生成的哈希值集合,有了它可以快速破解各类密码。越是复杂的密码,需要的彩虹表就越大,主流的彩虹表都是100G以上,目前主要的算法有LM, NTLM, MD5, SHA1, MYSQLSHA1, HALFLMCHALL, NTLMCHALL, ORACLE-SYSTEM, MD5-HALF。
加盐密码:
为了减轻彩虹表的效果,开发人员开始使用加盐密码。不再只使用密码作为哈希函数的输入,而是为每个用户的密码生成随机字节(称为盐)。盐和用户的密码将一起经过哈希函数运算,生成一个唯一的哈希。盐将以明文形式与用户的密码一起存储。然后,当用户尝试进行身份验证时,盐和用户输入的密码一起经过哈希函数运算,再与存储的密码进行比较。唯一的盐意味着彩虹表不再有效,因为对于每个盐和密码的组合,哈希都是不同的。
自适应单向函数:
随着硬件的不断发展,加盐哈希也不再安全。原因是,计算机可以每秒执行数十亿次哈希计算。这意味着我们可以轻松地破解每个密码。
现在,开发人员开始使用自适应单向函数来存储密码。使用自适应单向函数验证密码时,故意占用资源(故意使用大量的CPU、内存或其他资源)。自适应单向函数允许配置一个“工作因子”,随着硬件的改进而增加。我们建议将“工作因子”调整到系统中验证密码需要约一秒钟的时间。这种权衡是为了让攻击者难以破解密码。
自适应单向函数包括bcrypt、PBKDF2、scrypt和argon2。Spring Security 默认采用的是bcrypt
BCryptPasswordEncoder(bcryot)
使用广泛支持的bcrypt算法来对密码进行哈希。为了增加对密码破解的抵抗力,bcrypt故意设计得较慢。和其他自适应单向函数一样,应该调整其参数,使其在您的系统上验证一个密码大约需要1秒的时间。BCryptPasswordEncoder的默认实现使用强度10。建议您在自己的系统上调整和测试强度参数,以便验证密码时大约需要1秒的时间。
Argon2PasswordEncoder(argon2)
使用Argon2算法对密码进行哈希处理。Argon2是密码哈希比赛的获胜者。为了防止在自定义硬件上进行密码破解,Argon2是一种故意缓慢的算法,需要大量内存。与其他自适应单向函数一样,它应该在您的系统上调整为大约1秒来验证一个密码。当前的Argon2PasswordEncoder实现需要使用BouncyCastle库。
Pbkdf2PasswordEncoder(PBKDF2)
使用PBKDF2算法对密码进行哈希处理。为了防止密码破解,PBKDF2是一种故意缓慢的算法。与其他自适应单向函数一样,它应该在您的系统上调整为大约1秒来验证一个密码。当需要FIPS认证时,这种算法是一个很好的选择。
SCryptPasswordEncoder(scrypt)
使用scrypt算法对密码进行哈希处理。为了防止在自定义硬件上进行密码破解,scrypt是一种故意缓慢的算法,需要大量内存。与其他自适应单向函数一样,它应该在您的系统上调整为大约1秒来验证一个密码。
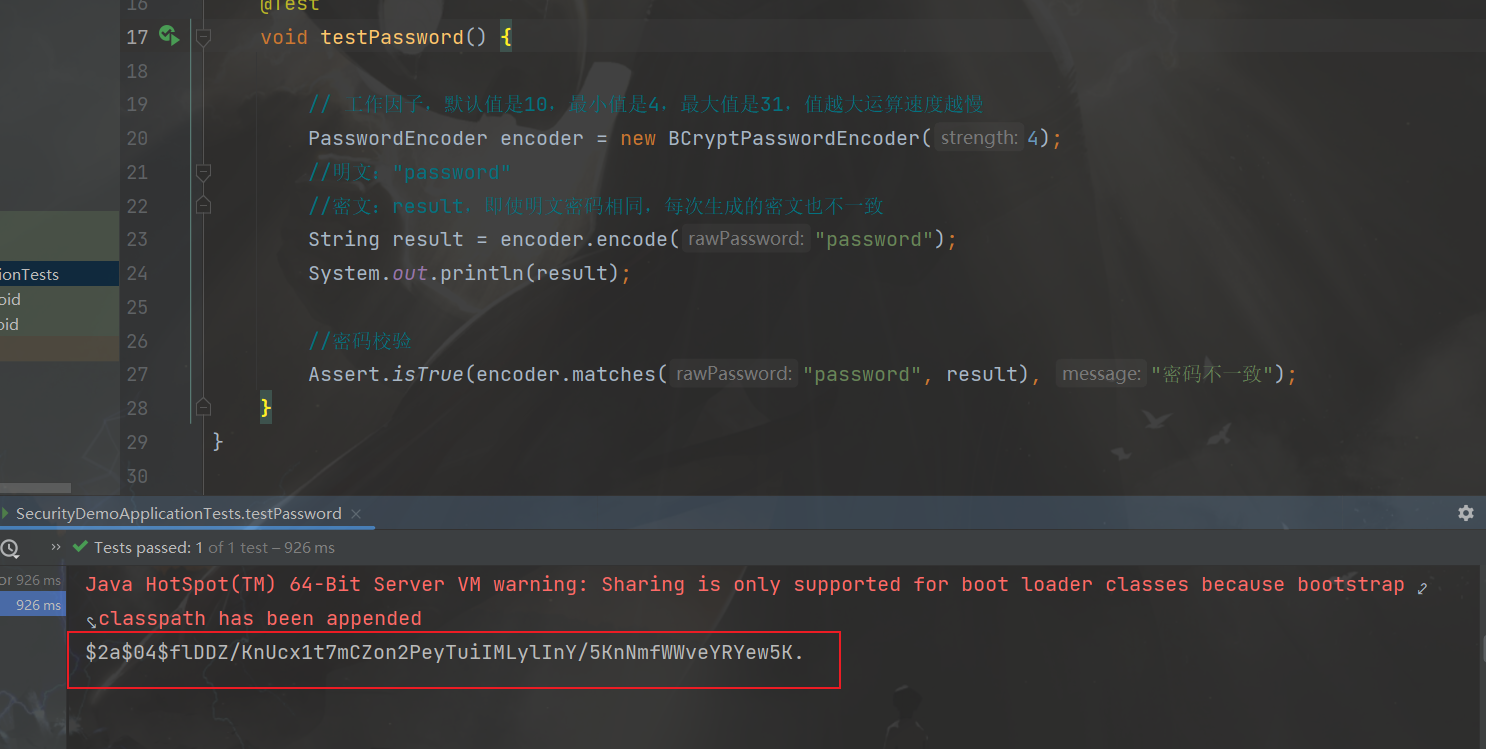
在测试类进行测试
1
2
3
4
5
6
7
8
9
10
11
12
13
| @Test
void testPassword() {
PasswordEncoder encoder = new BCryptPasswordEncoder(4);
String result = encoder.encode("password");
System.out.println(result);
Assert.isTrue(encoder.matches("password", result), "密码不一致");
}
|
9. 自定义登录页
创建LoginController
1
2
3
4
5
6
7
8
| @Controller
public class LoginController {
@GetMapping("/login")
public String login() {
return "login";
}
}
|
在templates目录下创建login.html登录页面
1
2
3
4
5
6
7
8
9
10
11
12
13
14
15
16
17
18
19
20
21
22
23
24
25
26
27
| <!DOCTYPE html>
<html xmlns:th="https://www.thymeleaf.org">
<head>
<title>登录</title>
</head>
<body>
<h1>登录</h1>
<div th:if="${param.error}">
错误的用户名和密码.</div>
<form th:action="@{/login}" method="post">
<div>
<input type="text" name="username" placeholder="用户名"/>
</div>
<div>
<input type="password" name="password" placeholder="密码"/>
</div>
<input type="submit" value="登录" />
</form>
</body>
</html>
|
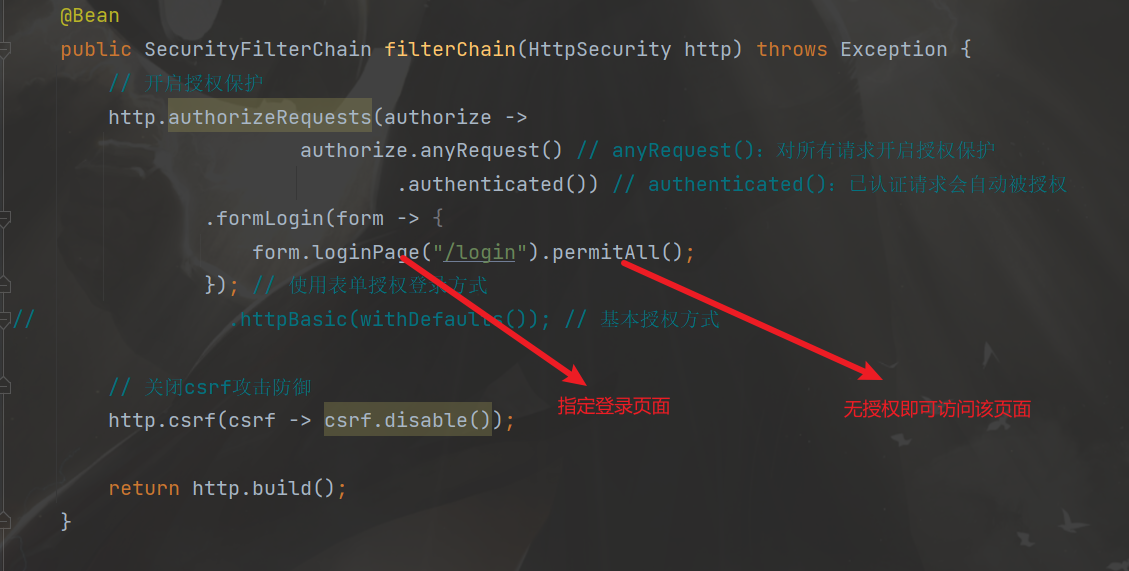
修改filterChain中的配置,修改formLogin中的参数
1
2
3
4
5
6
7
8
9
10
11
12
13
14
15
16
| @Bean
public SecurityFilterChain filterChain(HttpSecurity http) throws Exception {
http.authorizeRequests(authorize ->
authorize.anyRequest()
.authenticated())
.formLogin(form -> {
form.loginPage("/login").permitAll();
});
http.csrf(csrf -> csrf.disable());
return http.build();
}
|
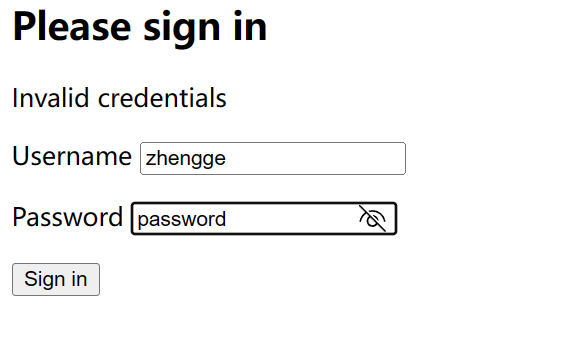
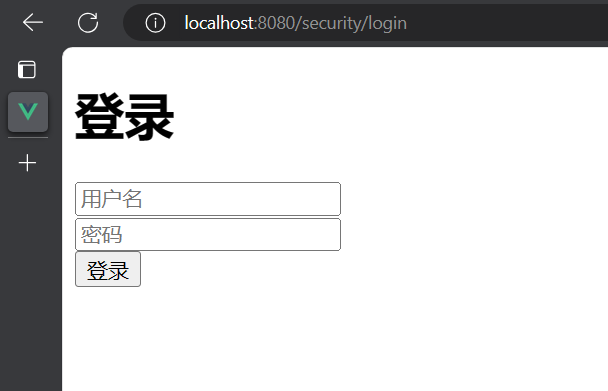
运行项目,这是项目的登录页面已经改为自定义的登录页面
三. 前后端分离
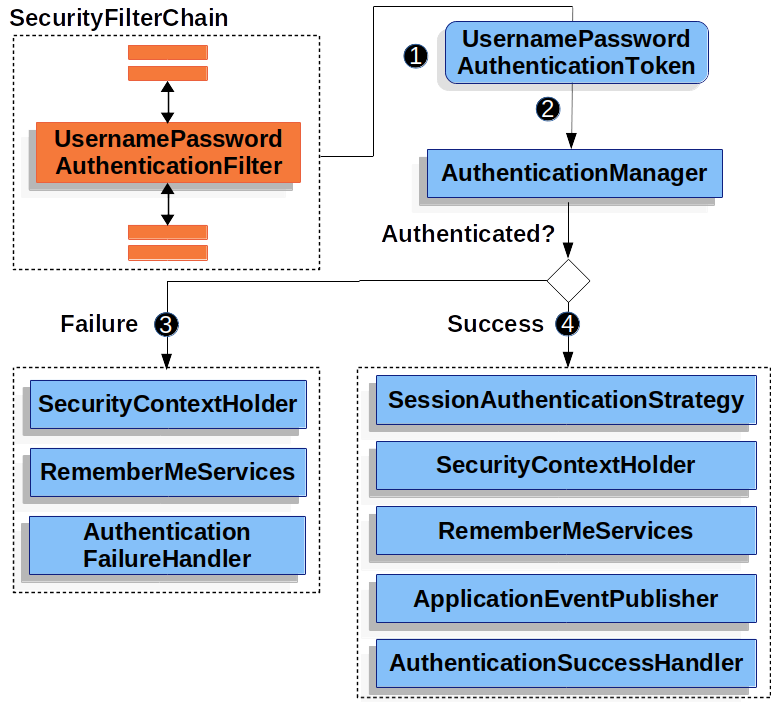
1. 用户认证成功代码实现
用户认证流程
引入fastjson依赖
1
2
3
4
5
| <dependency>
<groupId>com.alibaba.fastjson2</groupId>
<artifactId>fastjson2</artifactId>
<version>2.0.37</version>
</dependency>
|
用户认证成功代码实现
创建一个自定义类MyAuthenticationSuccessHandler实现接口AuthenticationSuccessHandler,并实现接口中的方法onAuthenticationSuccess,然后在方法中编写用户认证成功后的代码实现
1
2
3
4
5
6
7
8
9
10
11
12
13
14
15
16
17
18
19
20
21
22
23
24
25
26
|
public class MyAuthenticationSuccessHandler implements AuthenticationSuccessHandler {
@Override
public void onAuthenticationSuccess(HttpServletRequest request, HttpServletResponse response, Authentication authentication) throws IOException, ServletException {
Object principal = authentication.getPrincipal();
HashMap result = new HashMap();
result.put("code", 0);
result.put("message", "登录成功");
result.put("data", principal);
String json = JSON.toJSONString(result);
response.setContentType("application/json;charset=UTF-8");
response.getWriter().println(json);
}
}
|
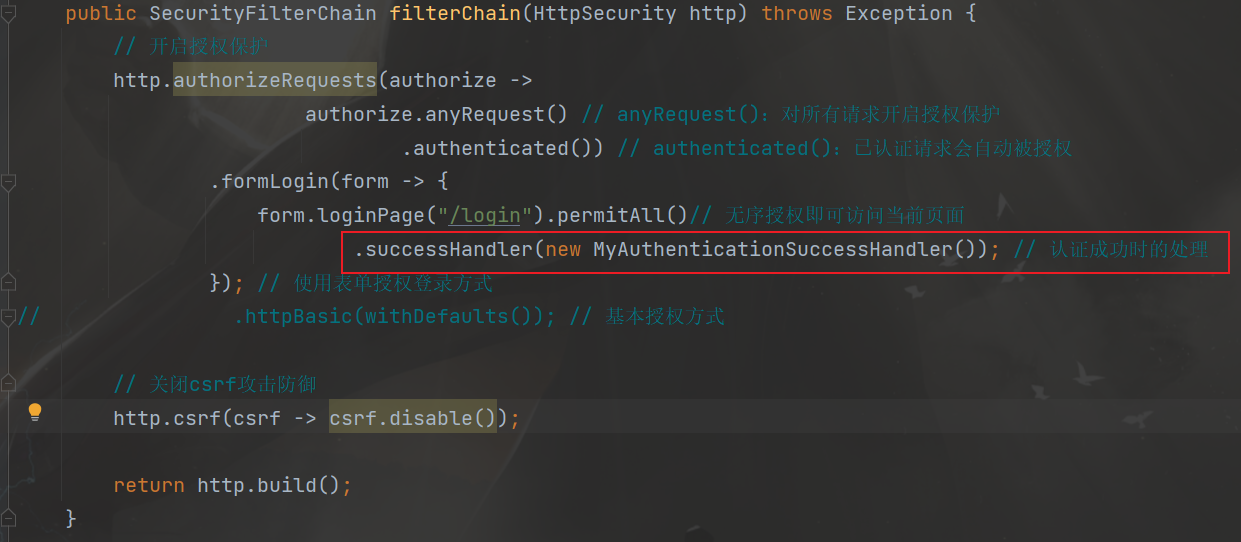
在WebSecurityConfig类的filterChain方法中添加相关代码
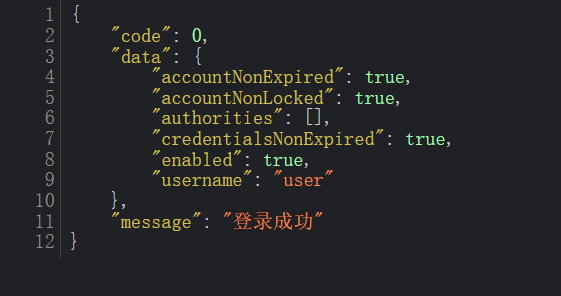
测试
登录成功后返回相关信息
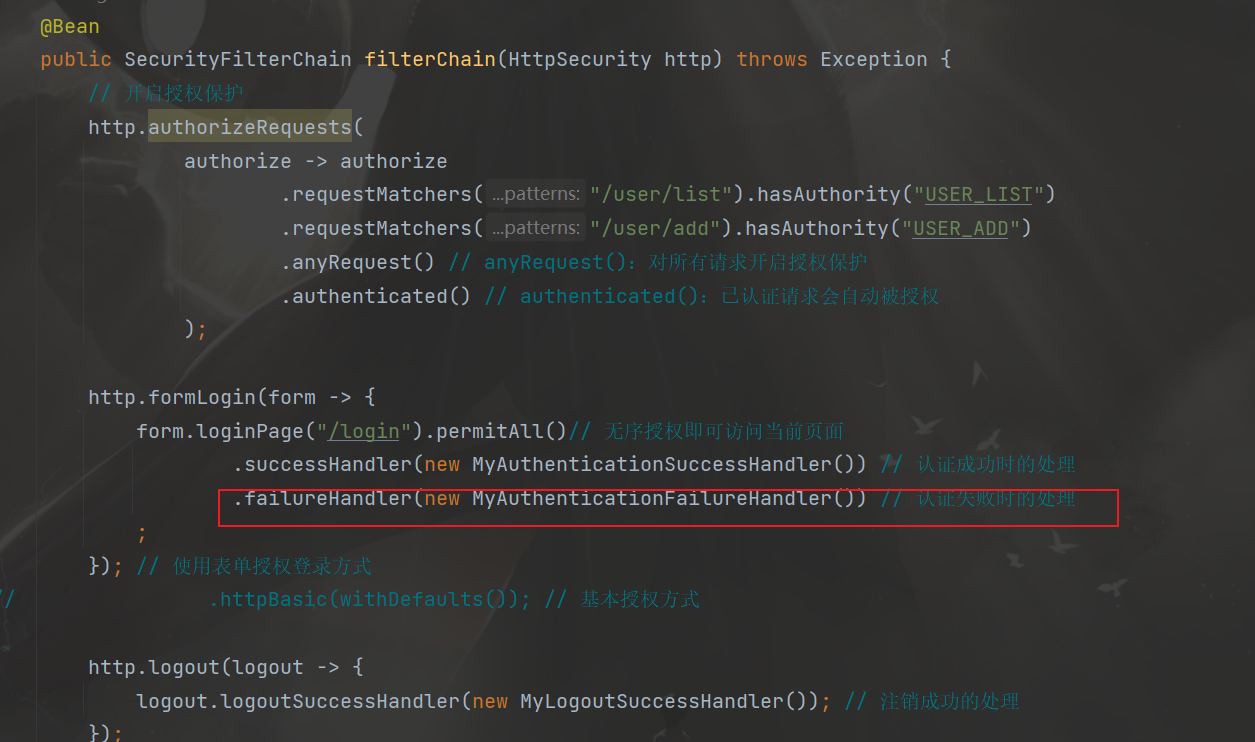
2. 用户认证失败代码实现
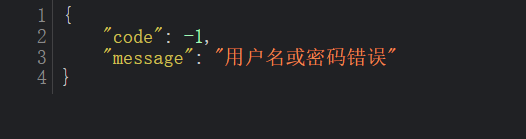
创建一个自定义类MyAuthenticationFailureHandler实现接口AuthenticationFailureHandler,并实现接口中的方法onAuthenticationFailure,然后在方法中编写用户认证失败后的代码实现
1
2
3
4
5
6
7
8
9
10
11
12
13
14
15
16
17
| public class MyAuthenticationFailureHandler implements AuthenticationFailureHandler {
@Override
public void onAuthenticationFailure(HttpServletRequest request, HttpServletResponse response, AuthenticationException exception) throws IOException, ServletException {
String localizedMessage = exception.getLocalizedMessage();
HashMap result = new HashMap();
result.put("code", -1);
result.put("message", localizedMessage);
String json = JSON.toJSONString(result);
response.setContentType("application/json;charset=UTF-8");
response.getWriter().println(json);
}
}
|
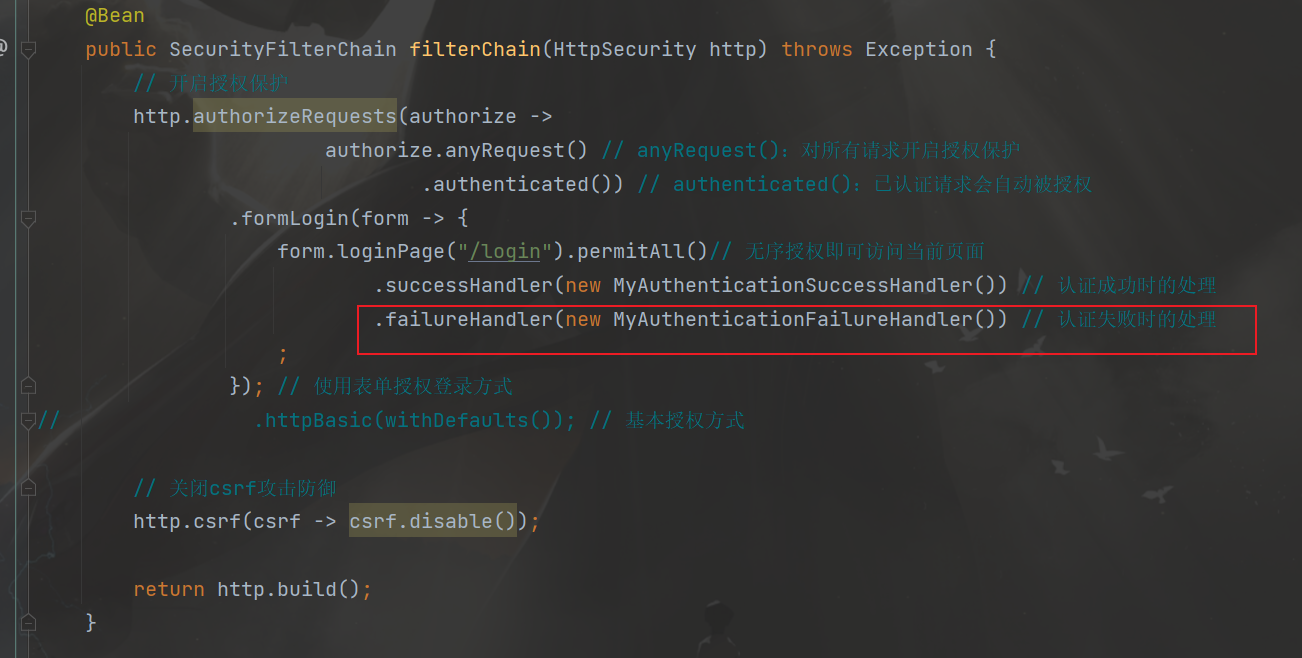
在WebSecurityConfig类的filterChain方法中添加相关代码
测试
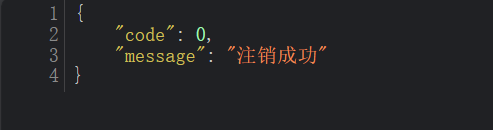
3. 注销用户处理
创建一个自定义类MyLogoutSuccessHandler实现接口LogoutSuccessHandler,并实现接口中的方法onLogoutSuccess,然后在方法中编写用户注销后的代码实现
1
2
3
4
5
6
7
8
9
10
11
12
13
14
15
16
17
| public class MyLogoutSuccessHandler implements LogoutSuccessHandler {
@Override
public void onLogoutSuccess(HttpServletRequest request, HttpServletResponse response, Authentication authentication) throws IOException, ServletException {
HashMap result = new HashMap();
result.put("code", 0);
result.put("message", "注销成功");
String json = JSON.toJSONString(result);
response.setContentType("application/json;charset=UTF-8");
response.getWriter().println(json);
}
}
|
在WebSecurityConfig类的filterChain方法中添加相关代码
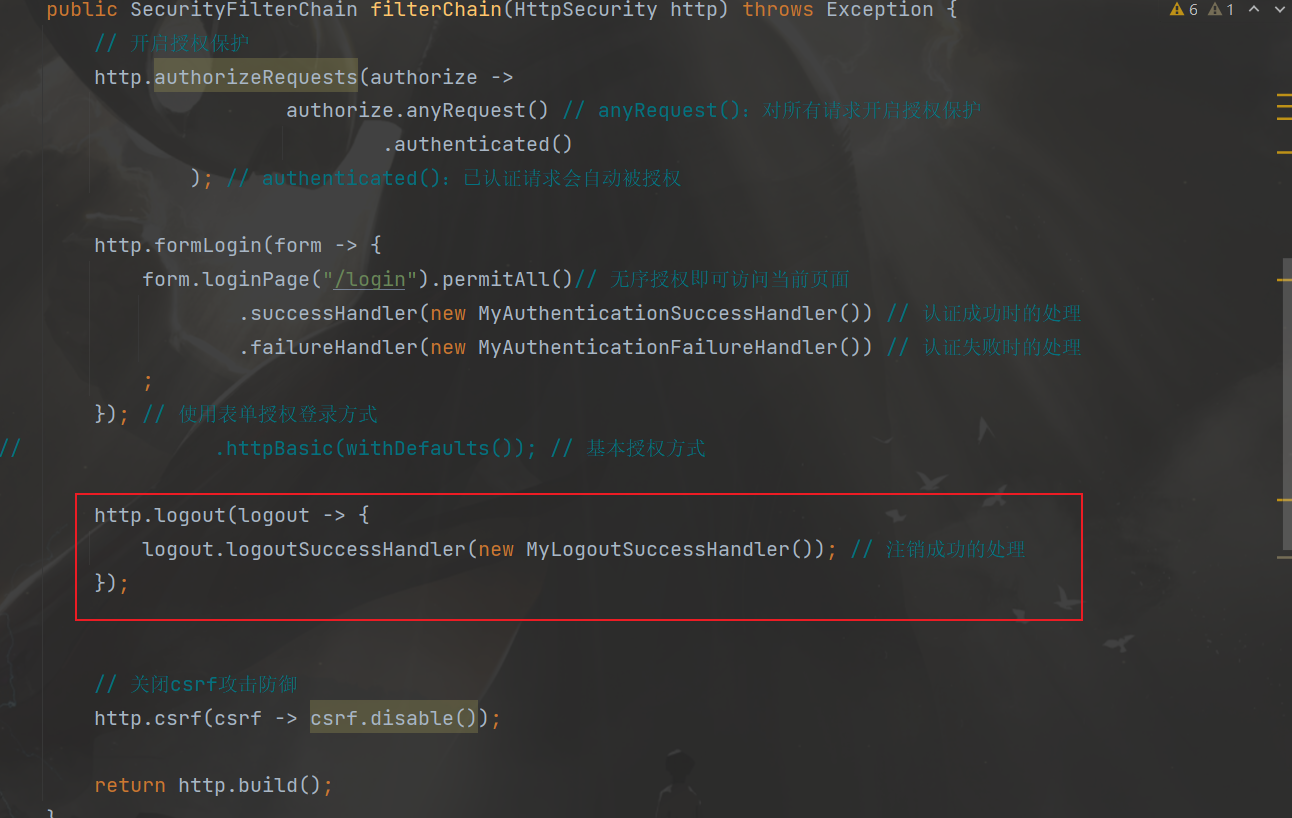
测试
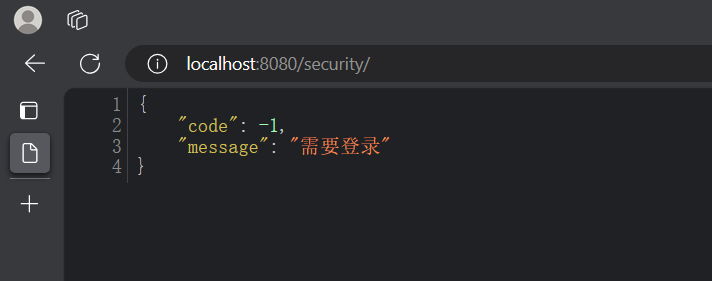
4. 请求未认证处理
创建一个自定义类MyAuthenticationEntryPoint实现接口AuthenticationEntryPoint,并实现接口中的方法commence,然后在方法中编写用户请求未认证处理的代码实现
1
2
3
4
5
6
7
8
9
10
11
12
13
14
15
16
17
18
| public class MyAuthenticationEntryPoint implements AuthenticationEntryPoint {
@Override
public void commence(HttpServletRequest request, HttpServletResponse response, AuthenticationException authException) throws IOException, ServletException {
String localizedMessage = "需要登录";
HashMap result = new HashMap();
result.put("code", -1);
result.put("message", localizedMessage);
String json = JSON.toJSONString(result);
response.setContentType("application/json;charset=UTF-8");
response.getWriter().println(json);
}
}
|
在WebSecurityConfig类的filterChain方法中添加相关代码
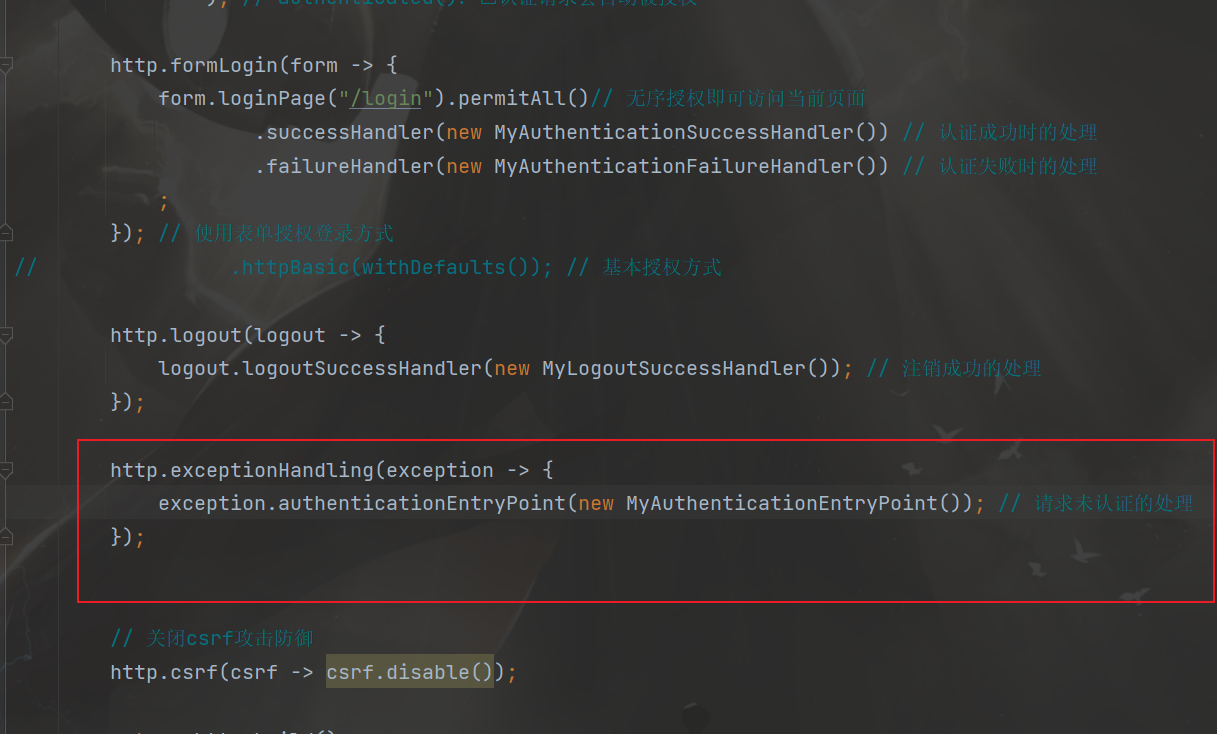
测试
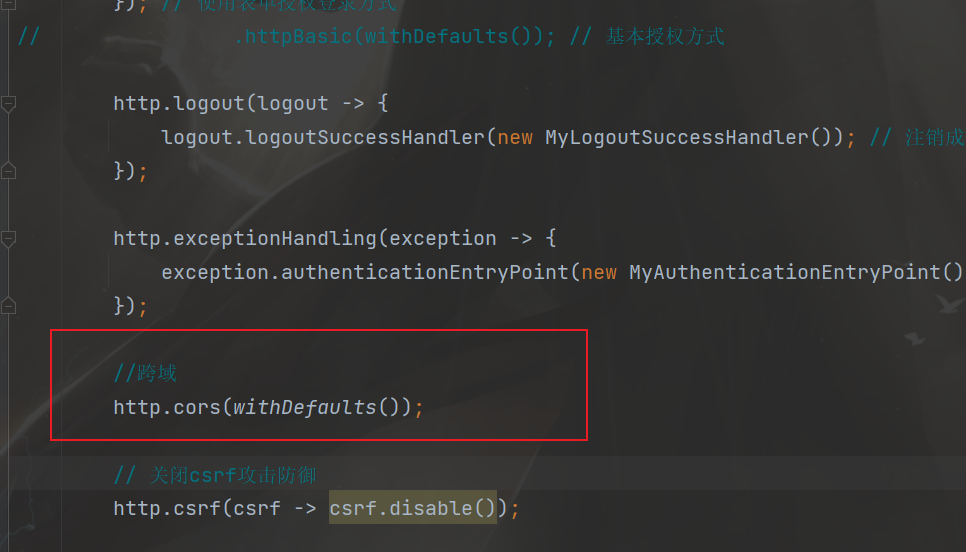
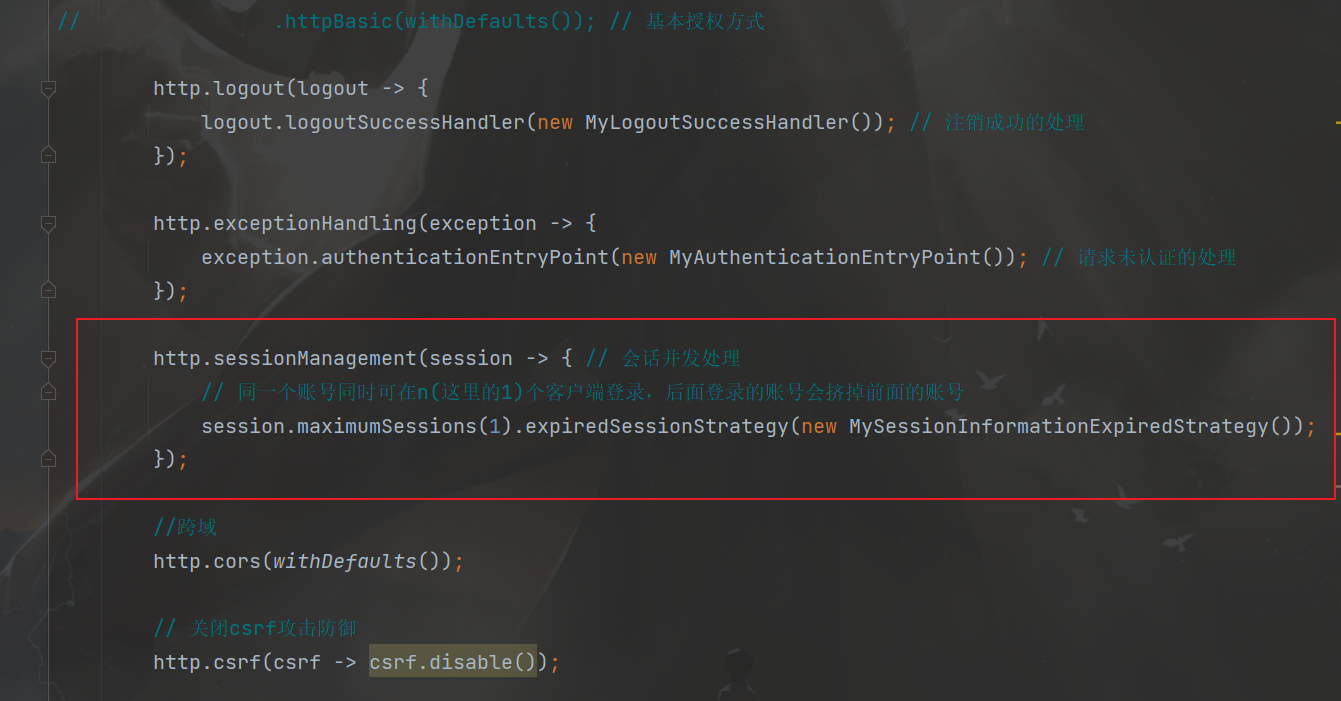
5. 跨域处理
跨域全称是跨域资源共享(Cross-Origin Resources Sharing,CORS),它是浏览器的保护机制,只允许网页请求统一域名下的服务,同一域名指=>协议、域名、端口号都要保持一致,如果有一项不同,那么就是跨域请求。在前后端分离的项目中,需要解决跨域的问题。
在SpringSecurity中解决跨域很简单,在配置文件中添加如下配置即可,在WebSecurityConfig类的filterChain方法中添加相关代码
1
2
|
http.cors(withDefaults());
|
6. 用户认证信息
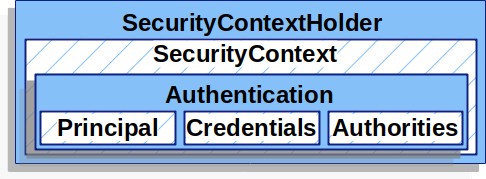
在Spring Security框架中,SecurityContextHolder、SecurityContext、Authentication、Principal和Credential是一些与身份验证和授权相关的重要概念。它们之间的关系如下:
- SecurityContextHolder:SecurityContextHolder 是 Spring Security 存储已认证用户详细信息的地方。
- SecurityContext:SecurityContext 是从 SecurityContextHolder 获取的内容,包含当前已认证用户的 Authentication 信息。
- Authentication:Authentication 表示用户的身份认证信息。它包含了用户的Principal、Credential和Authority信息。
- Principal:表示用户的身份标识。它通常是一个表示用户的实体对象,例如用户名。Principal可以通过Authentication对象的getPrincipal()方法获取。
- Credentials:表示用户的凭证信息,例如密码、证书或其他认证凭据。Credential可以通过Authentication对象的getCredentials()方法获取。
- GrantedAuthority:表示用户被授予的权限
总结起来,SecurityContextHolder用于管理当前线程的安全上下文,存储已认证用户的详细信息,其中包含了SecurityContext对象,该对象包含了Authentication对象,后者表示用户的身份验证信息,包括Principal(用户的身份标识)和Credential(用户的凭证信息)。
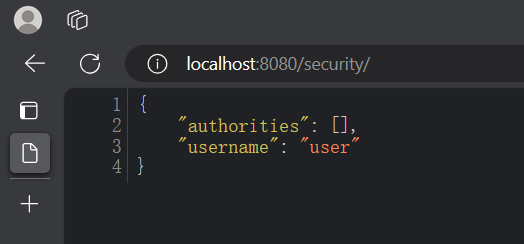
在controller中获取用户信息
1
2
3
4
5
6
7
8
9
10
11
12
13
14
15
16
17
18
19
20
| @RestController
public class IndexController {
@GetMapping("/")
public Map index(){
SecurityContext context = SecurityContextHolder.getContext();
Authentication authentication = context.getAuthentication();
Object principal = authentication.getPrincipal();
Object credentials = authentication.getCredentials();
Collection<? extends GrantedAuthority> authorities = authentication.getAuthorities();
String name = authentication.getName();
HashMap result = new HashMap();
result.put("username", name);
result.put("authorities", authorities);
return result;
}
}
|
测试
7. 会话并发处理
创建一个自定义类MySessionInformationExpiredStrategy实现接口SessionInformationExpiredStrategy,并实现接口中的方法onExpiredSessionDetected,然后在方法中编写会话并发处理的代码实现
1
2
3
4
5
6
7
8
9
10
11
12
13
14
15
16
17
18
| public class MySessionInformationExpiredStrategy implements SessionInformationExpiredStrategy {
@Override
public void onExpiredSessionDetected(SessionInformationExpiredEvent event) throws IOException, ServletException {
HashMap result = new HashMap();
result.put("code", -1);
result.put("message", "该账号已从其他设备登录");
String json = JSON.toJSONString(result);
HttpServletResponse response = event.getResponse();
response.setContentType("application/json;charset=UTF-8");
response.getWriter().println(json);
}
}
|
在WebSecurityConfig类的filterChain方法中添加相关代码
测试
先在一个浏览器登录,然后再在另一个浏览器登录同一个用户,然后访问第一个浏览器登录后的主页会提升该账号已从其他设备登录,由于电脑只有一个浏览器,没有做测试了
四. 授权
授权管理的实现在SpringSecurity中非常灵活,可以帮助应用程序实现以下两种常见的授权需求:
1. 基于request的授权
需求
- 具有USER_LIST权限的用户可以访问/user/list接口
- 具有USER_ADD权限的用户可以访问/user/add接口
在WebSecurityConfig的filterChain方法中添加相关配置
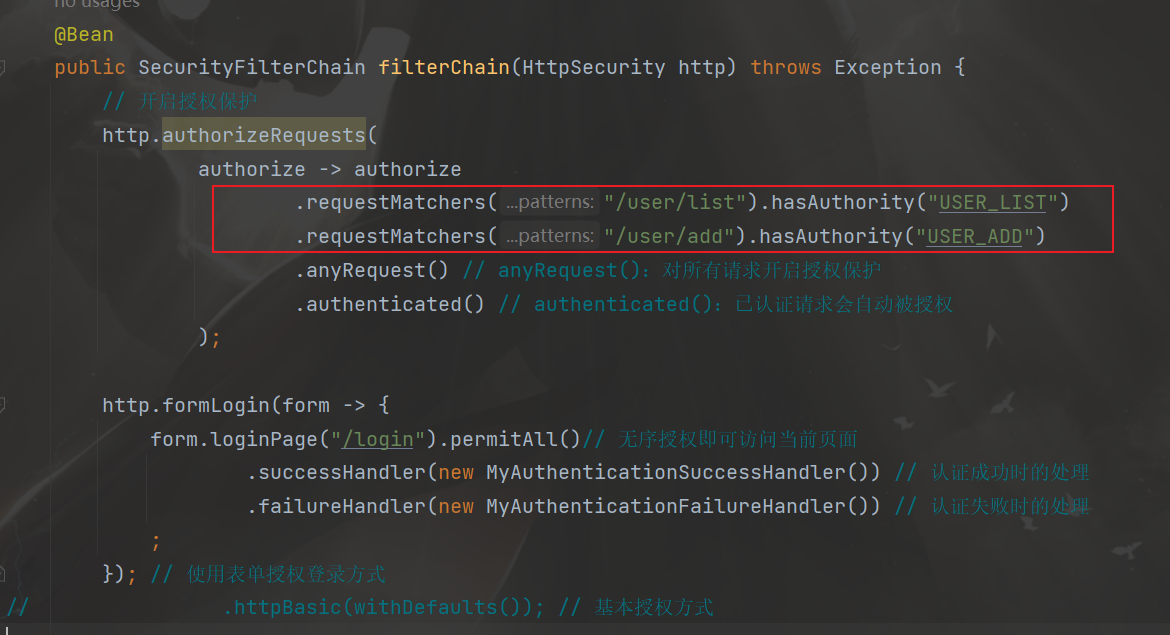
- requestMatchers(“/user/list”).hasAuthority(“USER_LIST”)
- 用户要有
USER_LIST权限,才能访问/user/list,其它同理
实际开发中一般都会用一个数据库表来记录用户权限或者给用户表添加一个权限字段,这里为了方便测试,直接在用户登录时就给他赋予权限
在DBUserDetailsManager类中的loadUserByUsername方法中给用户赋予相关权限(方便测试)
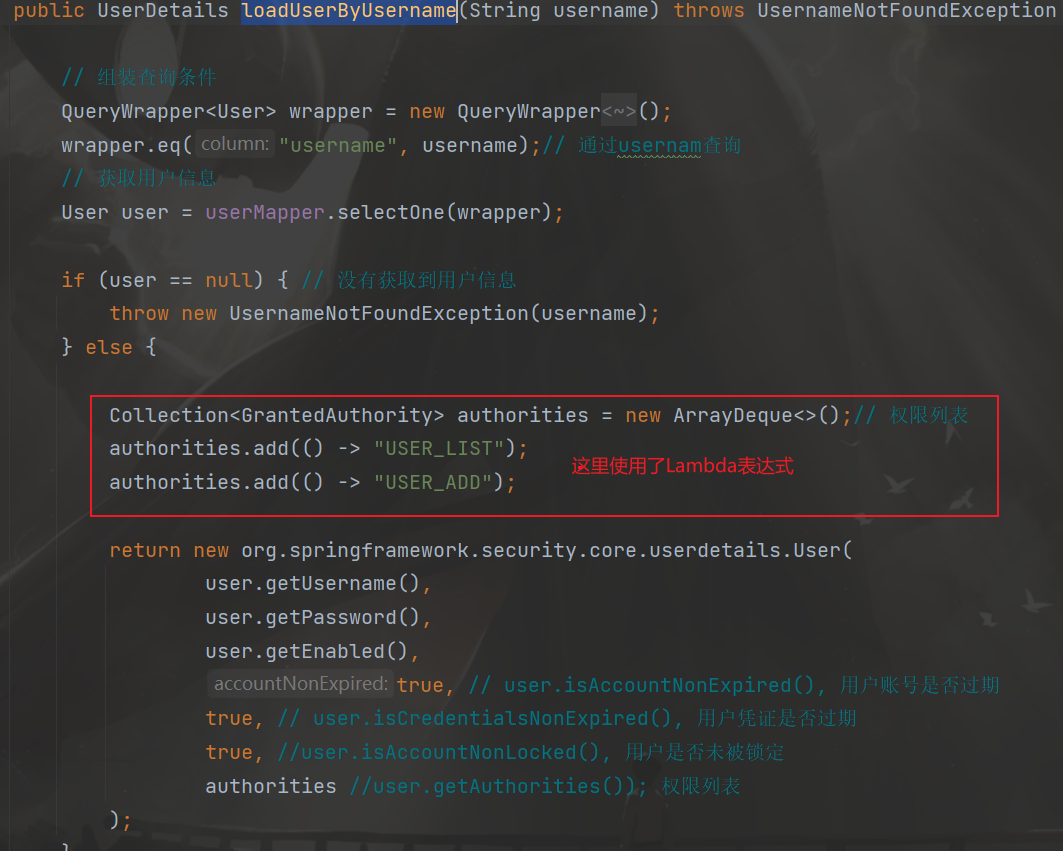
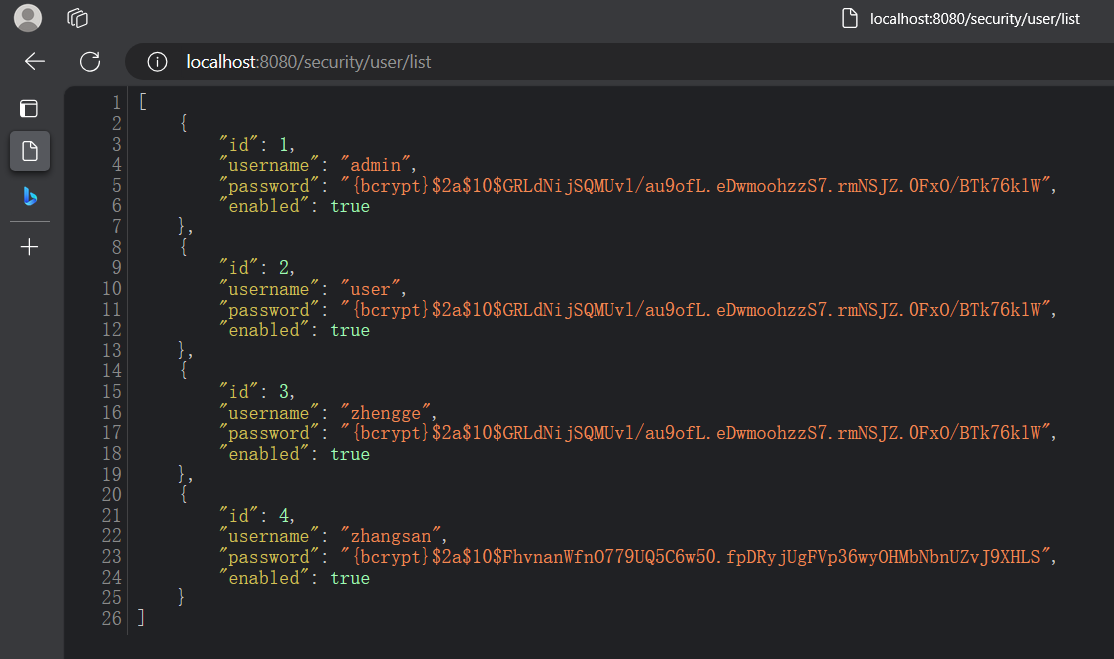
测试
登录后再访问/user/list
去掉list权限后重新启动再次访问
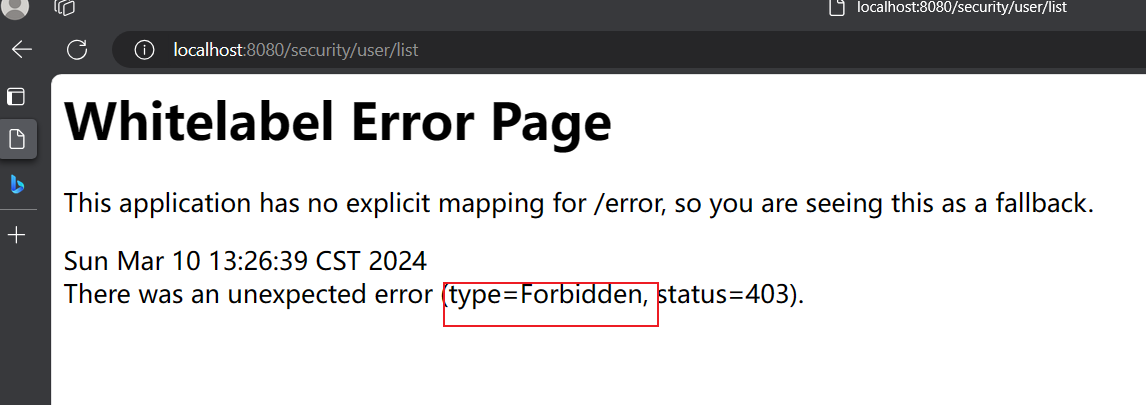
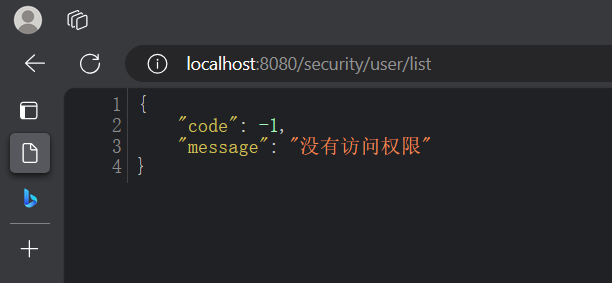
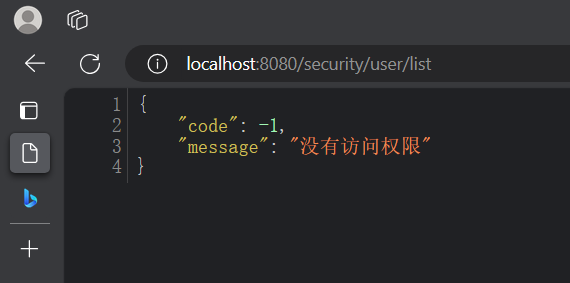
2. 请求未授权处理
创建一个自定义类MyAccessDeniedHandler实现接口AccessDeniedHandler,并实现接口中的方法handle,然后在方法中编写用户请求未授权处理的代码实现
1
2
3
4
5
6
7
8
9
10
11
12
13
14
15
16
| public class MyAccessDeniedHandler implements AccessDeniedHandler {
@Override
public void handle(HttpServletRequest request, HttpServletResponse response, AccessDeniedException accessDeniedException) throws IOException, ServletException {
HashMap result = new HashMap();
result.put("code", -1);
result.put("message", "没有访问权限");
String json = JSON.toJSONString(result);
response.setContentType("application/json;charset=UTF-8");
response.getWriter().println(json);
}
}
|
在WebSecurityConfig类的filterChain方法中添加相关代码
测试
3. 角色分配
需求:角色为ADMIN的用户才可以访问/user/**路径下的资源
在WebSecurityConfig的filterChain方法中添加相关配置

实际开发中一般都会用一个数据库表来记录用户权限或者给用户表添加一个权限字段,这里为了方便测试,直接在用户登录时就给他赋予权限
在DBUserDetailsManager类中的loadUserByUsername方法中给用户赋予相关权限(方便测试)
测试
登录成功后可以看见用户的权限
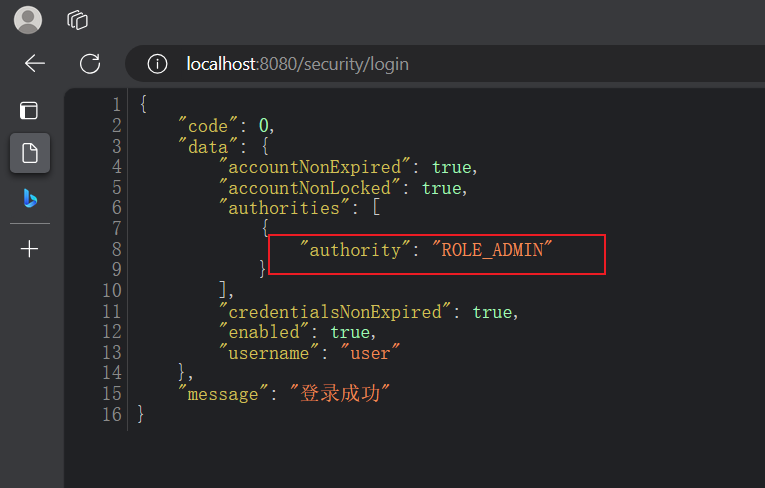
访问/user/list
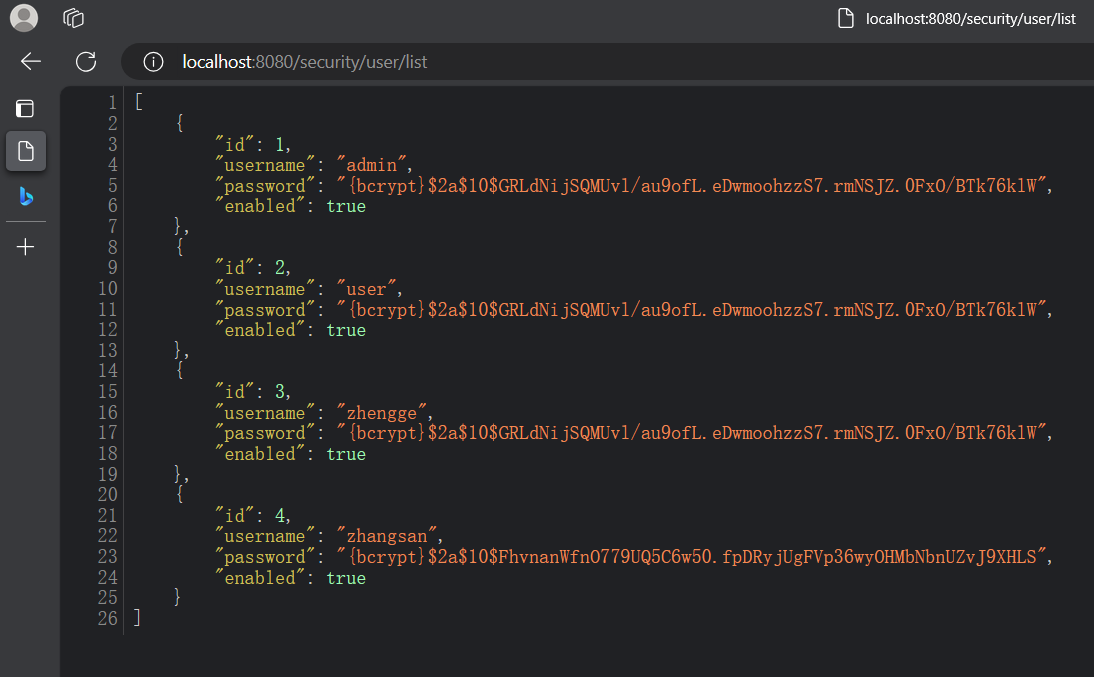
修改用户登录时赋予的权限,再次访问
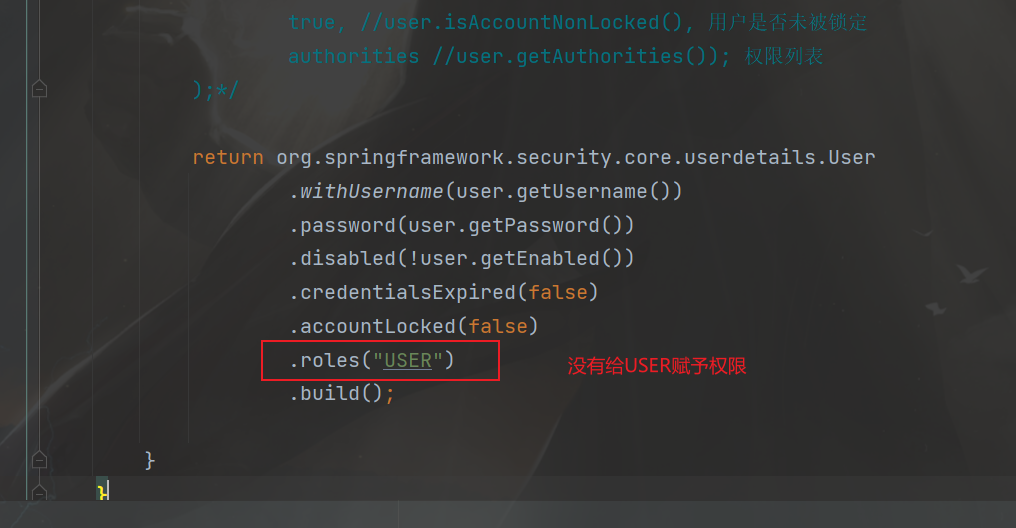
重新启动并登录

再次访问user/list
4. RBAC
RBAC(Role-Based Access Control,基于角色的访问控制)是一种常用的数据库设计方案,它将用户的权限分配和管理与角色相关联。以下是一个基本的RBAC数据库设计方案的示例:
- 用户表(User table):包含用户的基本信息,例如用户名、密码和其他身份验证信息。
| 列名 |
数据类型 |
描述 |
| user_id |
int |
用户ID |
| username |
varchar |
用户名 |
| password |
varchar |
密码 |
| email |
varchar |
电子邮件地址 |
| … |
… |
… |
- 角色表(Role table):存储所有可能的角色及其描述。
| 列名 |
数据类型 |
描述 |
| role_id |
int |
角色ID |
| role_name |
varchar |
角色名称 |
| description |
varchar |
角色描述 |
| … |
… |
… |
- 权限表(Permission table):定义系统中所有可能的权限。
| 列名 |
数据类型 |
描述 |
| permission_id |
int |
权限ID |
| permission_name |
varchar |
权限名称 |
| description |
varchar |
权限描述 |
| … |
… |
… |
- 用户角色关联表(User-Role table):将用户与角色关联起来。
| 列名 |
数据类型 |
描述 |
| user_role_id |
int |
用户角色关联ID |
| user_id |
int |
用户ID |
| role_id |
int |
角色ID |
| … |
… |
… |
- 角色权限关联表(Role-Permission table):将角色与权限关联起来。
| 列名 |
数据类型 |
描述 |
| role_permission_id |
int |
角色权限关联ID |
| role_id |
int |
角色ID |
| permission_id |
int |
权限ID |
| … |
… |
… |
在这个设计方案中,用户可以被分配一个或多个角色,而每个角色又可以具有一个或多个权限。通过对用户角色关联和角色权限关联表进行操作,可以实现灵活的权限管理和访问控制。
当用户尝试访问系统资源时,系统可以根据用户的角色和权限决定是否允许访问。这样的设计方案使得权限管理更加简单和可维护,因为只需调整角色和权限的分配即可,而不需要针对每个用户进行单独的设置。
RABC的详细介绍可以参考这篇文章http://t.csdnimg.cn/Tl60Y
5. 基于方法的授权
开启方法授权注解,在WebSecurityConfig配置类中开启
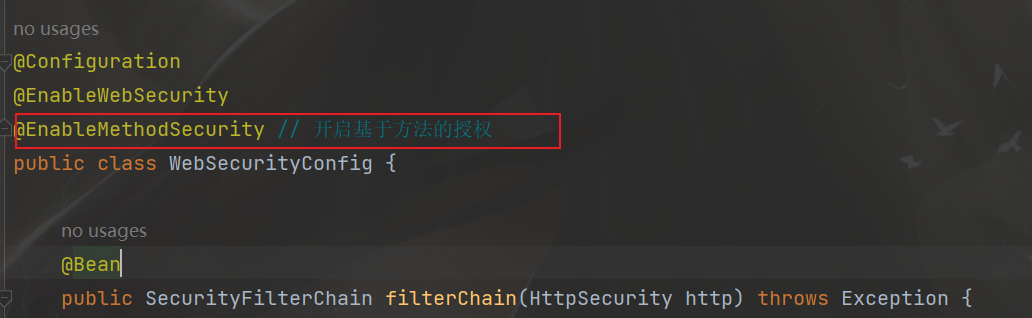
把之前的权限给注释掉

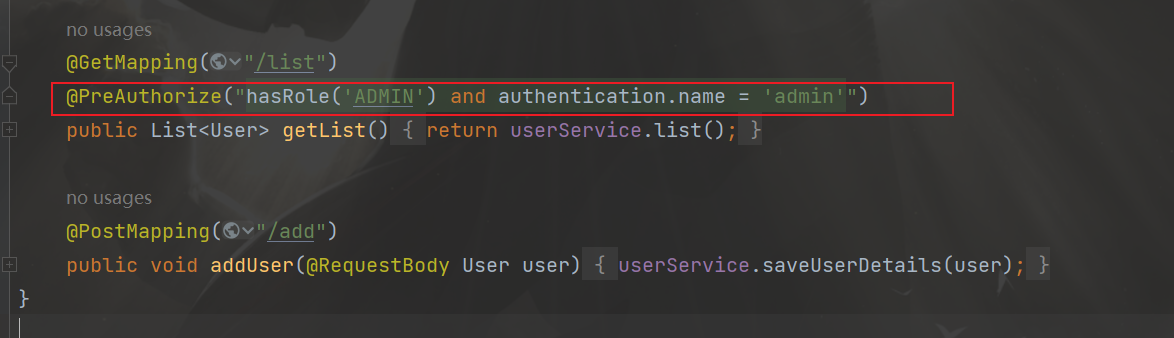
在方法上添加注解

测试
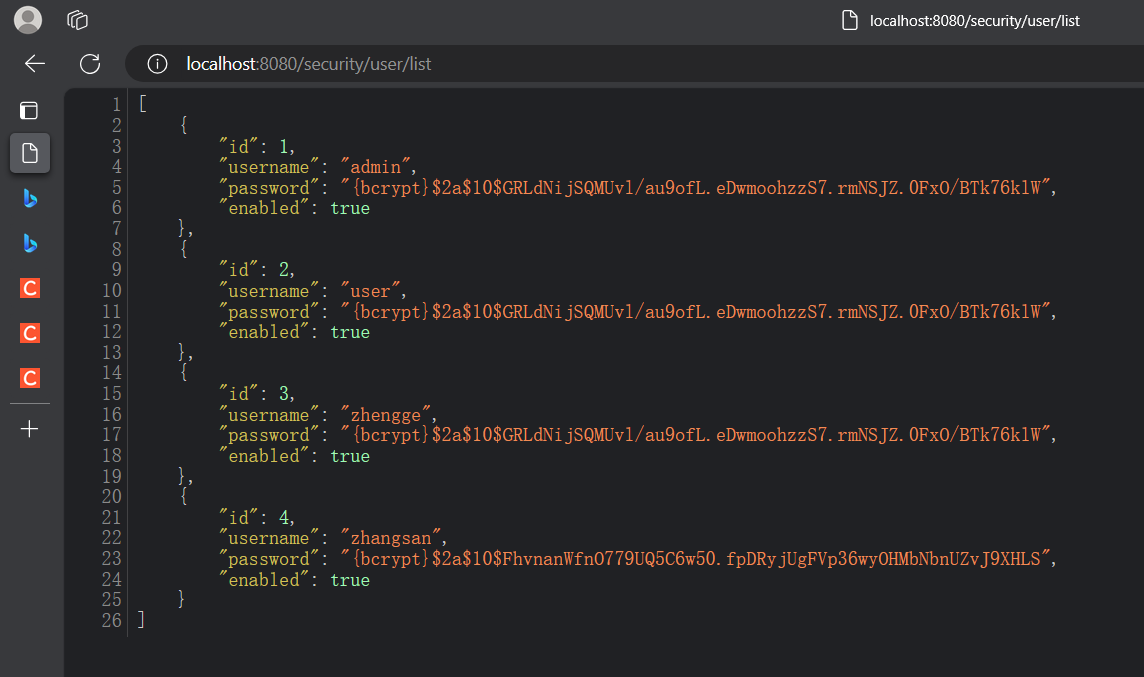
访问/user/list
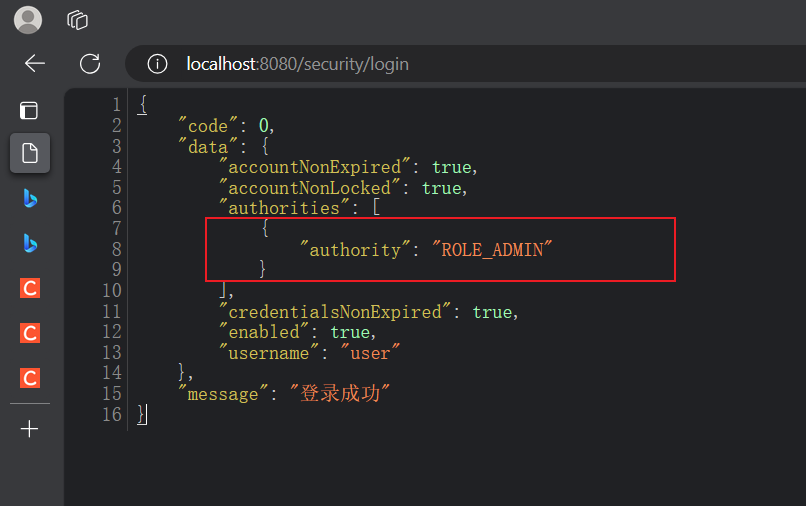
可以在方法注解中添加authentication属性
- @PreAuthorize(“hasRole(‘ADMIN’) and authentication.name = ‘admin’”)
- 用户要用于AMDIN权限,并且用户名为admin,才能访问次方法
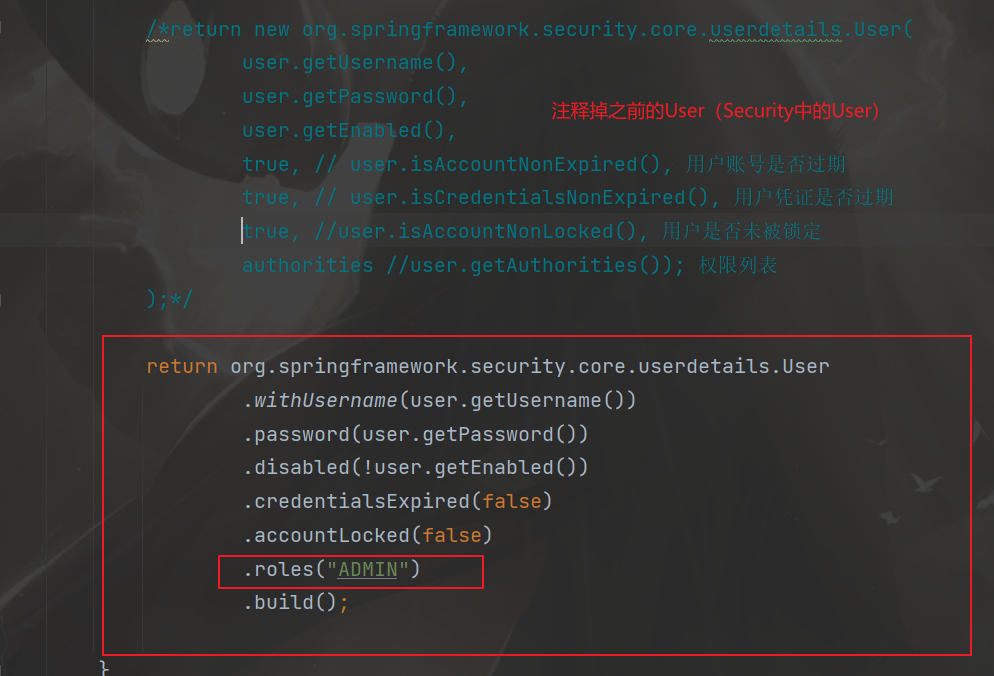
还可以使用另一种注解方式
@PreAuthorize(“hasAuthority(‘USER_ADD’)”),权限认证,上面的是角色认证
这时候需要给User(Security框架中的User)分配相关的权限
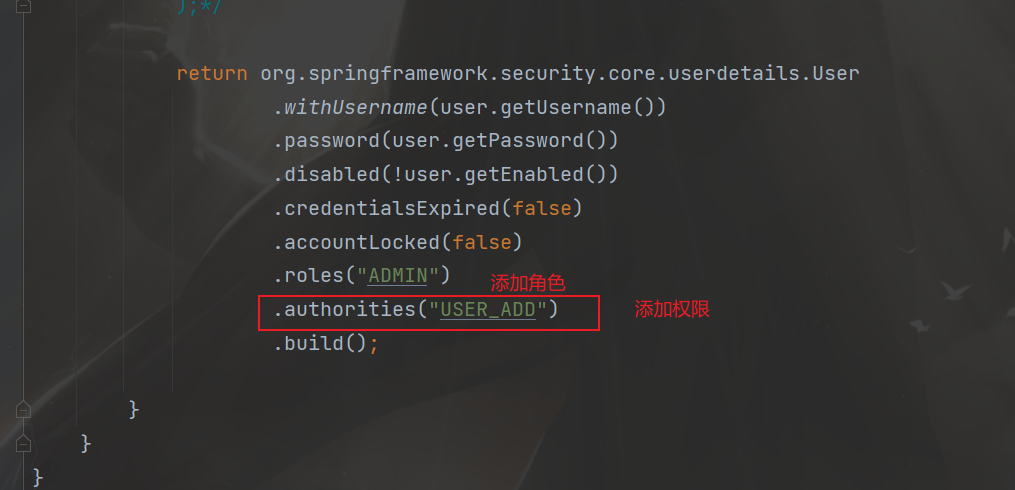
重启登录后发现,角色权限ADMIN没了,因为authorities配置覆盖了roles配置(谁在后面谁生效),这两个不能同时使用
