该笔记学习b站视频制作而成:POI,EasyExcel
一. 简介
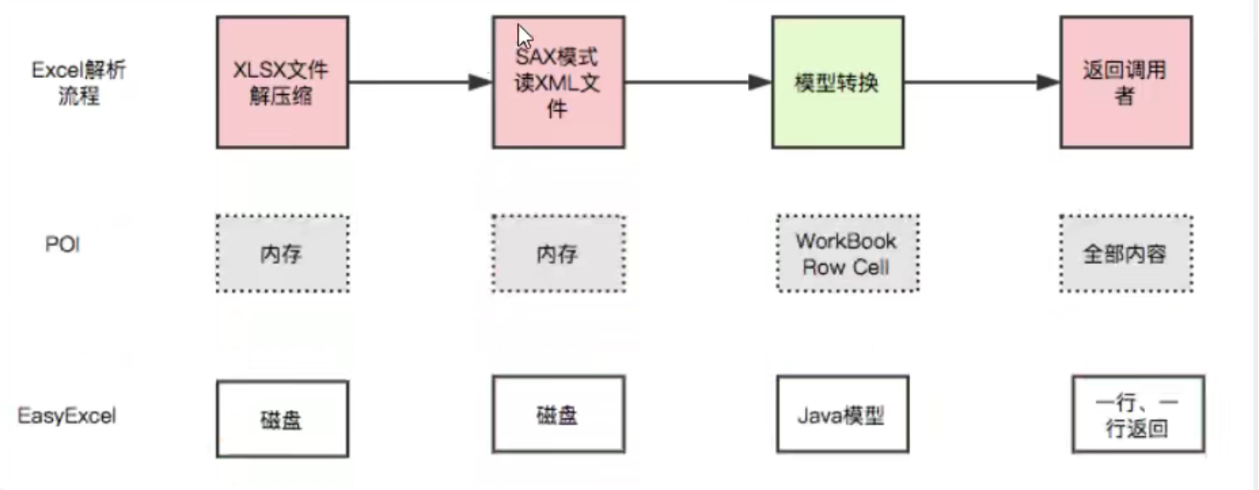
Java解析、生成Excel比较有名的框架有Apache poi、jxl。但他们都存在一个严重的问题就是非常的耗内存,poi有一套SAX模式的API可以一定程度的解决一些内存溢出的问题,但POI还是有一些缺陷,比如07版Excel解压缩以及解压后存储都是在内存中完成的,内存消耗依然很大。
easyexcel重写了poi对07版Excel的解析,一个3M的excel用POI sax解析依然需要100M左右内存,改用easyexcel可以降低到几M,并且再大的excel也不会出现内存溢出;03版依赖POI的sax模式,在上层做了模型转换的封装,让使用者更加简单方便
EasyExcel能大大减少内存的原因是在解析Excel时没有将文件数据一次性全部加载到内存中,而是从磁盘上一行一行读取数据,逐个解析
下图是EasyExcel和POl在解析Excel时的对比图
二. Apache poi
1. Excel基本写操作
创建项目并导入依赖
1
2
3
4
5
6
7
8
9
10
11
12
13
14
15
16
17
18
19
20
21
22
23
24
25
26
| <dependencies>
<dependency>
<groupId>org.apache.poi</groupId>
<artifactId>poi</artifactId>
<version>3.9</version>
</dependency>
<dependency>
<groupId>org.apache.poi</groupId>
<artifactId>poi-ooxml</artifactId>
<version>3.9</version>
</dependency>
<dependency>
<groupId>joda-time</groupId>
<artifactId>joda-time</artifactId>
<version>2.10.1</version>
</dependency>
<dependency>
<groupId>junit</groupId>
<artifactId>junit</artifactId>
<version>3.8.1</version>
</dependency>
</dependencies>
|
Excel的结构
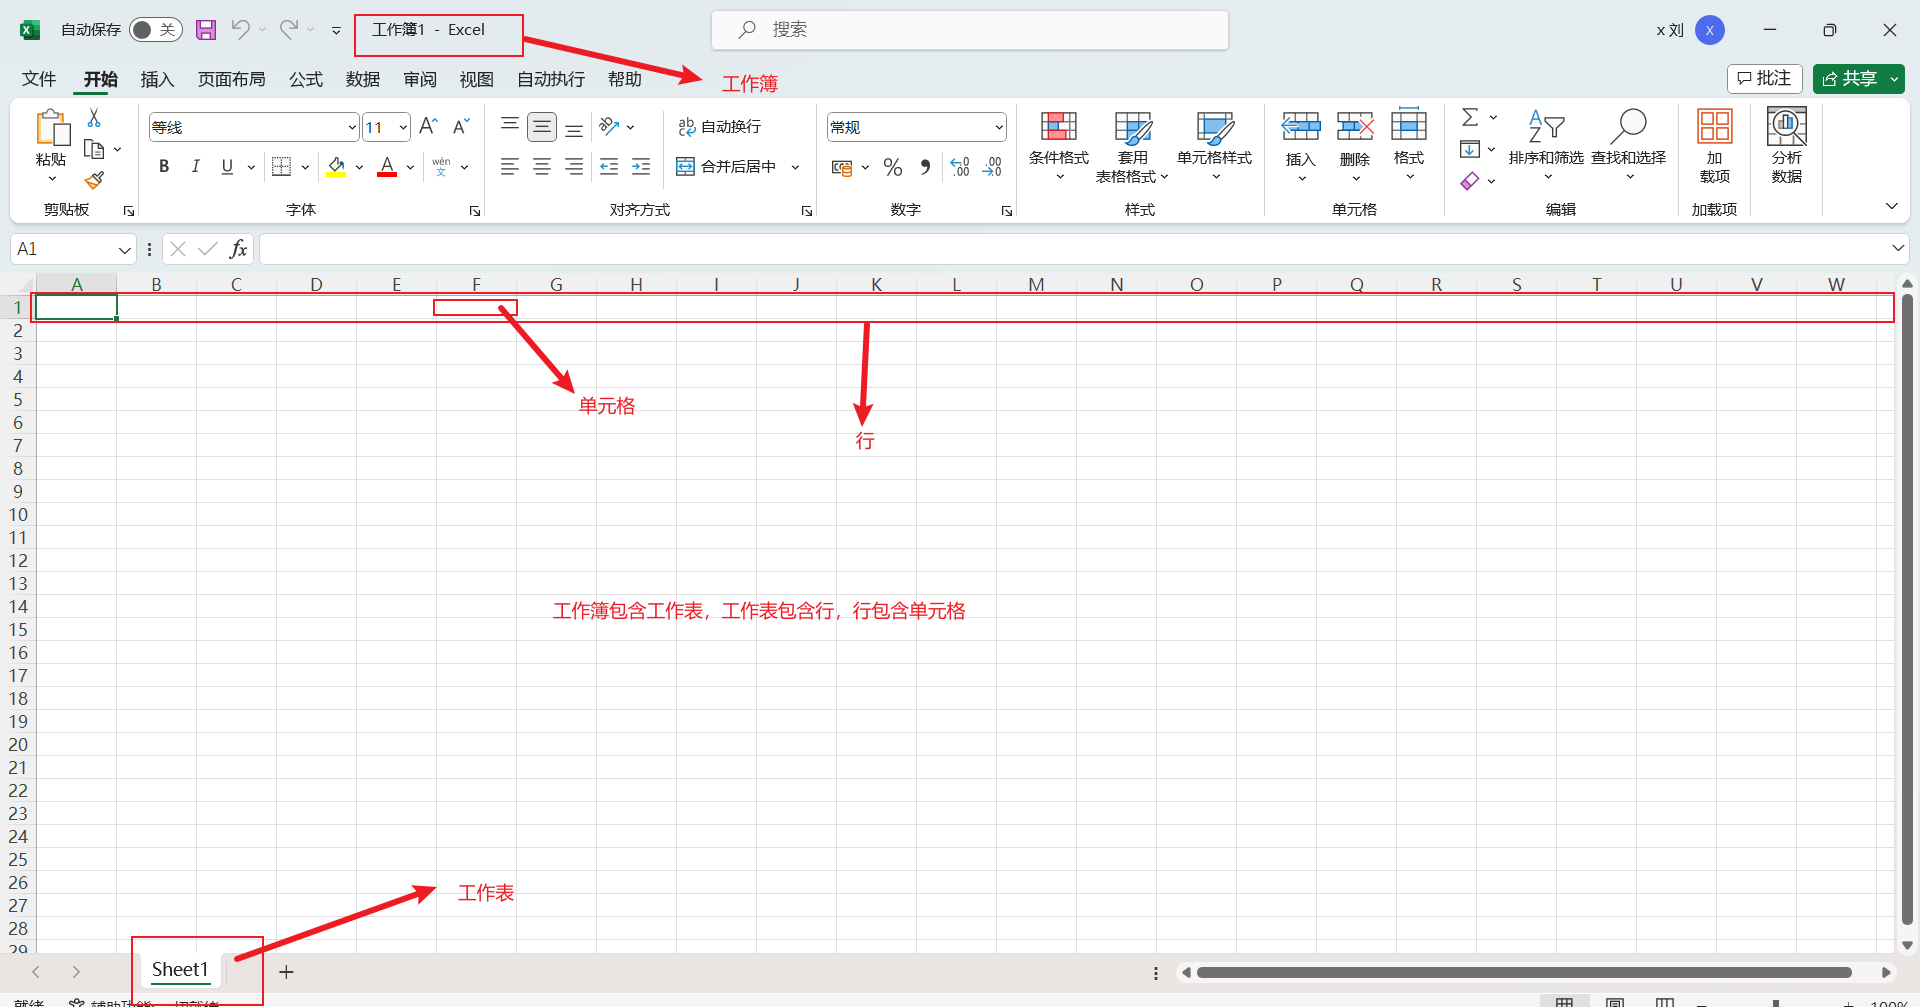
Excel有03版(xls)和07版(xlsx),03版的一个表最多有65536行
在idea中创建Excel表会有03版和07版两个版本
创建工作簿时使用WorkBook接口的实现类

07版的操作方法和03版的一模一样,只需要在创建WorkBook对象时使用07版的实现类即可
1
2
3
4
5
6
7
8
9
10
11
12
13
14
15
16
17
18
19
20
21
22
23
24
25
26
27
28
29
30
31
32
33
34
35
36
37
38
39
40
41
42
43
44
45
46
47
48
49
50
51
52
53
54
55
56
57
58
59
60
61
62
63
64
65
66
67
68
69
70
71
72
73
74
75
76
77
| public class ExcelWrite {
String PATH = "E:\\workspace\\esayexcel";
@Test
public void testWrite03() throws Exception{
Workbook workbook = new HSSFWorkbook();
Sheet sheet = workbook.createSheet("216寝室登记表");
Row row1 = sheet.createRow(0);
Cell cell11 = row1.createCell(0);
cell11.setCellValue("学生姓名");
Cell cell12 = row1.createCell(1);
cell12.setCellValue("出生日期");
Row row2 = sheet.createRow(1);
Cell cell21 = row2.createCell(0);
cell21.setCellValue("张三");
Cell cell22 = row2.createCell(1);
cell22.setCellValue("2000-1-1");
FileOutputStream fileOutputStream = new FileOutputStream(PATH + "寝室登记表03.xls");
workbook.write(fileOutputStream);
fileOutputStream.close();
System.out.println("寝室表生成成功");
}
@Test
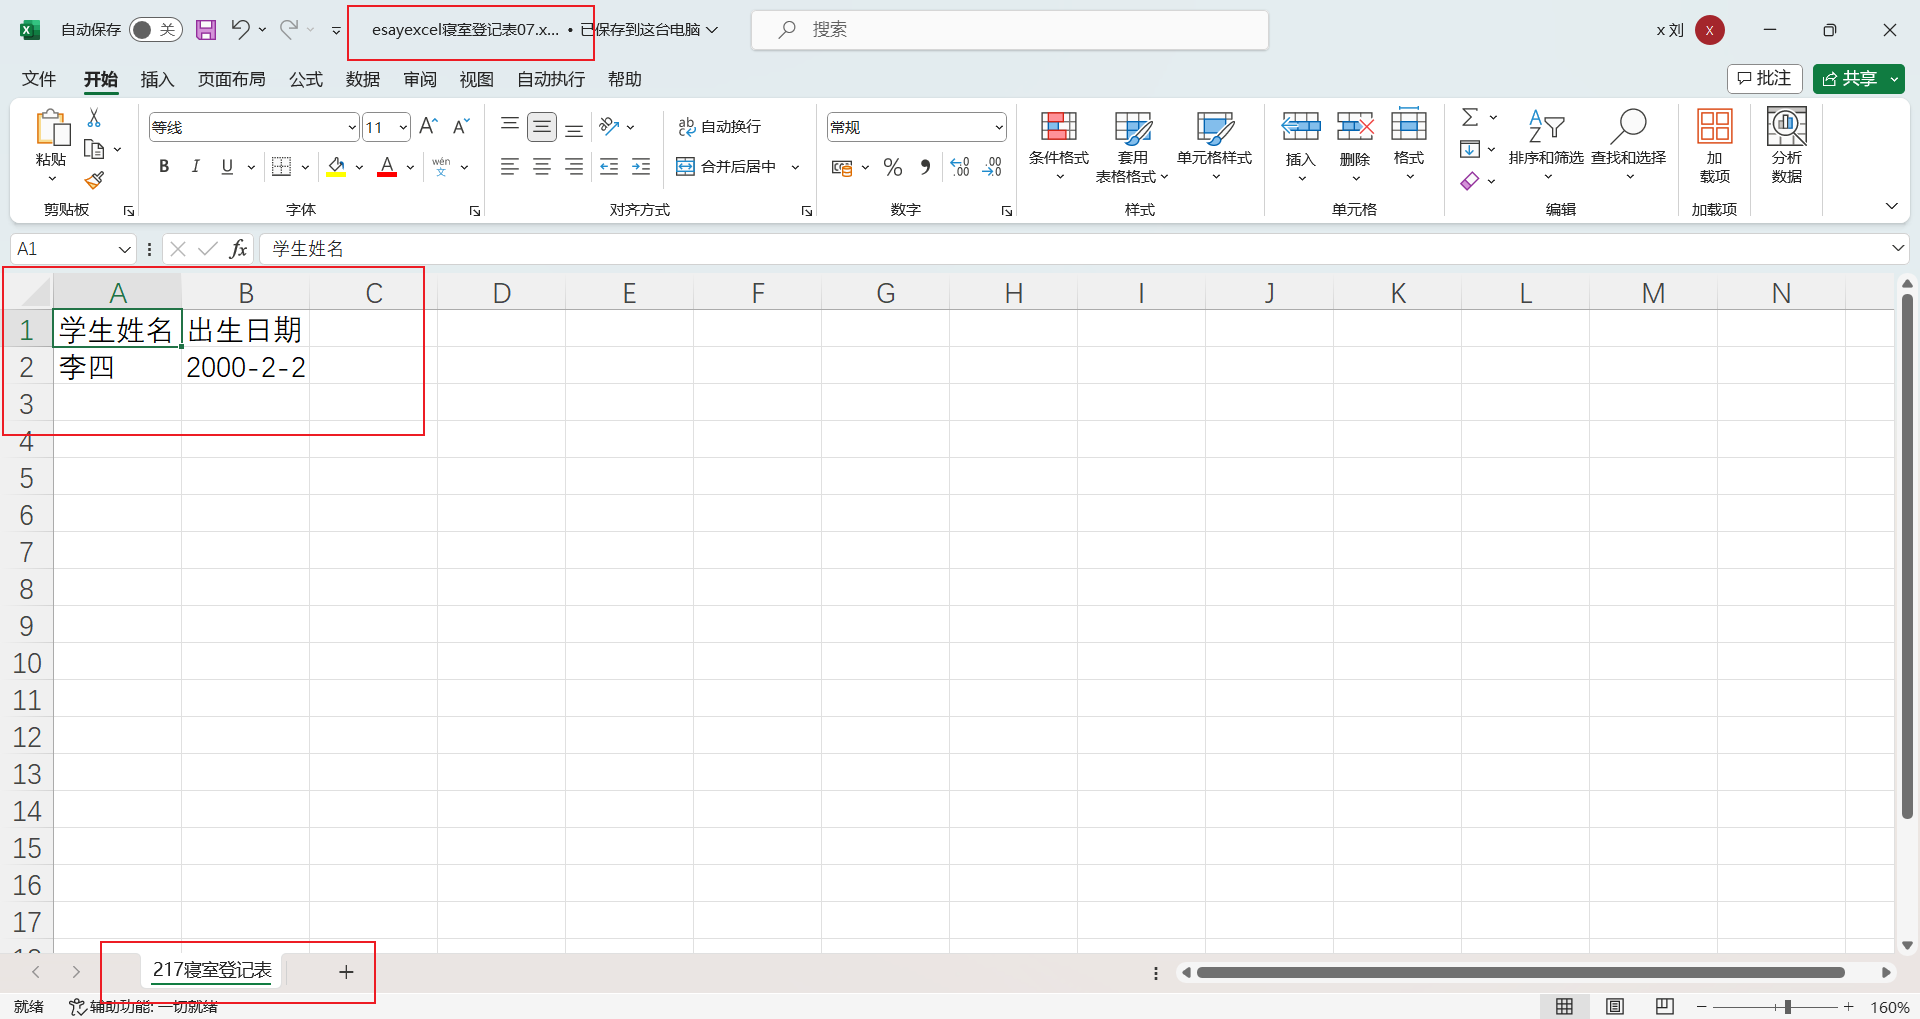
public void testWrite07() throws Exception{
Workbook workbook = new XSSFWorkbook();
Sheet sheet = workbook.createSheet("217寝室登记表");
Row row1 = sheet.createRow(0);
Cell cell11 = row1.createCell(0);
cell11.setCellValue("学生姓名");
Cell cell12 = row1.createCell(1);
cell12.setCellValue("出生日期");
Row row2 = sheet.createRow(1);
Cell cell21 = row2.createCell(0);
cell21.setCellValue("李四");
Cell cell22 = row2.createCell(1);
cell22.setCellValue("2000-2-2");
FileOutputStream fileOutputStream = new FileOutputStream(PATH + "寝室登记表07.xlsx");
workbook.write(fileOutputStream);
fileOutputStream.close();
System.out.println("寝室表生成成功");
}
}
|
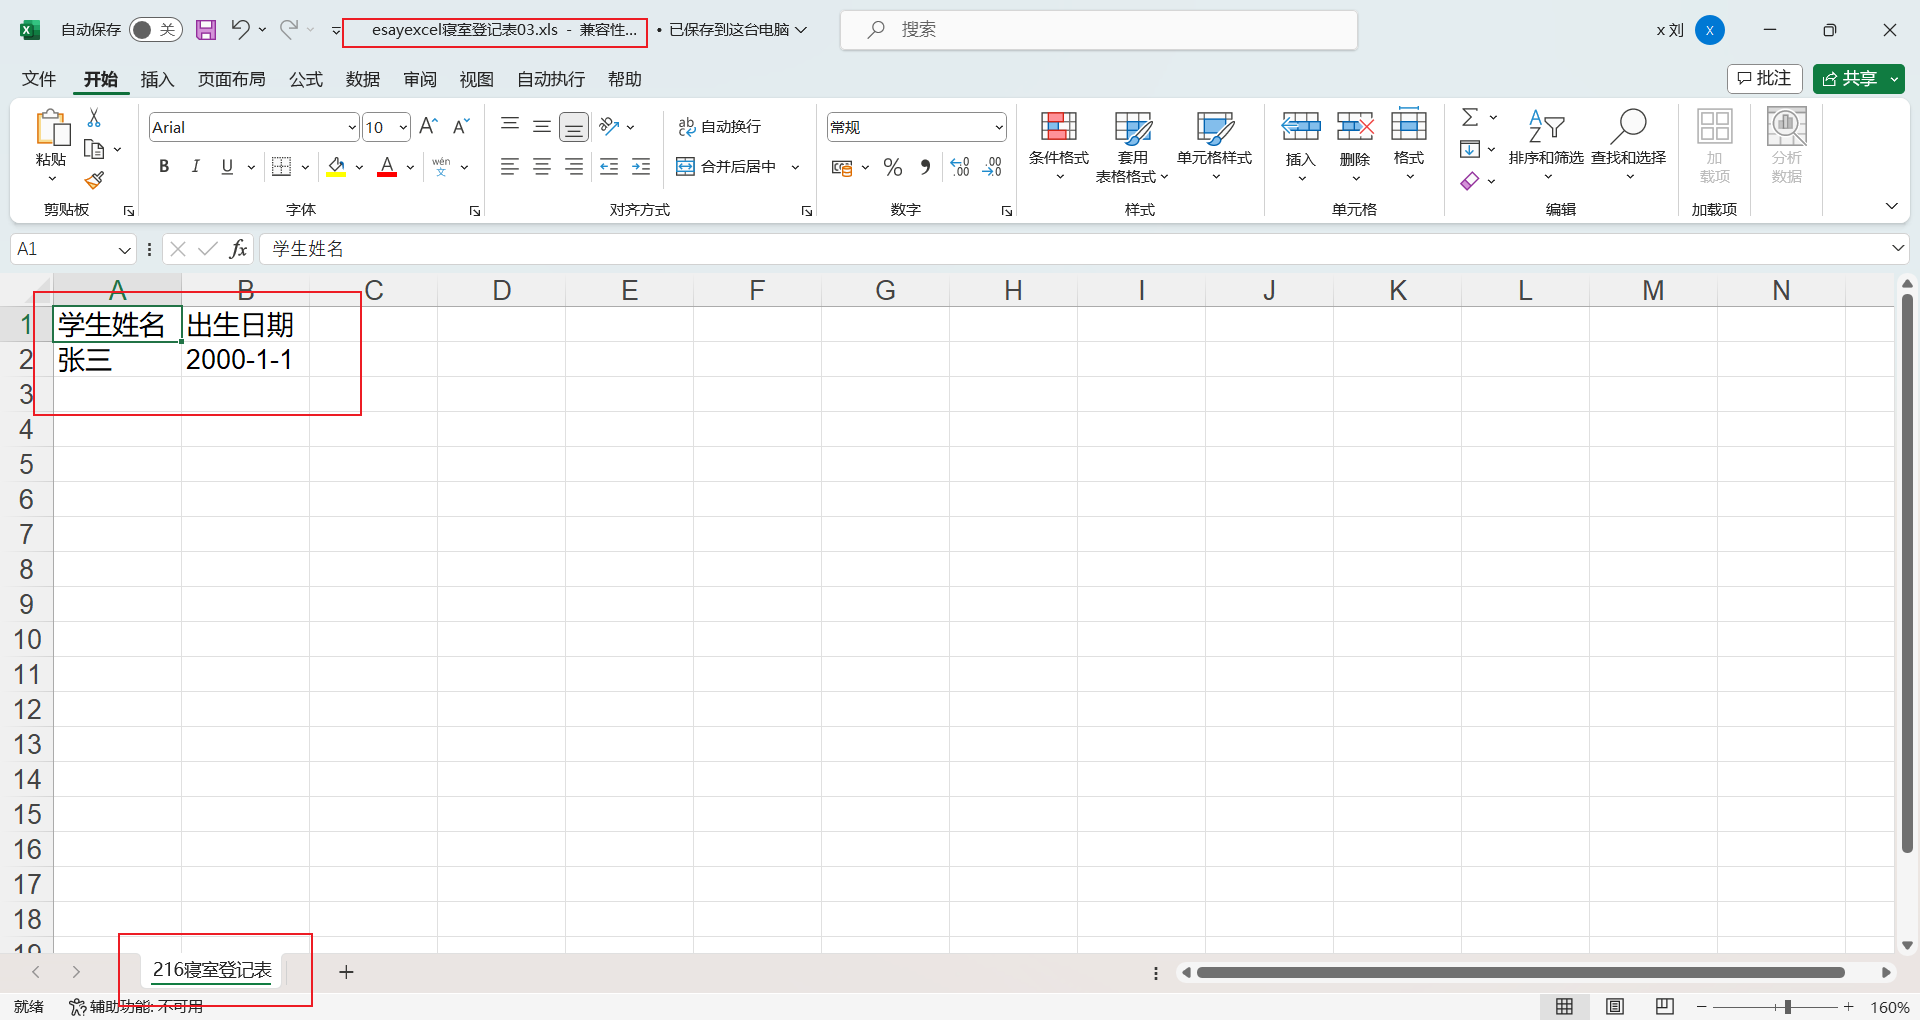
注意对象的区别和文件名后缀
运行后会获得03版和07版的两个Excel表

2. 大数据量的写入
大文件写HSSF(03版)
大文件写XSSF(07版)
- 缺点:写数据时速度非常慢,非常消耗内存,也会发生内存溢出,如100万条
- 优点:可以写较大的数据量,如20万条
大文件写SXSSF(07版)
- 优点:可以写非常大的数据量,如100万条甚至更多条,写数据速度快,占用更少的内存
- 注意:过程会产生临时文件,需要清理临时文件。默认由100条记录被保存在内存中,如果超过这个数量,则最前面的数据被写入临时文件。如果想自定义内存中的数据的数量,可以使用new SXSSFWorkbook(数量)
大数据量写HSSF代码实现
1
2
3
4
5
6
7
8
9
10
11
12
13
14
15
16
17
18
19
20
21
22
23
24
25
26
27
28
29
30
31
32
33
34
35
36
| public class ExcelWriteTest {
String PATH = "E:\\workspace\\esayexcel\\esayexcel";
@Test
public void testWriteBigData03() throws Exception {
long beginTime = System.currentTimeMillis();
Workbook workBook = new HSSFWorkbook();
Sheet sheet = workBook.createSheet();
for (int rowNum = 0; rowNum < 65536; rowNum++) {
Row row = sheet.createRow(rowNum);
for (int cellNum = 0; cellNum < 10; cellNum++) {
Cell cell = row.createCell(cellNum);
cell.setCellValue(cellNum);
}
}
FileOutputStream fileOutputStream = new FileOutputStream(PATH + "testWriteBigData03.xls");
workBook.write(fileOutputStream);
fileOutputStream.close();
long endTime = System.currentTimeMillis();
System.out.println("over");
System.out.println((double) (endTime-beginTime)/1000);
}
}
|
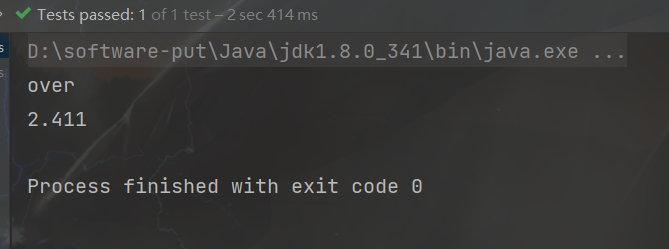
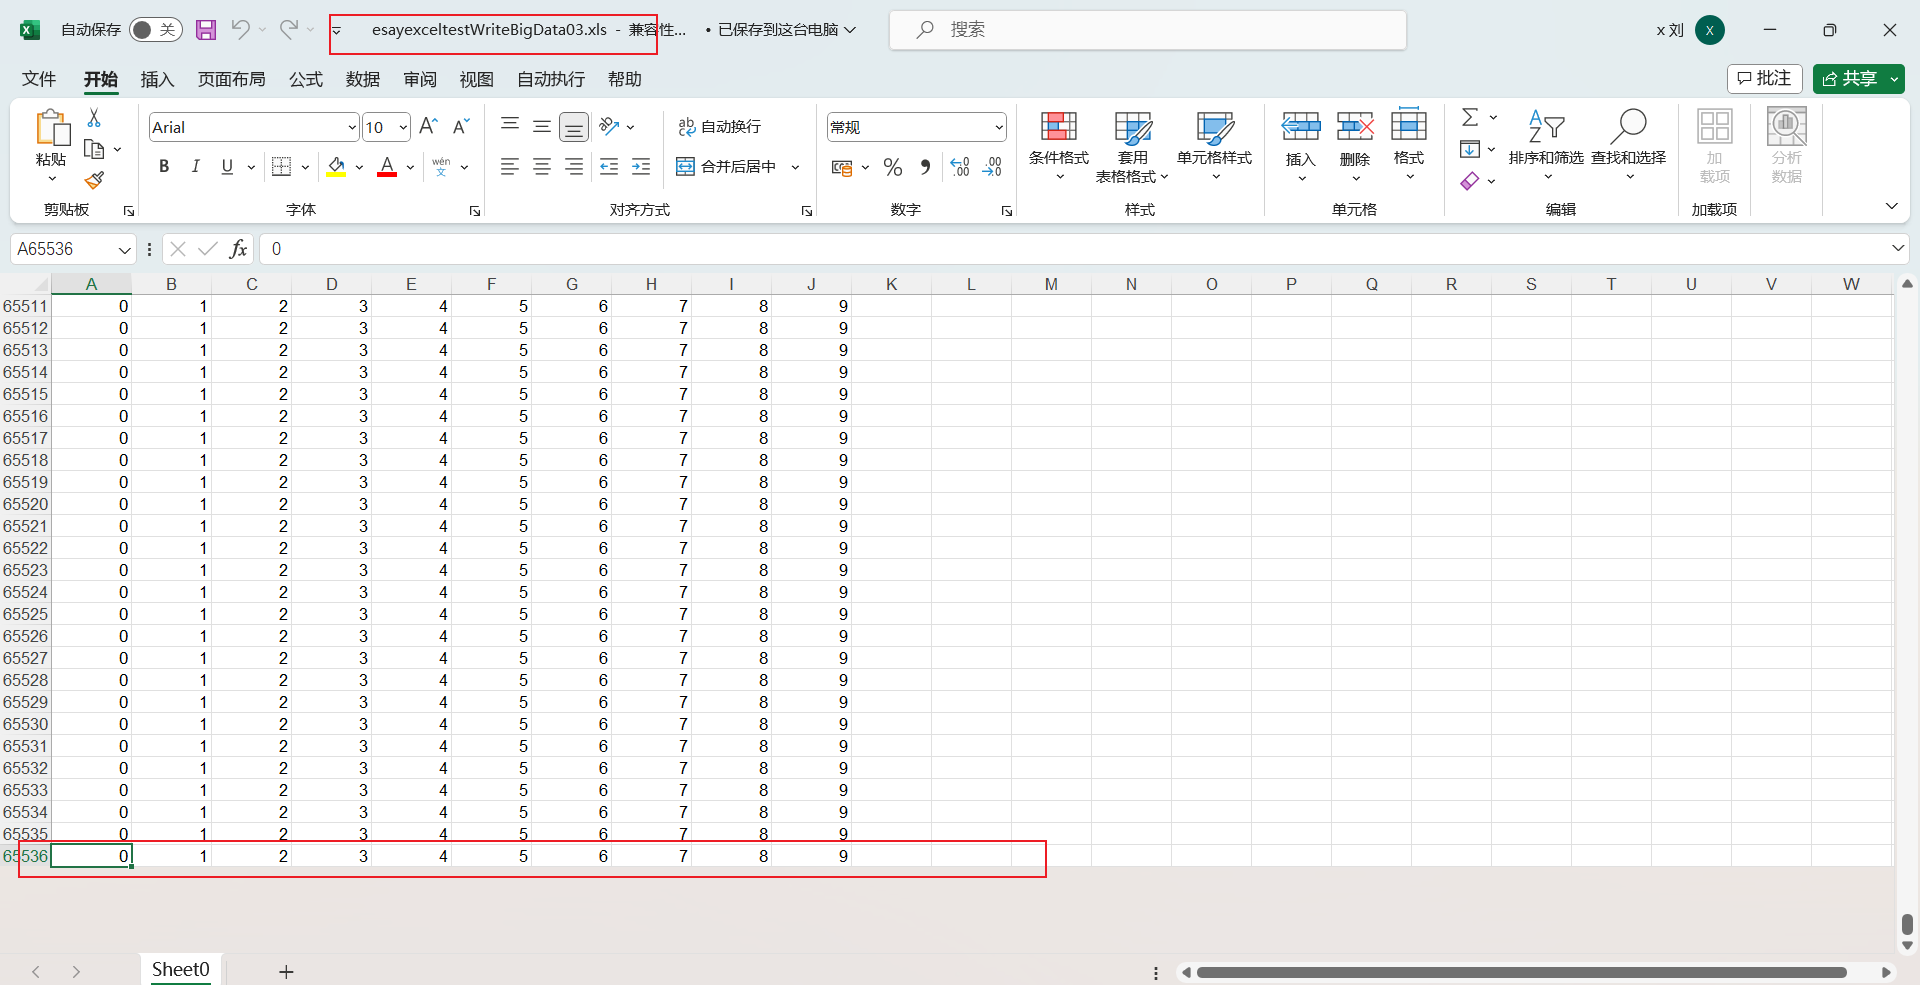
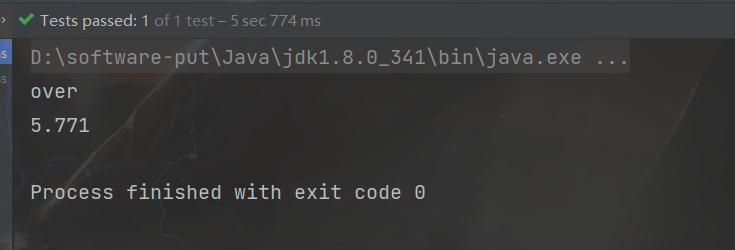
超过65536行数据会报错
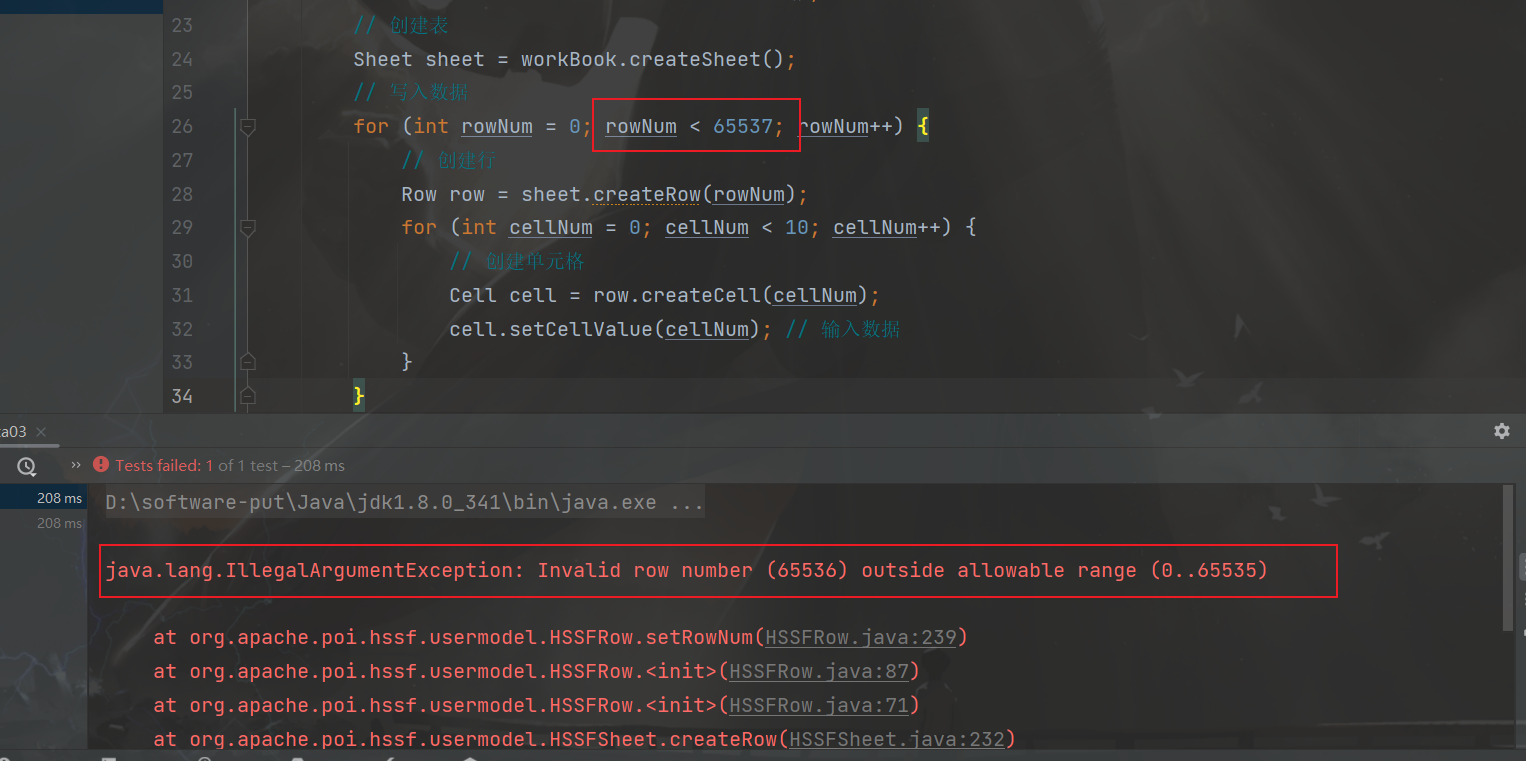
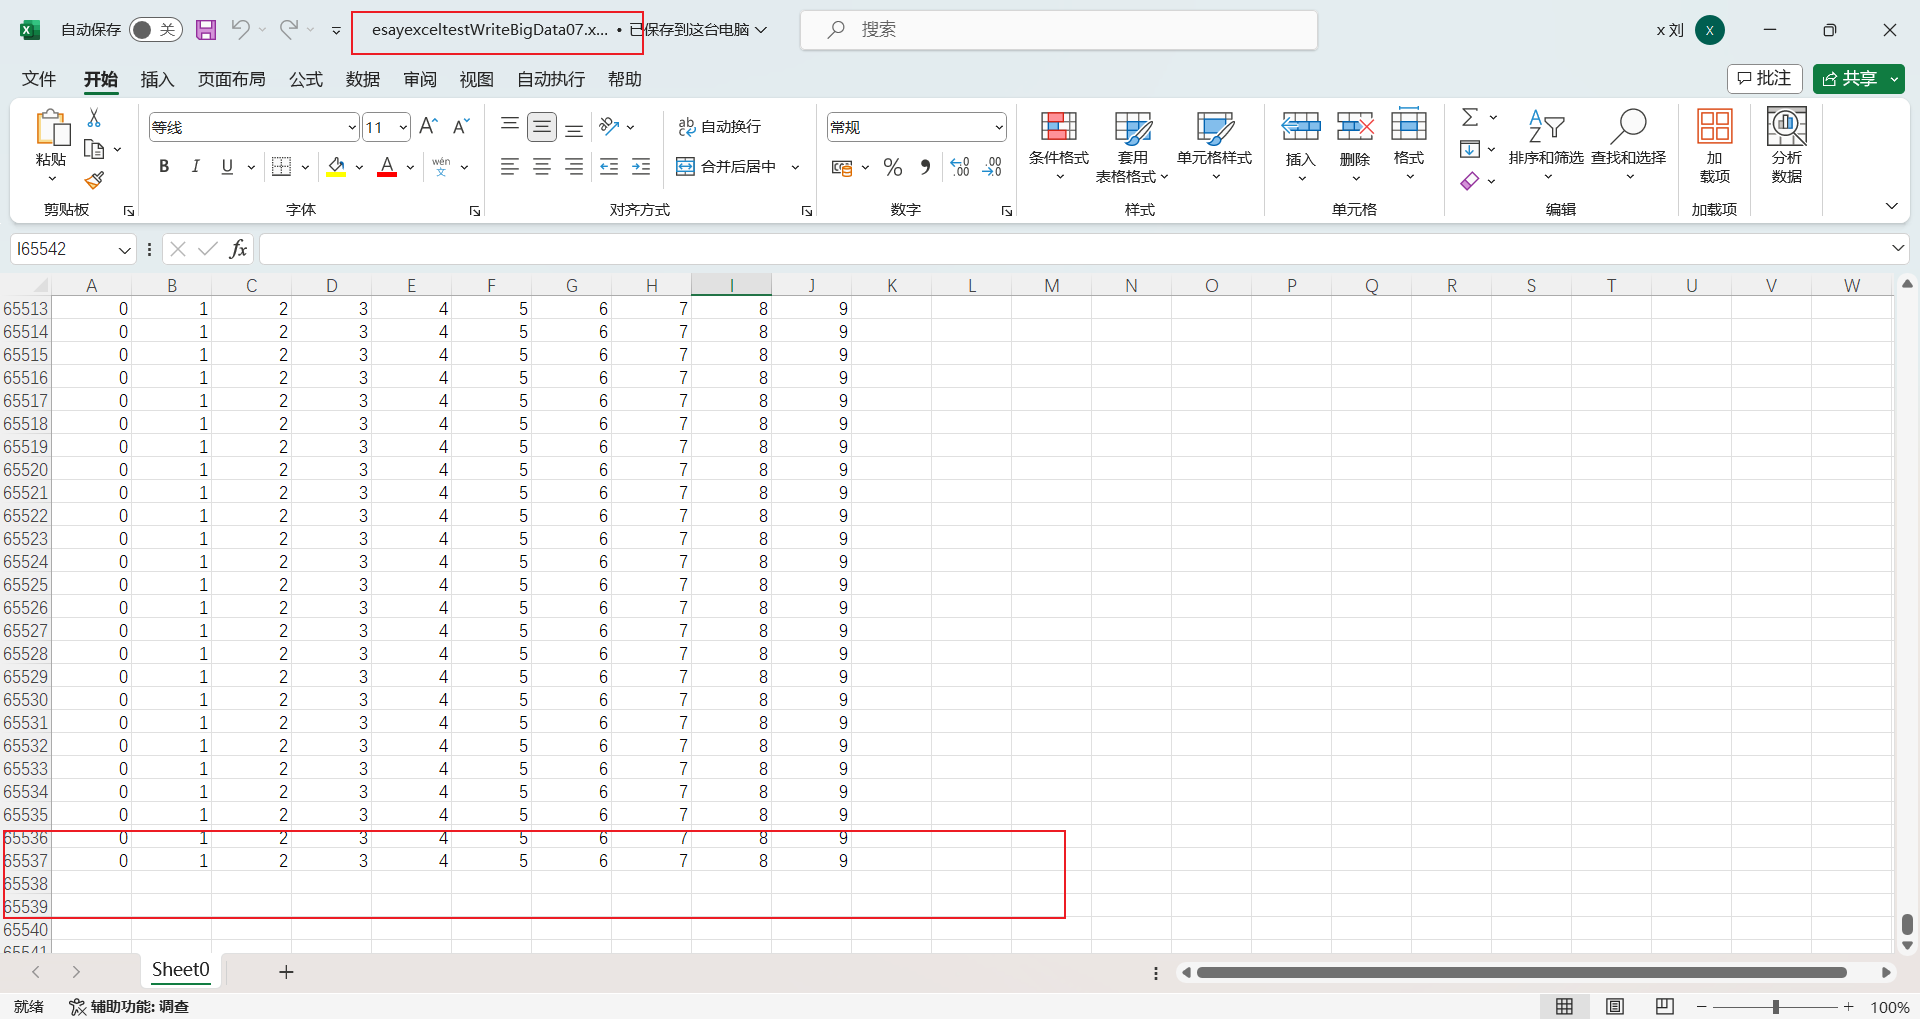
大数据量写XSSF代码实现
这里写入的行数是65537行,超过了65536
虽然XSSF可以写入更多的数据,但是速度明显变慢
1
2
3
4
5
6
7
8
9
10
11
12
13
14
15
16
17
18
19
20
21
22
23
24
25
26
27
28
29
30
31
32
33
34
35
36
| public class ExcelWriteTest {
String PATH = "E:\\workspace\\esayexcel\\esayexcel";
@Test
public void testWriteBigData07() throws Exception {
long beginTime = System.currentTimeMillis();
Workbook workBook = new XSSFWorkbook();
Sheet sheet = workBook.createSheet();
for (int rowNum = 0; rowNum < 65537; rowNum++) {
Row row = sheet.createRow(rowNum);
for (int cellNum = 0; cellNum < 10; cellNum++) {
Cell cell = row.createCell(cellNum);
cell.setCellValue(cellNum);
}
}
FileOutputStream fileOutputStream = new FileOutputStream(PATH + "testWriteBigData07.xlsx");
workBook.write(fileOutputStream);
fileOutputStream.close();
long endTime = System.currentTimeMillis();
System.out.println("over");
System.out.println((double) (endTime-beginTime)/1000);
}
}
|
大数据量写SXSSF的代码实现
这里相比于上面两种,多了一个清除临时文件的操作
((SXSSFWorkbook) workBook).dispose(); // 清除临时文件
1
2
3
4
5
6
7
8
9
10
11
12
13
14
15
16
17
18
19
20
21
22
23
24
25
26
27
28
29
30
31
32
33
34
35
36
37
38
| public class ExcelWriteTest {
String PATH = "E:\\workspace\\esayexcel\\esayexcel";
@Test
public void testWriteBigDataS07() throws Exception {
long beginTime = System.currentTimeMillis();
Workbook workBook = new SXSSFWorkbook();
Sheet sheet = workBook.createSheet();
for (int rowNum = 0; rowNum < 100000; rowNum++) {
Row row = sheet.createRow(rowNum);
for (int cellNum = 0; cellNum < 10; cellNum++) {
Cell cell = row.createCell(cellNum);
cell.setCellValue(cellNum);
}
}
FileOutputStream fileOutputStream = new FileOutputStream(PATH + "testWriteBigDataS07.xlsx");
workBook.write(fileOutputStream);
fileOutputStream.close();
((SXSSFWorkbook) workBook).dispose();
long endTime = System.currentTimeMillis();
System.out.println("over");
System.out.println((double) (endTime-beginTime)/1000);
}
}
|
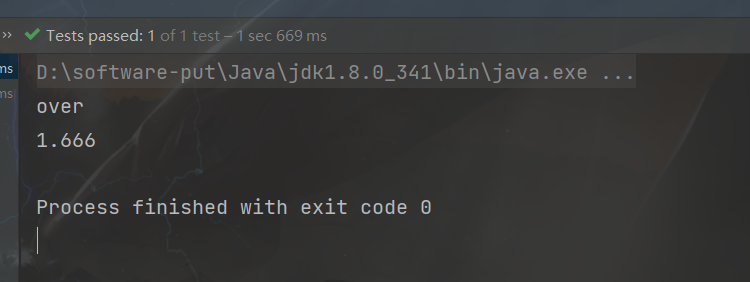
可以看见写入10万条数据只用了1.666s,速度提升非常大

3. Excel基本读取
在使用读取单元格的值时,不同的数据类型对应着不同的值
HSSF读的代码实现
1
2
3
4
5
6
7
8
9
10
11
12
13
14
15
16
17
18
19
20
21
22
23
| public class ExcelReadTest {
String PATH = "E:\\workspace\\esayexcel\\";
@Test
public void testRead03() throws Exception {
FileInputStream inputStream = new FileInputStream(PATH + "寝室登记表03.xls");
Workbook workbook = new HSSFWorkbook(inputStream);
Sheet sheet = workbook.getSheetAt(0);
Row row = sheet.getRow(0);
Cell cell = row.getCell(0);
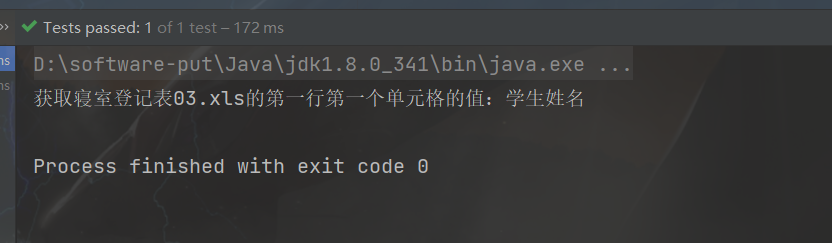
System.out.print("获取寝室登记表03.xls的第一行第一个单元格的值:");
System.out.println(cell.getStringCellValue());
inputStream.close();
}
}
|
HSSF读的代码实现
1
2
3
4
5
6
7
8
9
10
11
12
13
14
15
16
17
18
19
20
21
22
23
24
| public class ExcelReadTest {
String PATH = "E:\\workspace\\esayexcel\\";
@Test
public void testRead07() throws Exception {
FileInputStream inputStream = new FileInputStream(PATH + "寝室登记表07.xlsx");
Workbook workbook = new XSSFWorkbook(inputStream);
Sheet sheet = workbook.getSheetAt(0);
Row row = sheet.getRow(1);
Cell cell = row.getCell(0);
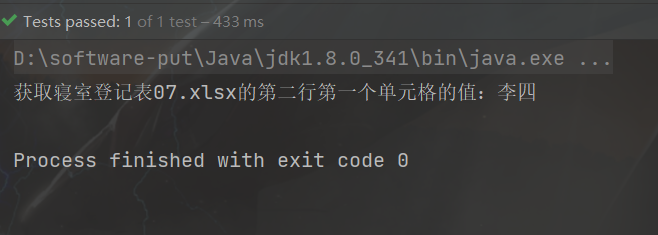
System.out.print("获取寝室登记表07.xlsx的第二行第一个单元格的值:");
System.out.println(cell.getStringCellValue());
inputStream.close();
}
}
|
4. 读取不同类型的数据
测试表名:明细表.xls
数据:

代码实现
1
2
3
4
5
6
7
8
9
10
11
12
13
14
15
16
17
18
19
20
21
22
23
24
25
26
27
28
29
30
31
32
33
34
35
36
37
38
39
40
41
42
43
44
45
46
47
48
49
50
51
52
53
54
55
56
57
58
59
60
61
62
63
64
65
66
67
68
69
70
71
72
73
74
75
76
77
| public class ExcelReadTest {
String PATH = "E:\\workspace\\esayexcel\\";
@Test
public void testCellType() throws Exception {
FileInputStream inputStream = new FileInputStream(PATH + "明细表.xls");
Workbook workbook = new HSSFWorkbook(inputStream);
Sheet sheet = workbook.getSheetAt(0);
Row rowTitle = sheet.getRow(0);
if (rowTitle != null) {
int cellCount = rowTitle.getPhysicalNumberOfCells();
for (int cellNum = 0; cellNum < cellCount; cellNum++) {
Cell cell = rowTitle.getCell(cellNum);
if (cell != null) {
int cellType = cell.getCellType();
String cellValue = cell.getStringCellValue();
System.out.print(cellValue + " | ");
}
}
System.out.println();
}
int rowCount = sheet.getPhysicalNumberOfRows();
for (int rowNum = 1; rowNum < rowCount; rowNum++) {
Row row = sheet.getRow(rowNum);
int cellCount = row.getPhysicalNumberOfCells();
for (int cellNum = 0; cellNum < cellCount; cellNum++) {
Cell cell = row.getCell(cellNum);
System.out.print("[" + (rowNum + 1) + "-" + (cellNum + 1) + "]");
if (cell != null) {
int cellType = cell.getCellType();
String cellValue = "";
switch (cellType) {
case Cell.CELL_TYPE_STRING:
System.out.print("【String】");
cellValue = cell.getStringCellValue();
break;
case Cell.CELL_TYPE_BOOLEAN:
System.out.print("【Boolean】");
cellValue = String.valueOf(cell.getBooleanCellValue());
break;
case Cell.CELL_TYPE_BLANK:
System.out.print("【Blank】");
break;
case Cell.CELL_TYPE_NUMERIC:
System.out.print("【numeric】");
if (HSSFDateUtil.isCellDateFormatted(cell)) {
System.out.print("【日期】");
Date date = cell.getDateCellValue();
cellValue = new DateTime(date).toString("yyyy-MM-dd");
} else {
System.out.print("【转成字符串输出】");
cell.setCellType(Cell.CELL_TYPE_STRING);
cellValue = cell.toString();
}
break;
case Cell.CELL_TYPE_ERROR:
System.out.print("【数据类型错误】");
break;
}
System.out.println(cellValue);
}
}
}
}
}
|
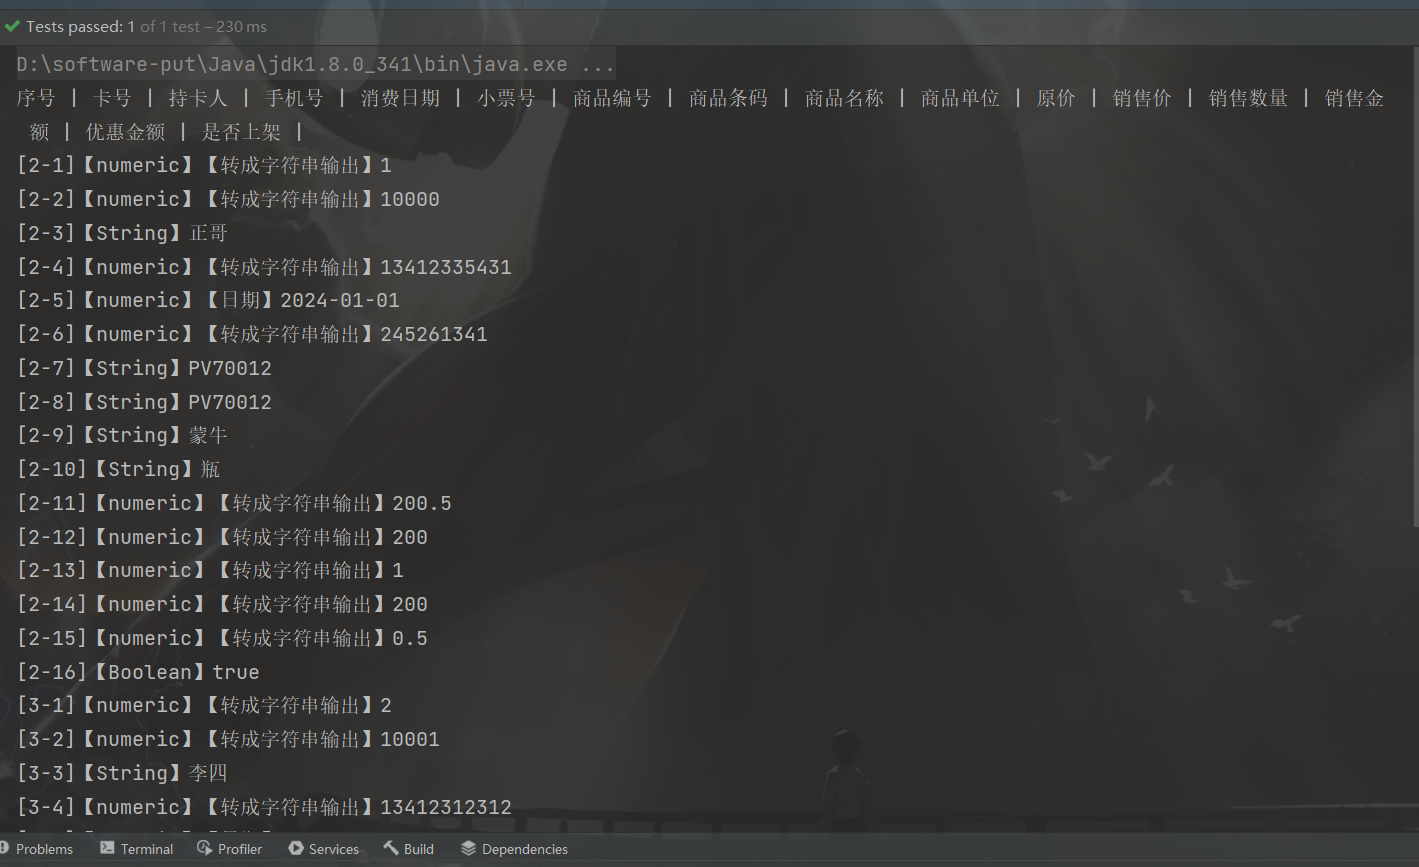
测试结果
测试结果只截取了一部分
三. EasyExcel
官方文档
导入依赖
1
2
3
4
5
| <dependency>
<groupId>com.alibaba</groupId>
<artifactId>easyexcel</artifactId>
<version>2.2.3</version>
</dependency>
|
1. 写操作
1.1 简单写
方式一
创建一个模板类User
@ExcelProperty:在表格中的名字
1
2
3
4
5
6
7
8
9
10
11
12
13
14
15
16
17
18
19
20
21
| @Data
public class User {
@ExcelProperty("用户编号")
private Integer userId;
@ExcelProperty("姓名")
private String name;
@ExcelProperty("性别")
private String gender;
@ExcelProperty("工资")
private Double salary;
@ExcelProperty("入职时间")
private Date hireDate;
public User(Integer userId, String name, String gender, Double salary, Date hireDate) {
this.userId = userId;
this.name = name;
this.gender = gender;
this.salary = salary;
this.hireDate = hireDate;
}
}
|
测试类
1
2
3
4
5
6
7
8
9
10
11
12
13
14
15
16
17
18
19
20
21
22
23
24
25
26
27
28
29
30
31
32
33
34
35
36
37
38
39
40
41
42
43
44
45
46
47
48
49
50
51
52
53
54
55
56
| public class WriteTest {
public String PATH = "E:\\workspace\\esayexcel\\";
@Test
public void test01() {
String fileName = PATH + "user1.xlsx";
List<User> users = new ArrayList<>();
User user1 = new User(1001,"张三","男",1000.12,new Date());
User user2 = new User(1002,"李四","男",2000.41,new Date());
User user3 = new User(1003,"王五","女",1402.36,new Date());
User user4 = new User(1004,"赵六","男",3000.11,new Date());
users.add(user1);
users.add(user2);
users.add(user3);
users.add(user4);
EasyExcel.write(fileName, User.class).sheet("用户信息表").doWrite(users);
System.out.println("写入成功");
}
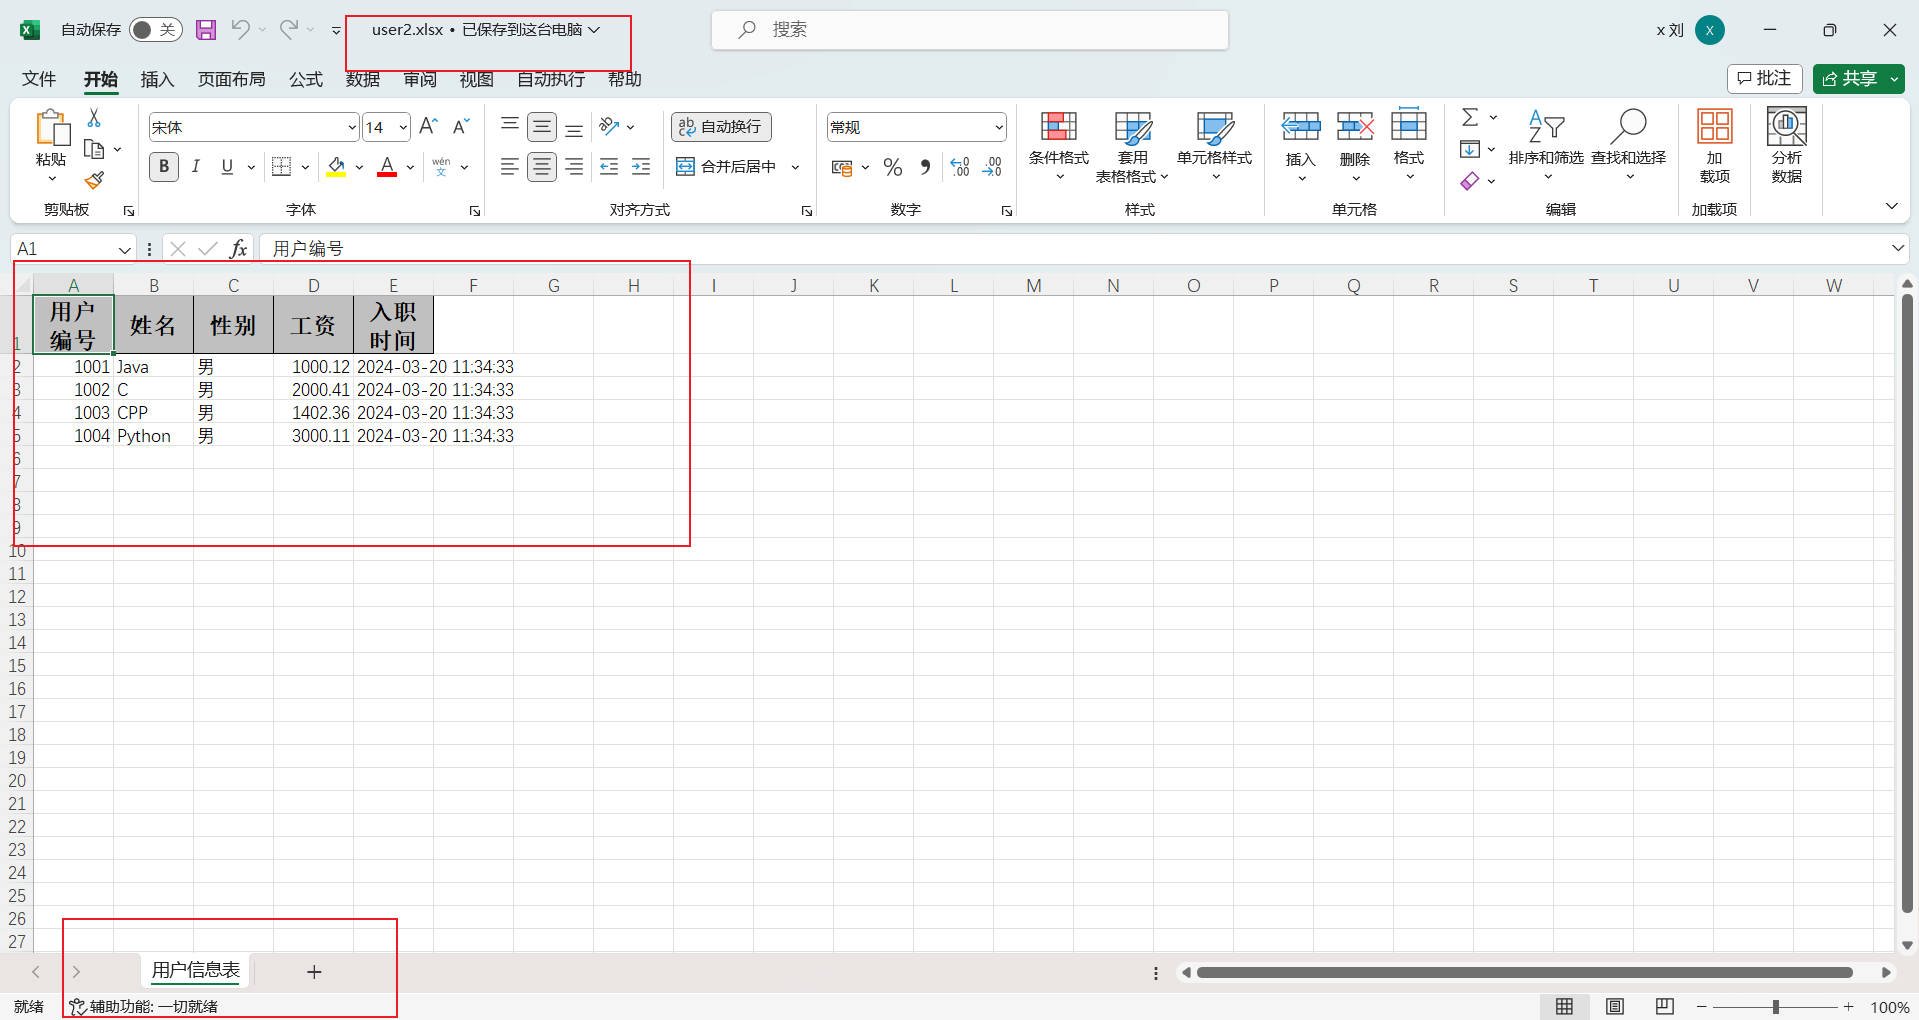
@Test
public void test02() {
String fileName = PATH + "user2.xlsx";
List<User> users = new ArrayList<>();
User user1 = new User(1001,"Java","男",1000.12,new Date());
User user2 = new User(1002,"C","男",2000.41,new Date());
User user3 = new User(1003,"CPP","男",1402.36,new Date());
User user4 = new User(1004,"Python","男",3000.11,new Date());
users.add(user1);
users.add(user2);
users.add(user3);
users.add(user4);
ExcelWriter excelWriter = EasyExcel.write(fileName, User.class).build();
WriteSheet writeSheet = EasyExcel.writerSheet("用户信息表").build();
excelWriter.write(users, writeSheet);
excelWriter.finish();
System.out.println("写入成功");
}
}
|
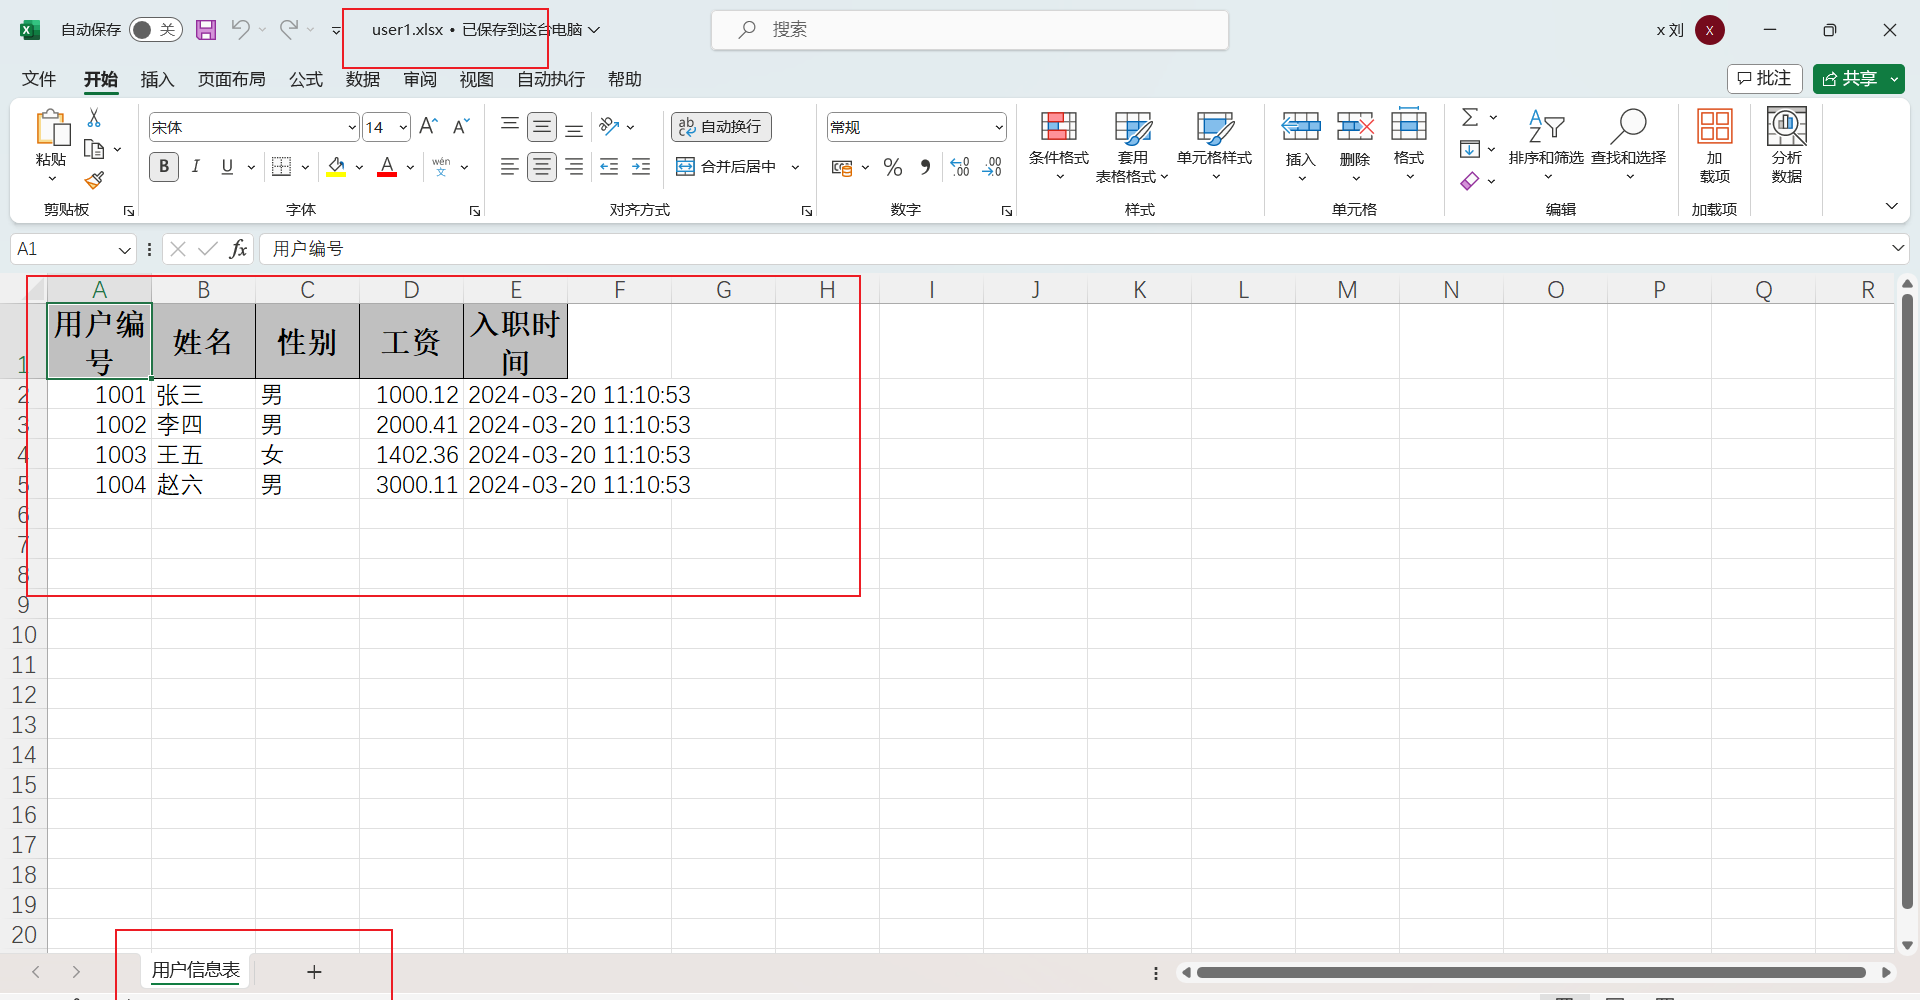
方式一
方式二
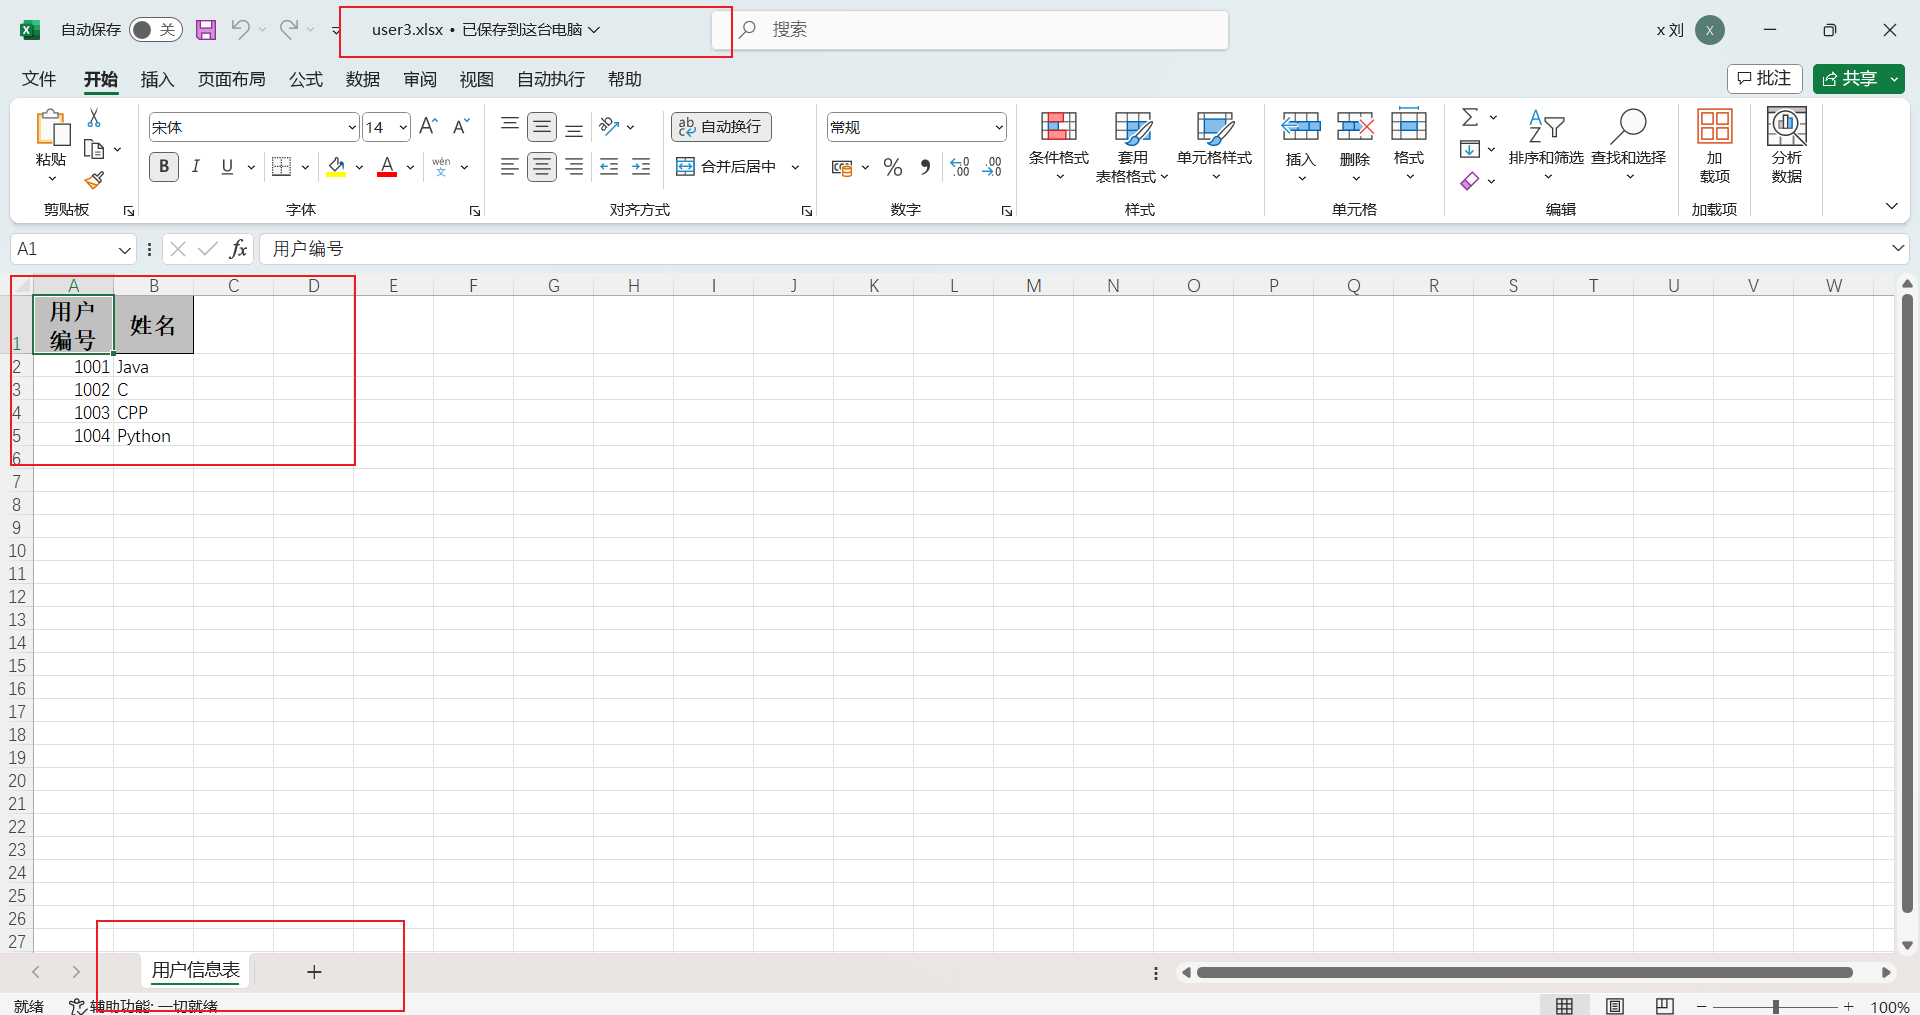
1.2 排除或指定写入字段
排除字段
如果有一些类的属性,我们不想写入表中,可以通过excludeColumnFiledNames()排除掉
1
2
3
4
5
6
7
8
9
10
11
12
13
14
15
16
17
18
19
20
21
22
23
24
25
26
|
@Test
public void test03() {
String fileName = PATH + "user3.xlsx";
List<User> users = new ArrayList<>();
User user1 = new User(1001,"Java","男",1000.12,new Date());
User user2 = new User(1002,"C","男",2000.41,new Date());
User user3 = new User(1003,"CPP","男",1402.36,new Date());
User user4 = new User(1004,"Python","男",3000.11,new Date());
users.add(user1);
users.add(user2);
users.add(user3);
users.add(user4);
Set<String> set = new HashSet<>();
set.add("hireDate");
set.add("salary");
set.add("gender");
EasyExcel.write(fileName, User.class).excludeColumnFiledNames(set).sheet("用户信息表").doWrite(users);
System.out.println("写入成功");
}
|
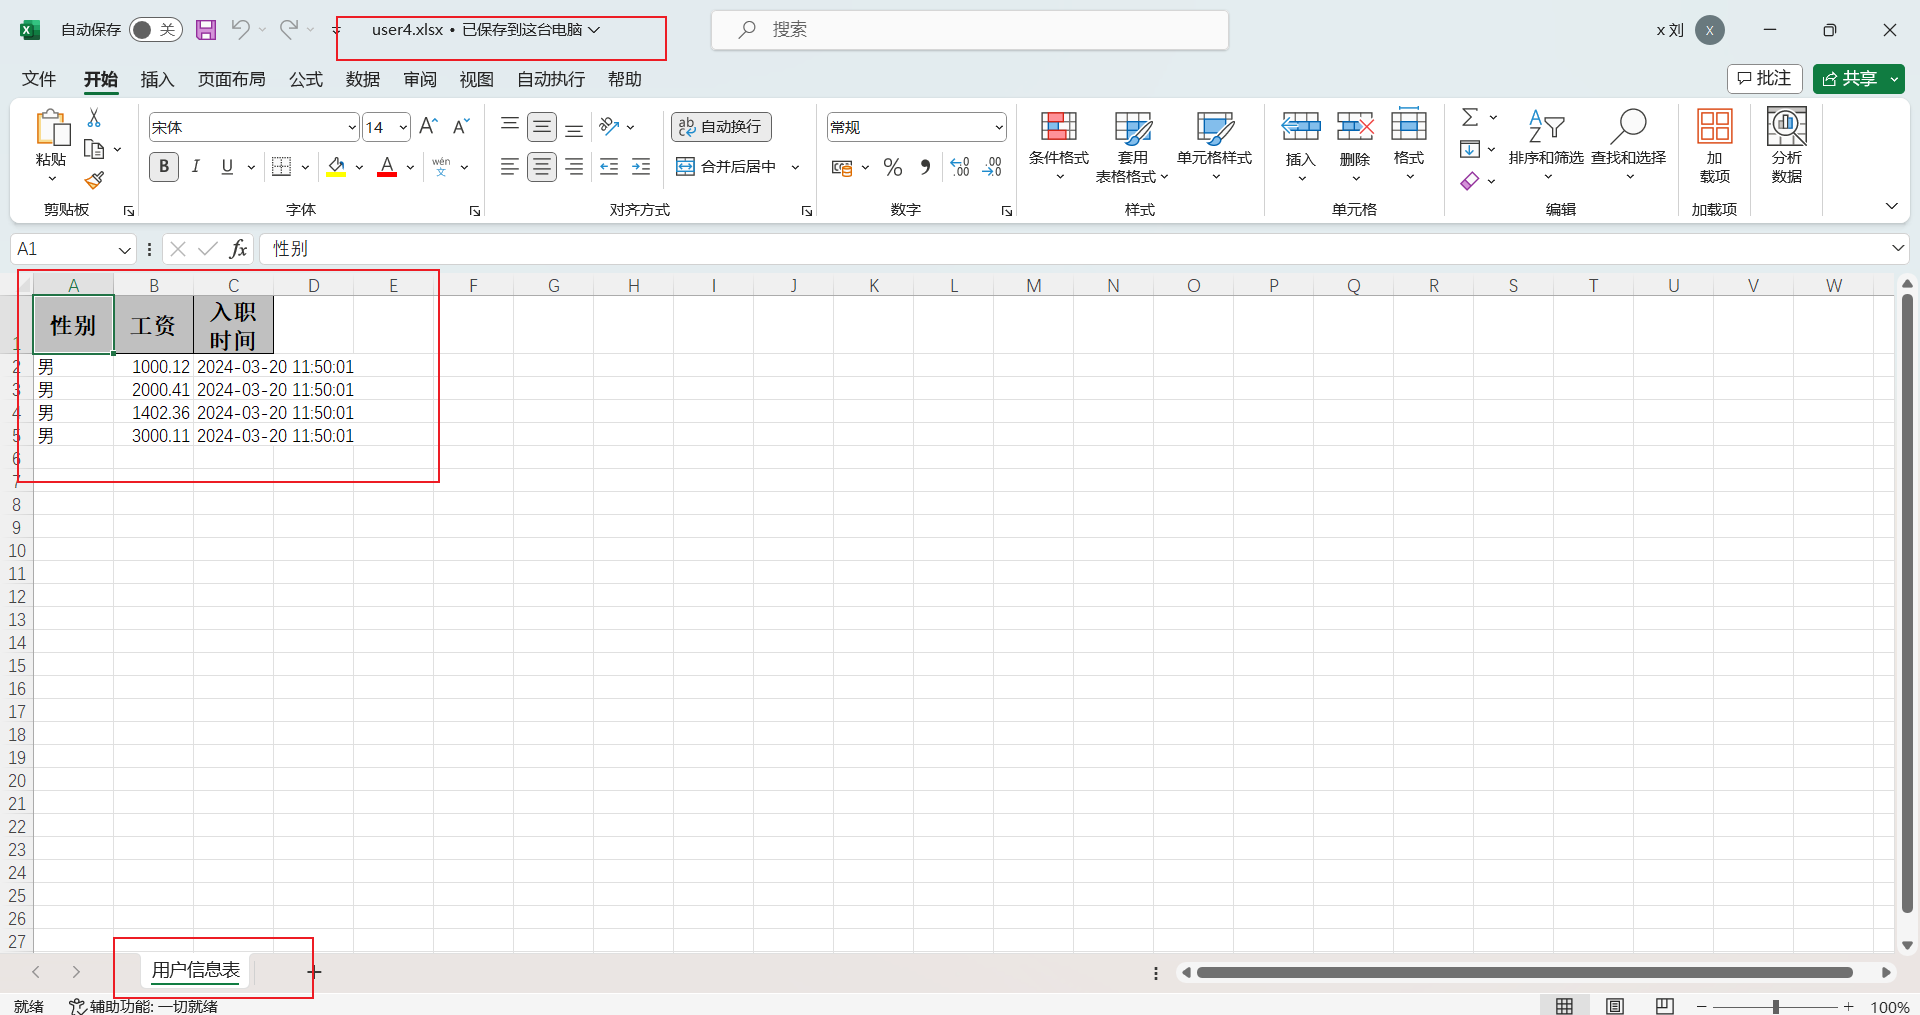
指定字段
指定要写入表格中的属性可以通过includeColumnFiledNames()来指定
1
2
3
4
5
6
7
8
9
10
11
12
13
14
15
16
17
18
19
20
21
22
23
24
25
26
|
@Test
public void test04() {
String fileName = PATH + "user4.xlsx";
List<User> users = new ArrayList<>();
User user1 = new User(1001,"Java","男",1000.12,new Date());
User user2 = new User(1002,"C","男",2000.41,new Date());
User user3 = new User(1003,"CPP","男",1402.36,new Date());
User user4 = new User(1004,"Python","男",3000.11,new Date());
users.add(user1);
users.add(user2);
users.add(user3);
users.add(user4);
Set<String> set = new HashSet<>();
set.add("hireDate");
set.add("salary");
set.add("gender");
EasyExcel.write(fileName, User.class).includeColumnFiledNames(set).sheet("用户信息表").doWrite(users);
System.out.println("写入成功");
}
|
1.3 对excel中的字段排序
写入时如果要想对excel中的字段排序,可以在类属性上的注解@ExcelProperty添加index属性来实现
1
2
3
4
5
6
7
8
9
10
11
12
13
14
15
16
17
18
19
20
21
| @Data
public class User {
@ExcelProperty(value = "用户编号", index = 0)
private Integer userId;
@ExcelProperty(value = "姓名", index = 1)
private String name;
@ExcelProperty(value = "性别", index = 2)
private String gender;
@ExcelProperty(value = "工资", index = 4)
private Double salary;
@ExcelProperty(value = "入职时间", index = 3)
private Date hireDate;
public User(Integer userId, String name, String gender, Double salary, Date hireDate) {
this.userId = userId;
this.name = name;
this.gender = gender;
this.salary = salary;
this.hireDate = hireDate;
}
}
|
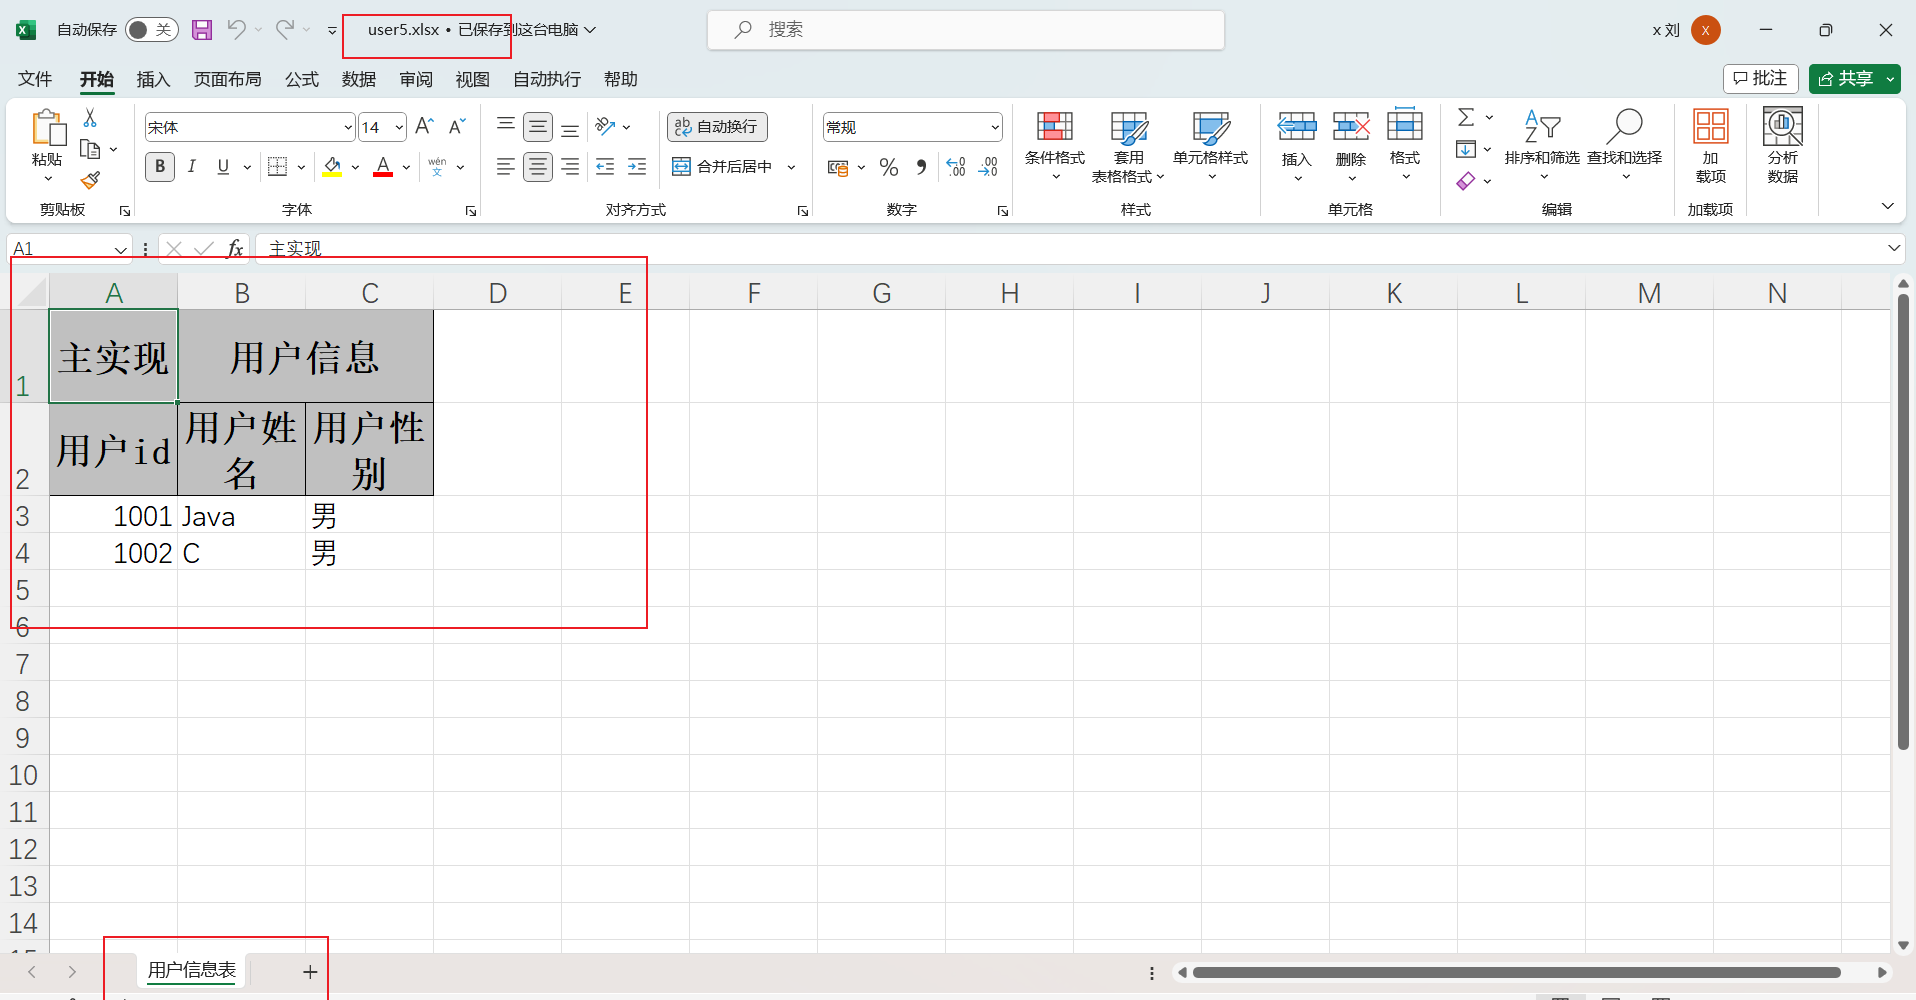
1.4 复杂头的数据写入
实体类
1
2
3
4
5
6
7
8
9
10
11
12
13
14
15
| @Data
public class ComplexHeadUser {
@ExcelProperty({"主实现","用户id"})
private Integer userId;
@ExcelProperty({"用户信息","用户姓名"})
private String name;
@ExcelProperty({"用户信息","用户性别"})
private String gender;
public ComplexHeadUser(Integer userId, String name, String gender) {
this.userId = userId;
this.name = name;
this.gender = gender;
}
}
|
测试类
1
2
3
4
5
6
7
8
9
10
11
12
13
14
15
16
17
18
|
@Test
public void test05() {
String fileName = PATH + "user5.xlsx";
List<ComplexHeadUser> users = new ArrayList<>();
ComplexHeadUser user1 = new ComplexHeadUser(1001,"Java","男");
ComplexHeadUser user2 = new ComplexHeadUser(1002,"C","男");
users.add(user1);
users.add(user2);
EasyExcel.write(fileName, ComplexHeadUser.class).sheet("用户信息表").doWrite(users);
System.out.println("写入成功");
}
|
生成的表
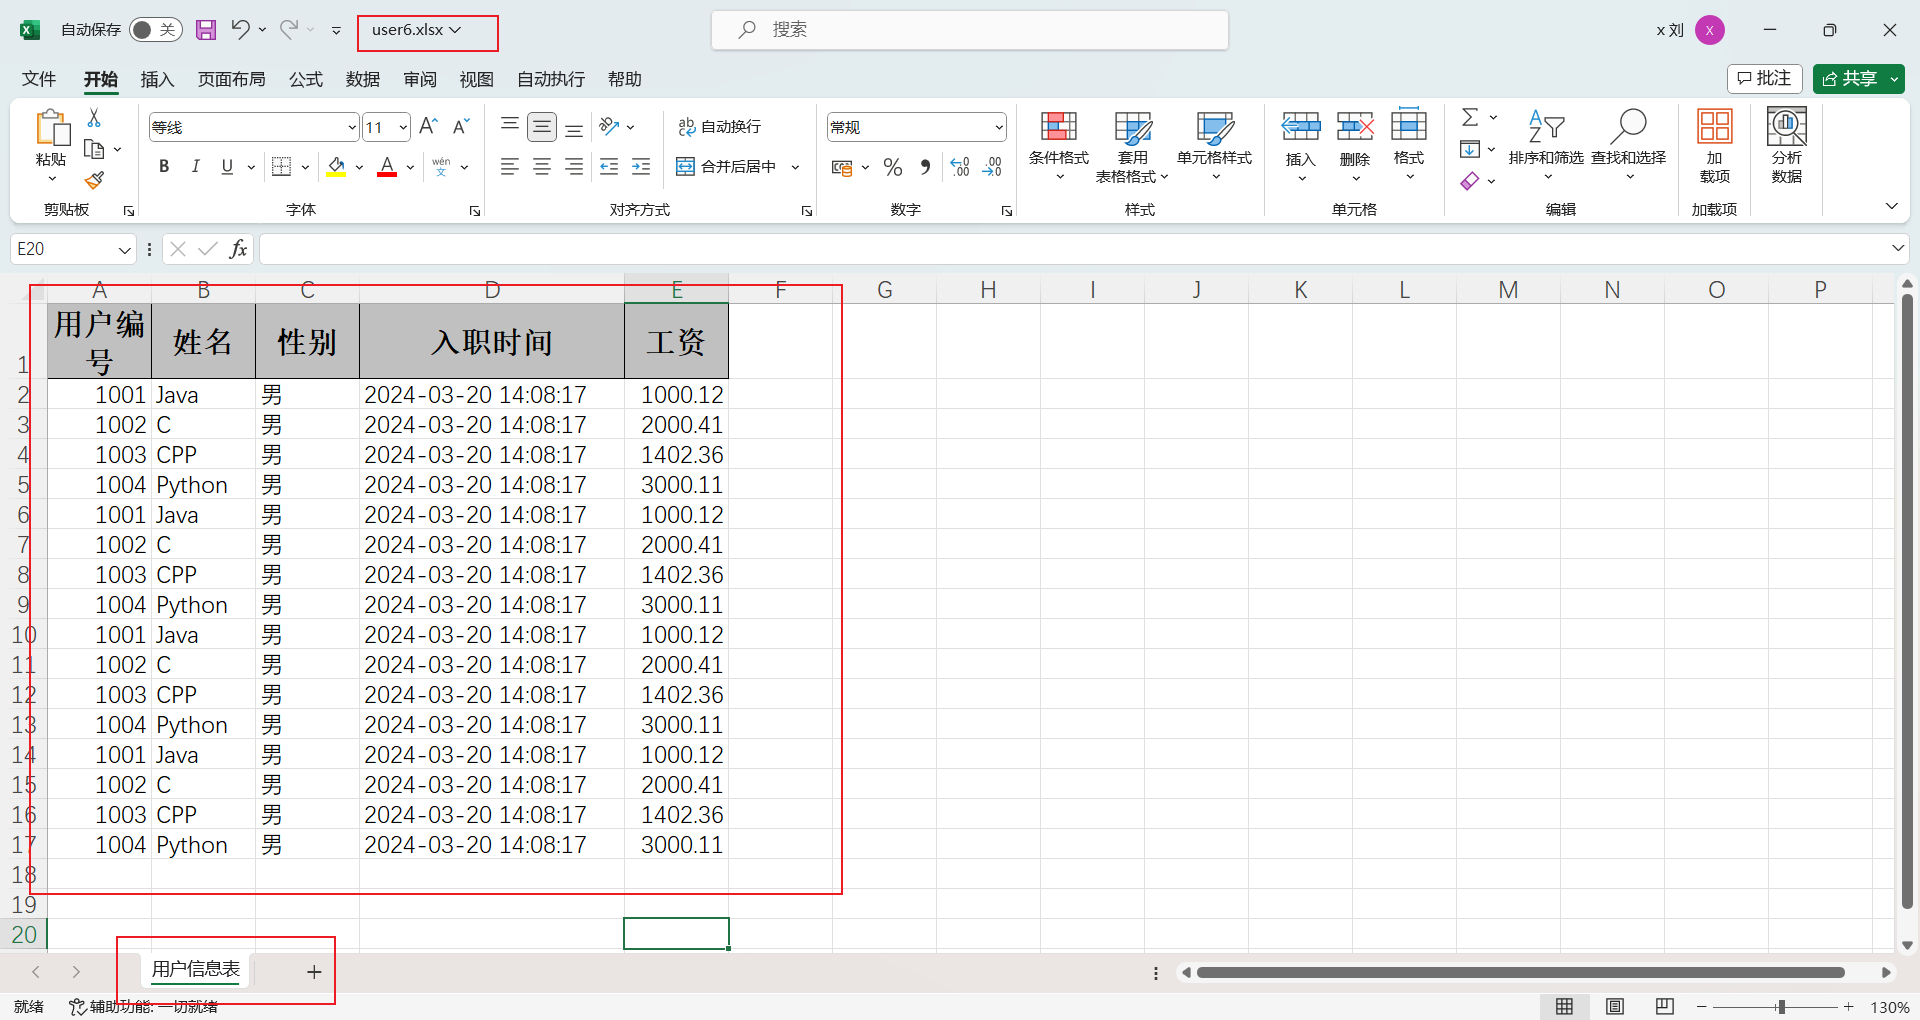
1.5 重复多次写入
重复写入到一个Sheet中
只需要在excelWriter.write时传入同一个Sheet即可
1
2
3
4
5
6
7
8
9
10
11
12
13
14
15
16
17
18
19
20
21
22
23
24
25
26
27
28
29
30
|
@Test
public void test06() {
String fileName = PATH + "user6.xlsx";
List<User> users = new ArrayList<>();
User user1 = new User(1001,"Java","男",1000.12,new Date());
User user2 = new User(1002,"C","男",2000.41,new Date());
User user3 = new User(1003,"CPP","男",1402.36,new Date());
User user4 = new User(1004,"Python","男",3000.11,new Date());
users.add(user1);
users.add(user2);
users.add(user3);
users.add(user4);
ExcelWriter excelWriter = EasyExcel.write(fileName, User.class).build();
WriteSheet writeSheet = EasyExcel.writerSheet("用户信息表").build();
for (int i = 0; i < 4; i++) {
excelWriter.write(users, writeSheet);
}
excelWriter.finish();
System.out.println("写入成功");
}
|
t
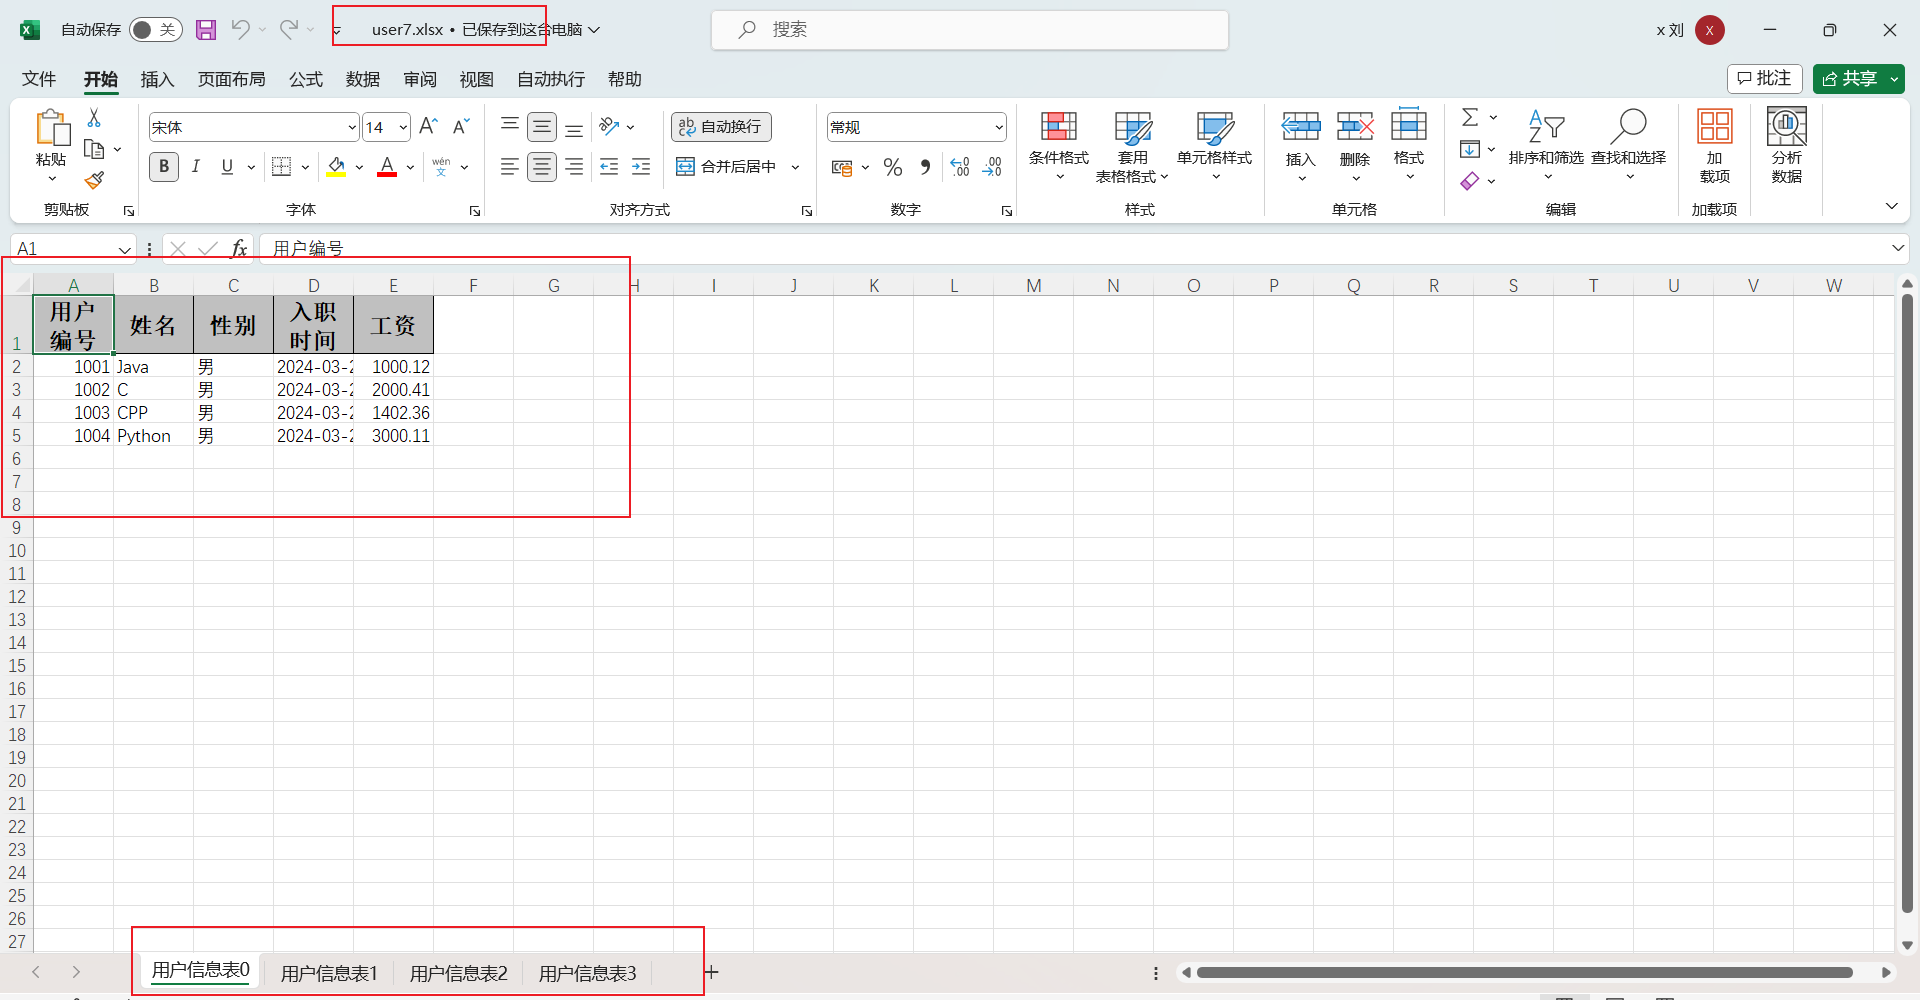
重复多次写在不同的sheet中
只需要在excelWriter.write时传入不同的Sheet即可
1
2
3
4
5
6
7
8
9
10
11
12
13
14
15
16
17
18
19
20
21
22
23
24
25
26
27
28
29
30
|
@Test
public void test07() {
String fileName = PATH + "user7.xlsx";
List<User> users = new ArrayList<>();
User user1 = new User(1001,"Java","男",1000.12,new Date());
User user2 = new User(1002,"C","男",2000.41,new Date());
User user3 = new User(1003,"CPP","男",1402.36,new Date());
User user4 = new User(1004,"Python","男",3000.11,new Date());
users.add(user1);
users.add(user2);
users.add(user3);
users.add(user4);
ExcelWriter excelWriter = EasyExcel.write(fileName, User.class).build();
for (int i = 0; i < 4; i++) {
WriteSheet writeSheet = EasyExcel.writerSheet("用户信息表" + i).build();
excelWriter.write(users, writeSheet);
}
excelWriter.finish();
System.out.println("写入成功");
}
|
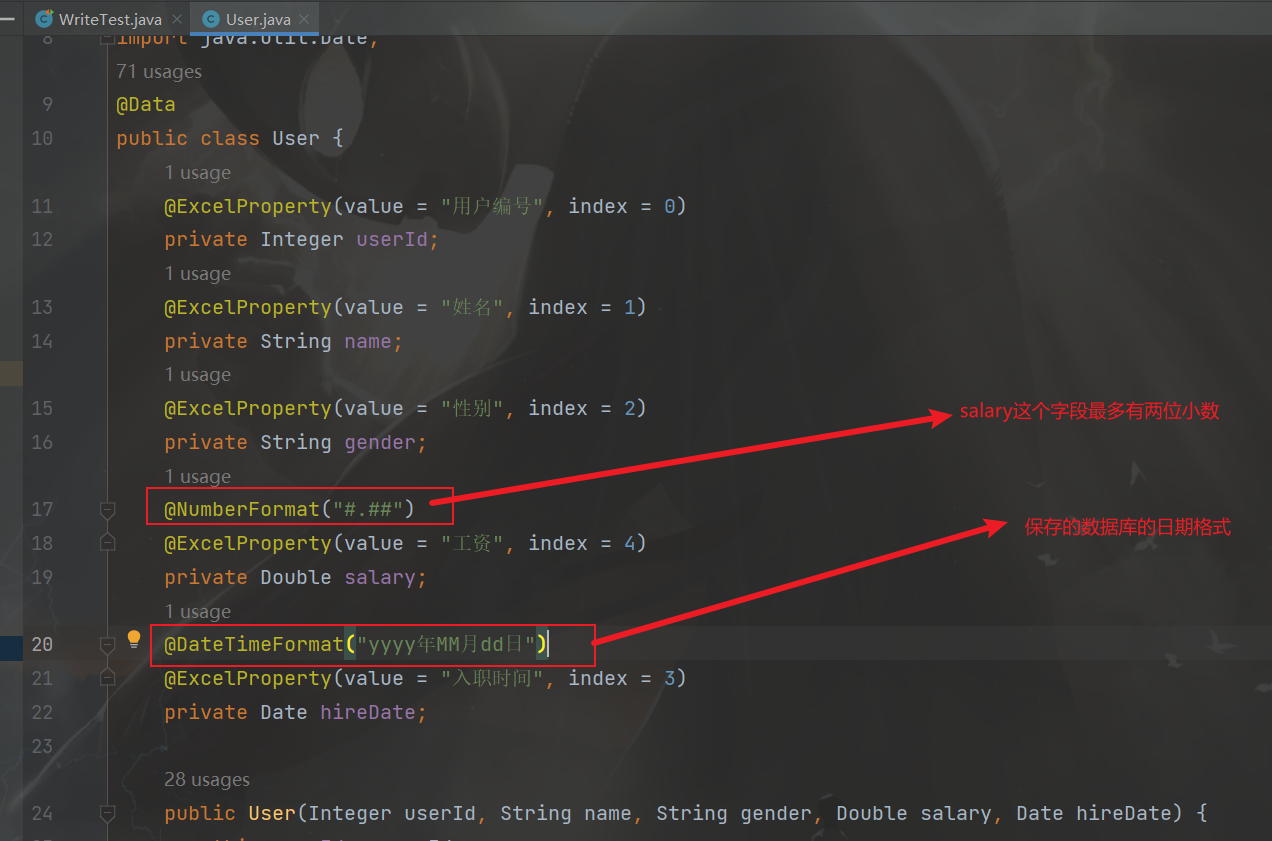
1.6 日期数字格式化
对于日期和数字有时候我们需要对其展示的样式进行格式化,easyexcel提供了一下注解
- @DateTimeFormat : 日期格式化
- @NumberFormat : 数字格式化(小数或者百分数)
给实体类相应的字段添加上注解
测试方法
1
2
3
4
5
6
7
8
9
10
11
12
13
14
15
16
17
18
19
20
21
|
@Test
public void test08() {
String fileName = PATH + "user8.xlsx";
List<User> users = new ArrayList<>();
User user1 = new User(1001,"张三","男",1000.121,new Date());
User user2 = new User(1002,"李四","男",2000.411,new Date());
User user3 = new User(1003,"王五","女",1402.3601,new Date());
User user4 = new User(1004,"赵六","男",3000.1,new Date());
users.add(user1);
users.add(user2);
users.add(user3);
users.add(user4);
EasyExcel.write(fileName, User.class).sheet("用户信息表").doWrite(users);
System.out.println("写入成功");
}
|
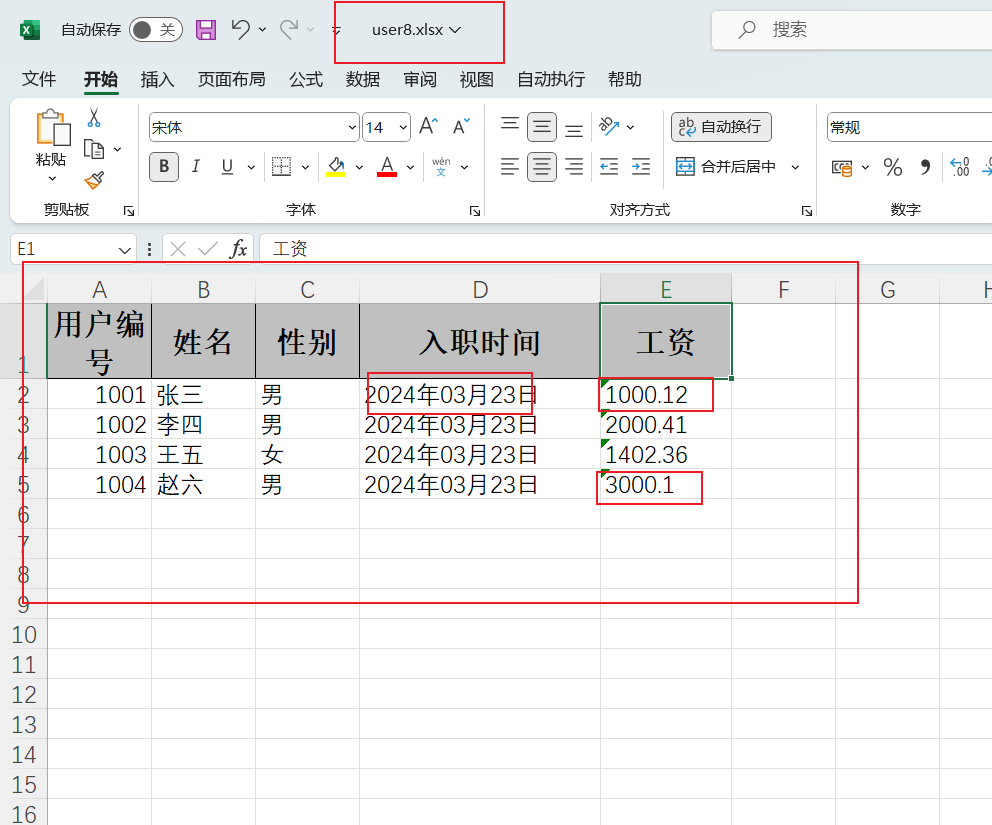
测试结果
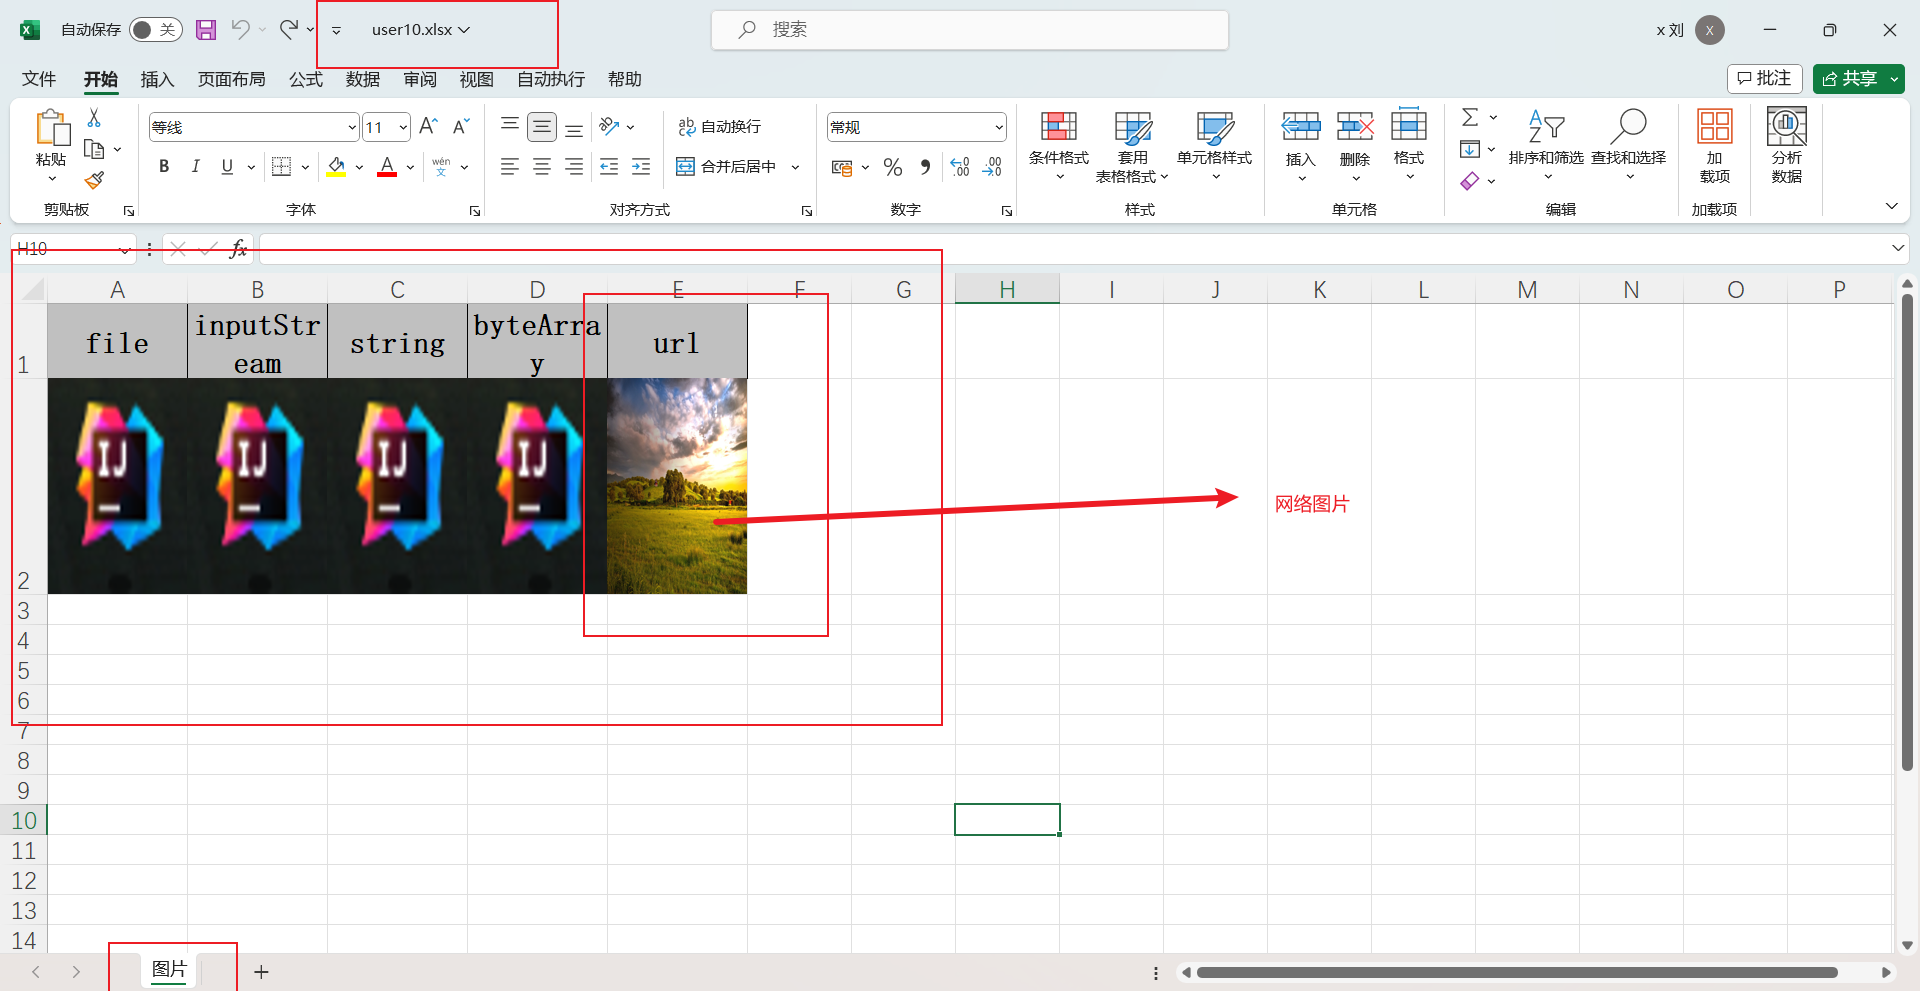
1.7 写入图片到excel
EasyExcel写入图片到excel时,支持5种数据类型的图片类型
- 图片可以是一个File格式
- 图片可以是一个InputStream输入流的方式
- 图片可以是一个byte[]数组的方式
- 图片可以是 一个网络的java.net.URL对象方式
- 图片也可以是一个String类型方式(当是String类型是,需要StringImageConverter类型转换器)
构建包含这五种数据类型的类
1
2
3
4
5
6
7
8
9
10
11
12
13
14
15
16
17
18
| @Data
@ContentRowHeight(100)
@ColumnWidth(100 / 8)
public class ImageData {
private File file;
private InputStream inputStream;
@ExcelProperty(converter = StringImageConverter.class)
private String string;
private byte[] byteArray;
private URL url;
}
|
测试方法
1
2
3
4
5
6
7
8
9
10
11
12
13
14
15
16
17
18
19
20
21
22
23
24
25
26
27
28
29
30
31
32
33
34
35
36
37
38
39
40
|
@Test
public void test09() throws IOException {
String fileName = PATH + "user10.xlsx";
List<ImageData> list = new ArrayList<>();
ImageData imageData = new ImageData();
imageData.setFile(new File("E:\\workspace\\esayexcel\\img.png"));
imageData.setInputStream(new FileInputStream("E:\\workspace\\esayexcel\\img.png"));
imageData.setString("E:\\workspace\\esayexcel\\img.png");
File file = new File("E:\\workspace\\esayexcel\\img.png");
byte[] bytes = new byte[(int)file.length()];
FileInputStream fileInputStream = new FileInputStream(file);
fileInputStream.read(bytes, 0, (int)file.length());
imageData.setByteArray(bytes);
imageData.setUrl(new URL("https://ts1.cn.mm.bing.net/th/id/R-C.5c53fb9d074c6e35302bca533c0204e5?rik=AYOvGEn5S6VPcw&riu=http%3a%2f%2fimg.pconline.com.cn%2fimages%2fupload%2fupc%2ftx%2fwallpaper%2f1301%2f10%2fc1%2f17280208_1357799853569.jpg&ehk=ckgBYNfHbwaEcgpJjb%2f7E%2bfYjy74F8b81gJaf5cBpic%3d&risl=&pid=ImgRaw&r=0"));
list.add(imageData);
EasyExcel.write(fileName, ImageData.class).sheet("图片").doWrite(list);
fileInputStream.close();
}
|
测试结果
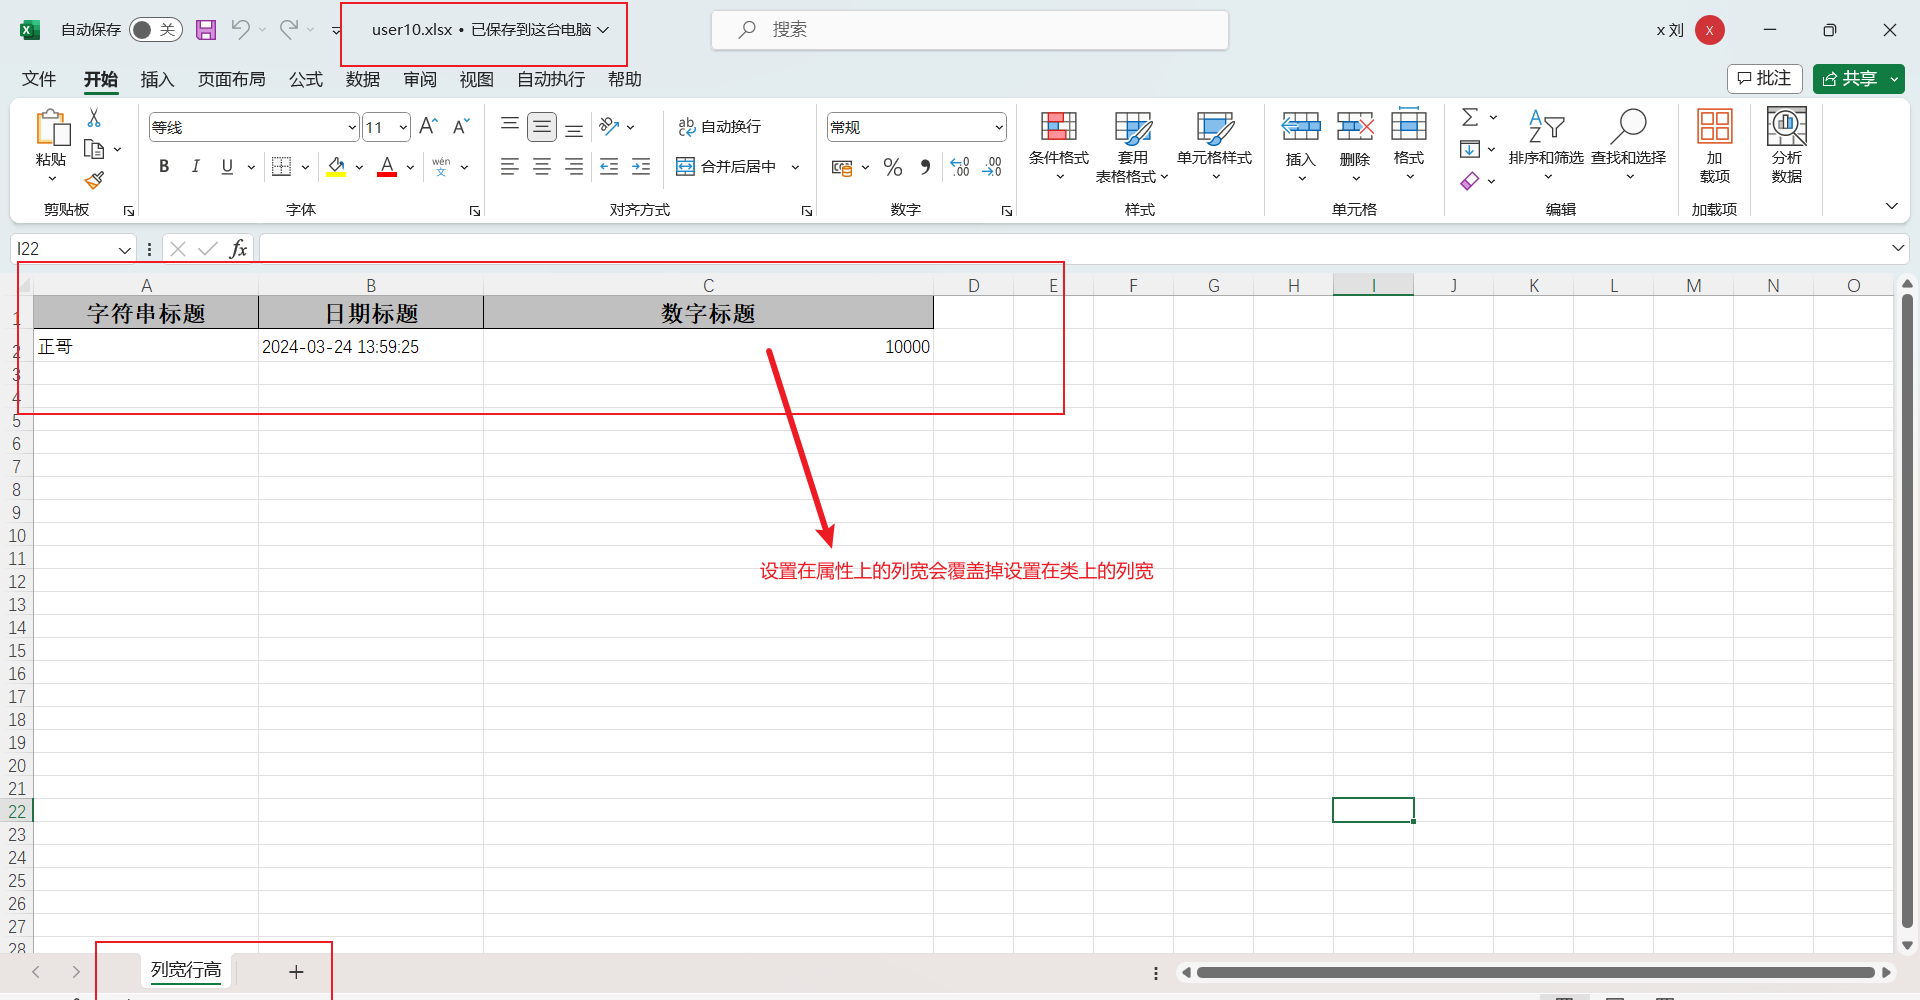
1.8 设置excel表格的列宽行高
可以通过以下注解来设置excel表的列宽和行高
- @ContentRowHeight 设置内容高度
- @HeadRowHeight 设置标题高度
- @ColumnWidth 设置列宽
- @ColumnWidth如果写在类上,就是设置整个表格所有的列宽,如果写在属性上,就是设置这个属性对应的表格字段的列宽
实体类
1
2
3
4
5
6
7
8
9
10
11
12
13
14
15
| @Data
@ContentRowHeight(20)
@HeadRowHeight(20)
@ColumnWidth(25)
public class WidthAndHeightData {
@ExcelProperty("字符串标题")
private String string;
@ExcelProperty("日期标题")
private Date date;
@ColumnWidth(50)
@ExcelProperty("数字标题")
private Double doubleData;
}
|
测试方法
1
2
3
4
5
6
7
8
9
10
11
12
13
14
15
16
17
18
|
@Test
public void test10() throws IOException {
String fileName = PATH + "user10.xlsx";
List<WidthAndHeightData> list = new ArrayList<>();
WidthAndHeightData widthAndHeightData = new WidthAndHeightData();
widthAndHeightData.setString("正哥");
widthAndHeightData.setDate(new Date());
widthAndHeightData.setDoubleData(10000D);
list.add(widthAndHeightData);
EasyExcel.write(fileName, WidthAndHeightData.class).sheet("列宽行高").doWrite(list);
}
|
测试结果
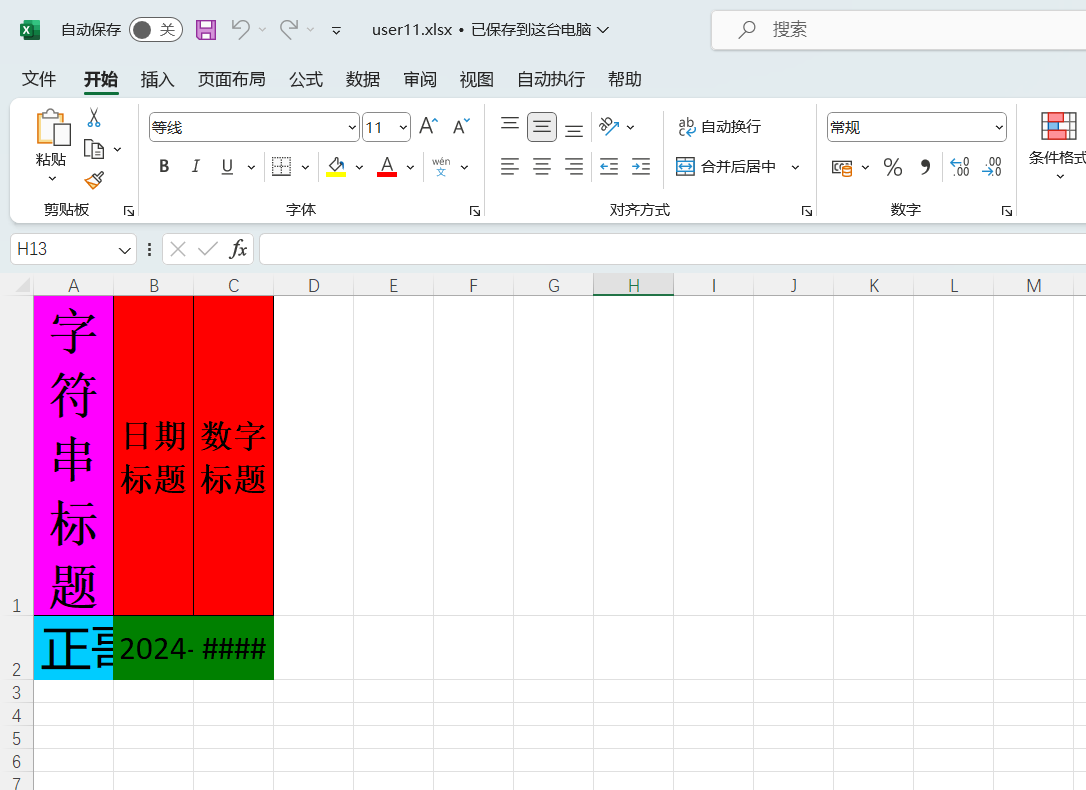
1.9 通过注解设置excel的样式
- @HeadStyle:设置头的背景
- 这个字段写在类上就是对所有的字段头都设置,也就是表的第一行。如果写在属性上就是只对这个属性的头设置背景颜色,属性的设置会覆盖掉类的设置
- @HeadFontStyle:设置头字体,规则同事
- @ContentStyle:设置内容的背景,规则同上
- @ContentFontStyle:设置内容的字体,规则同上
实体类
1
2
3
4
5
6
7
8
9
10
11
12
13
14
15
16
17
18
19
20
21
22
23
24
25
26
27
28
29
|
@Data
@HeadStyle(fillPatternType = FillPatternType.SOLID_FOREGROUND, fillForegroundColor = 10)
@HeadFontStyle(fontHeightInPoints = 20)
@ContentStyle(fillPatternType = FillPatternType.SOLID_FOREGROUND, fillForegroundColor = 17)
@ContentFontStyle(fontHeightInPoints = 20)
public class DemoStyleData {
@HeadStyle(fillPatternType = FillPatternType.SOLID_FOREGROUND, fillForegroundColor = 14)
@HeadFontStyle(fontHeightInPoints = 30)
@ContentStyle(fillPatternType = FillPatternType.SOLID_FOREGROUND, fillForegroundColor = 40)
@ContentFontStyle(fontHeightInPoints = 30)
@ExcelProperty("字符串标题")
private String string;
@ExcelProperty("日期标题")
private Date date;
@ExcelProperty("数字标题")
private Double doubleData;
}
|
测试方法
1
2
3
4
5
6
7
8
9
10
11
12
13
14
15
16
17
18
|
@Test
public void test11() throws IOException {
String fileName = PATH + "user11.xlsx";
List<DemoStyleData> list = new ArrayList<>();
DemoStyleData demoStyleData = new DemoStyleData();
demoStyleData.setString("正哥");
demoStyleData.setDate(new Date());
demoStyleData.setDoubleData(10000D);
list.add(demoStyleData);
EasyExcel.write(fileName, DemoStyleData.class).sheet("excel样式").doWrite(list);
}
|
测试结果
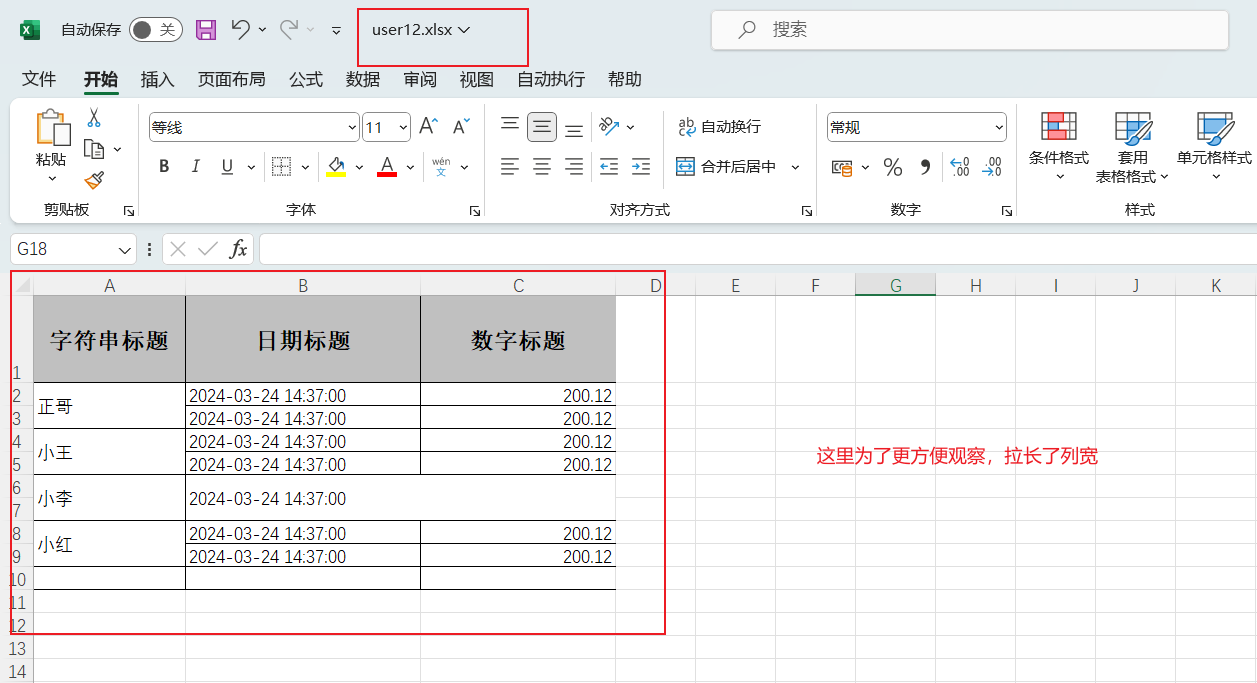
1.10 合并单元格
实体类
1
2
3
4
5
6
7
8
9
10
11
12
13
| @Data
@OnceAbsoluteMerge(firstRowIndex = 5, lastRowIndex = 6, firstColumnIndex = 1, lastColumnIndex = 2)
public class DemoMergeData {
@ContentLoopMerge(eachRow = 2)
@ExcelProperty("字符串标题")
private String string;
@ExcelProperty("日期标题")
private Date date;
@ExcelProperty("数字标题")
private Double doubleData;
}
|
测试方法
1
2
3
4
5
6
7
8
9
10
11
12
13
14
15
16
17
18
19
20
21
22
23
24
25
26
27
28
29
30
31
32
33
34
35
36
37
38
39
40
41
42
43
44
45
46
47
48
49
50
51
52
|
@Test
public void test12() throws IOException {
String fileName = PATH + "user12.xlsx";
List<DemoMergeData> list = new ArrayList<>();
DemoMergeData dmd = new DemoMergeData();
dmd.setDate(new Date());
dmd.setDoubleData(200.12);
dmd.setString("正哥");
DemoMergeData dmd2 = new DemoMergeData();
dmd2.setDate(new Date());
dmd2.setDoubleData(200.12);
dmd2.setString("正哥");
DemoMergeData dmd3 = new DemoMergeData();
dmd3.setDate(new Date());
dmd3.setDoubleData(200.12);
dmd3.setString("小王");
DemoMergeData dmd4 = new DemoMergeData();
dmd4.setDate(new Date());
dmd4.setDoubleData(200.12);
dmd4.setString("小王");
DemoMergeData dmd5 = new DemoMergeData();
dmd5.setDate(new Date());
dmd5.setDoubleData(200.12);
dmd5.setString("小李");
DemoMergeData dmd6= new DemoMergeData();
dmd6.setDate(new Date());
dmd6.setDoubleData(200.12);
dmd6.setString("小李");
DemoMergeData dmd7 = new DemoMergeData();
dmd7.setDate(new Date());
dmd7.setDoubleData(200.12);
dmd7.setString("小红");
DemoMergeData dmd8 = new DemoMergeData();
dmd8.setDate(new Date());
dmd8.setDoubleData(200.12);
dmd8.setString("小红");
list.add(dmd);
list.add(dmd2);
list.add(dmd3);
list.add(dmd4);
list.add(dmd5);
list.add(dmd6);
list.add(dmd7);
list.add(dmd8);
EasyExcel.write(fileName, DemoMergeData.class).sheet("合并单元格").doWrite(list);
}
|
测试结果
2. 读操作
2.1 简单读
先创建实体类
1
2
3
4
5
6
7
8
9
10
11
12
13
14
15
| @Data
public class DemoData {
private String name;
private Date hireDate;
private Double salary;
public DemoData() {
}
public DemoData(String name, Date hireDate, Double salary) {
this.name = name;
this.hireDate = hireDate;
this.salary = salary;
}
}
|
测试类
方式二是在方式一的基础上进行拆分
1
2
3
4
5
6
7
8
9
10
11
12
13
14
15
16
17
18
19
20
21
22
23
24
25
26
27
28
29
30
31
32
33
34
35
36
37
38
39
40
41
42
43
44
45
46
47
48
49
50
51
52
53
54
55
56
57
58
59
60
61
|
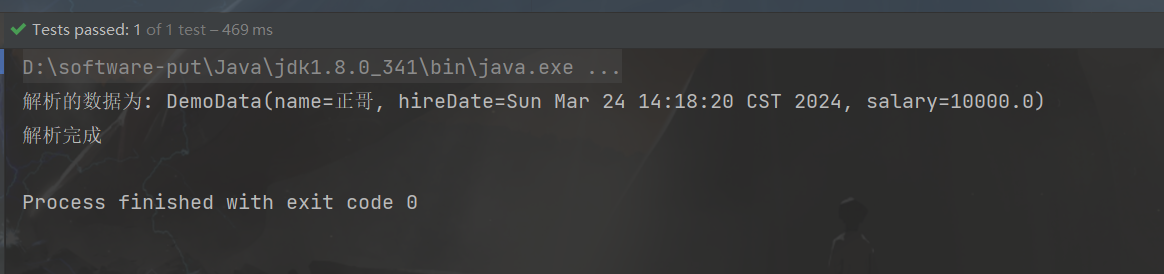
@Test
public void test01() {
String fileName = PATH + "user11.xlsx";
EasyExcel.read(fileName, DemoData.class, new AnalysisEventListener<DemoData>() {
@Override
public void invoke(DemoData data, AnalysisContext context) {
System.out.println("解析的数据为: "+data);
}
@Override
public void doAfterAllAnalysed(AnalysisContext context) {
System.out.println("解析完成");
}
}).sheet().doRead();
}
@Test
public void test02() {
String fileName = PATH + "user11.xlsx";
ExcelReader excelReader = EasyExcel.read(fileName, DemoData.class, new AnalysisEventListener<DemoData>() {
@Override
public void invoke(DemoData data, AnalysisContext context) {
System.out.println("解析的数据为: " + data);
}
@Override
public void doAfterAllAnalysed(AnalysisContext context) {
System.out.println("解析完成");
}
}).build();
ReadSheet readSheet = EasyExcel.readSheet(0).build();
excelReader.read(readSheet);
excelReader.finish();
}
|
测试结果
2.2 指定列的下标或列名
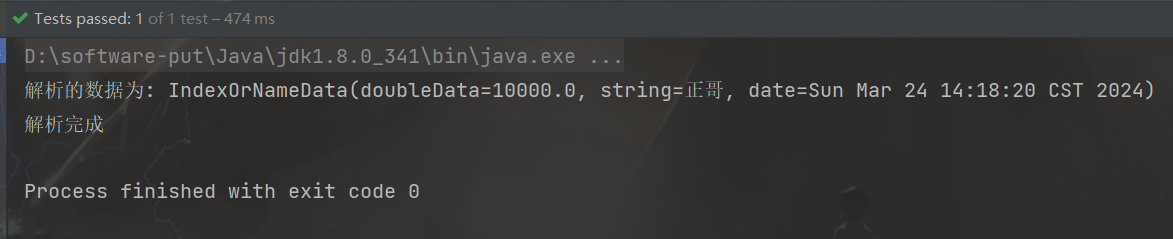
当实体类的属性顺序和表中的属性顺序不一致时,需要通过注解指定列的下标或者列名
实体类
1
2
3
4
5
6
7
8
9
10
11
12
13
14
15
16
| @Data
public class IndexOrNameData {
@ExcelProperty(index = 2)
private Double doubleData;
@ExcelProperty("字符串标题")
private String string;
@ExcelProperty("日期标题")
private Date date;
}
|
表字段

测试方法
1
2
3
4
5
6
7
8
9
10
11
12
13
14
15
16
17
18
19
20
21
22
23
24
25
26
|
@Test
public void test03() {
String fileName = PATH + "user10.xlsx";
EasyExcel.read(fileName, IndexOrNameData.class, new AnalysisEventListener<IndexOrNameData>() {
@Override
public void invoke(IndexOrNameData data, AnalysisContext context) {
System.out.println("解析的数据为: " + data);
}
@Override
public void doAfterAllAnalysed(AnalysisContext context) {
System.out.println("解析完成");
}
}).sheet().doRead();
}
|
测试结果
2.3 日期或数字的格式转换
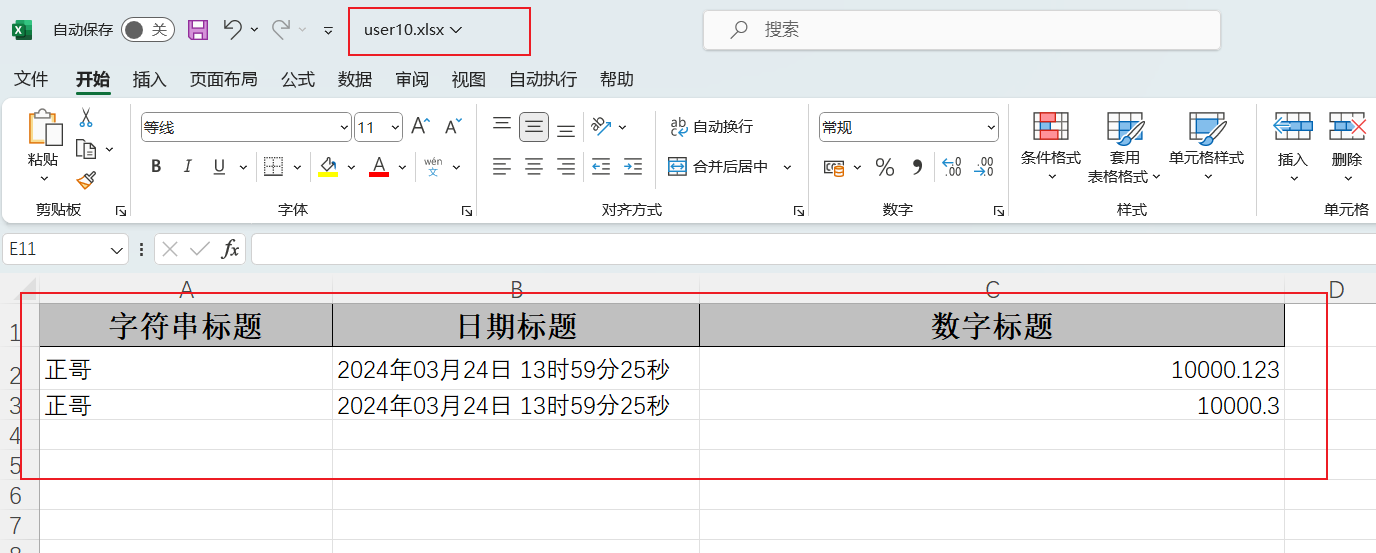
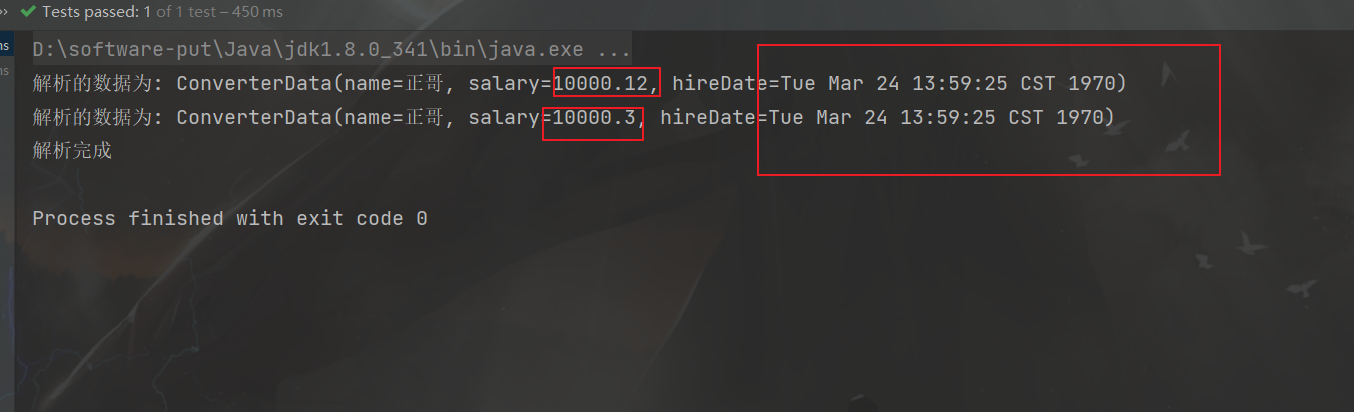
如果Excel表中的日期格式或者数字格式不符合需求,或者无法被Java解析时,需要在接收的实体类上进行数据转换
修改Excel表
实体类
1
2
3
4
5
6
7
8
9
10
11
12
13
14
|
public class ConverterData {
@ExcelProperty("姓名")
private String name;
@NumberFormat("#.##")
@ExcelProperty("数字标题")
private String salary;
@DateTimeFormat("yyyy年MM月dd日 HH时mm分ss秒")
@ExcelProperty("日期标题")
private Date hireDate;
}
|
测试类
1
2
3
4
5
6
7
8
9
10
11
12
13
14
15
16
17
18
19
20
21
22
23
24
25
26
27
|
@Test
public void test04() {
String fileName = PATH + "user10.xlsx";
EasyExcel.read(fileName, ConverterData.class, new AnalysisEventListener<ConverterData>() {
@Override
public void invoke(ConverterData data, AnalysisContext context) {
System.out.println("解析的数据为: " + data);
}
@Override
public void doAfterAllAnalysed(AnalysisContext context) {
System.out.println("解析完成");
}
}).sheet().doRead();
}
|
测试结果
2.4 读取多个或全部sheet标签
读取全部sheet标签
只需要在构建时使用doReadAll()即可,这里要注意要所有的sheet都是使用同一个类模板来读取,才能使用doReadAll()
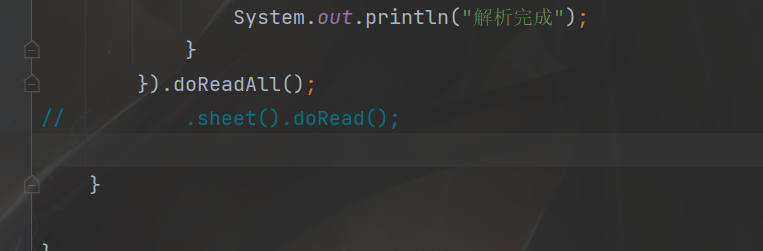
读取部分sheet
使用简单读方式二,每次创建不同的sheet
示例代码
1
2
3
4
5
6
7
8
9
10
11
12
13
14
15
16
17
18
19
20
21
22
23
24
25
26
27
28
29
30
31
32
33
34
35
36
37
38
39
40
41
42
43
44
45
46
47
48
49
50
51
52
53
54
55
56
57
58
59
60
61
62
63
64
65
66
67
68
|
@Test
public void testRead5() {
String fileName="user11.xlsx";
Class<DemoData> head = DemoData.class;
EasyExcel.read(fileName, head, new AnalysisEventListener<DemoData>() {
@Override
public void invoke(DemoData data, AnalysisContext context) {
System.out.println("解析的数据为: "+data);
}
@Override
public void doAfterAllAnalysed(AnalysisContext context) {
System.out.println("数据解析完成......");
}
}).doReadAll();
System.out.println("============================================================");
ExcelReader excelReader = EasyExcel.read(fileName).build();
ReadSheet sheet1 = EasyExcel.readSheet(0).head(DemoData.class).registerReadListener(new AnalysisEventListener<DemoData>() {
@Override
public void invoke(DemoData data, AnalysisContext context) {
System.out.println("解析的数据为: "+data);
}
@Override
public void doAfterAllAnalysed(AnalysisContext context) {
System.out.println("数据解析完成......");
}
}).build();
ReadSheet sheet2 = EasyExcel.readSheet(2).head(DemoData.class).registerReadListener(new AnalysisEventListener<DemoData>() {
@Override
public void invoke(DemoData data, AnalysisContext context) {
System.out.println("解析的数据为: "+data);
}
@Override
public void doAfterAllAnalysed(AnalysisContext context) {
System.out.println("数据解析完成......");
}
}).build();
excelReader.read(sheet1,sheet2);
excelReader.finish();
}
|
官方代码
1
2
3
4
5
6
7
8
9
10
11
12
13
14
15
16
17
18
19
20
21
22
23
24
25
26
27
28
29
30
|
@Test
public void repeatedRead() {
String fileName = TestFileUtil.getPath() + "demo" + File.separator + "demo.xlsx";
EasyExcel.read(fileName, DemoData.class, new DemoDataListener()).doReadAll();
fileName = TestFileUtil.getPath() + "demo" + File.separator + "demo.xlsx";
try (ExcelReader excelReader = EasyExcel.read(fileName).build()) {
ReadSheet readSheet1 =
EasyExcel.readSheet(0).head(DemoData.class).registerReadListener(new DemoDataListener()).build();
ReadSheet readSheet2 =
EasyExcel.readSheet(1).head(DemoData.class).registerReadListener(new DemoDataListener()).build();
excelReader.read(readSheet1, readSheet2);
}
}
|
3. 填充
3.1 简单填充,填充当个对象
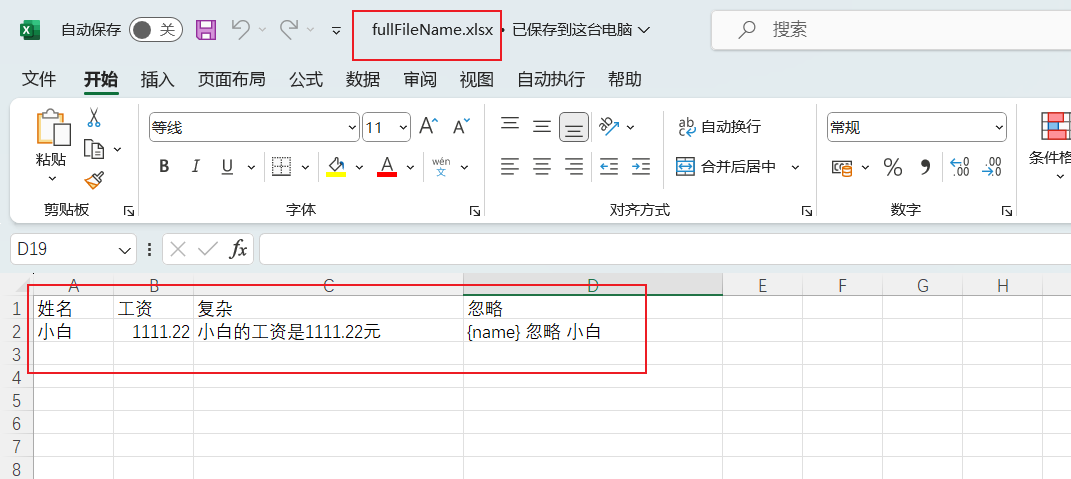
填充单个属性使用{}作为占位符,在大括号里面定义属性名称,如果{}想不作为占位符展示出来,可以使用反斜杠进行转义.
填充模板excel

测试类
1
2
3
4
5
6
7
8
9
10
11
12
13
14
15
16
17
18
19
20
| public class FullTest {
public String PATH = "E:\\workspace\\esayexcel\\";
@Test
public void test01() {
String templateName = PATH + "templateName.xlsx";
String fullName = PATH + "fullFileName.xlsx";
FillData data = new FillData();
data.setName("小白");
data.setNumber(1111.22);
EasyExcel.write(fullName).withTemplate(templateName).sheet().doFill(data);
}
}
|
测试结果
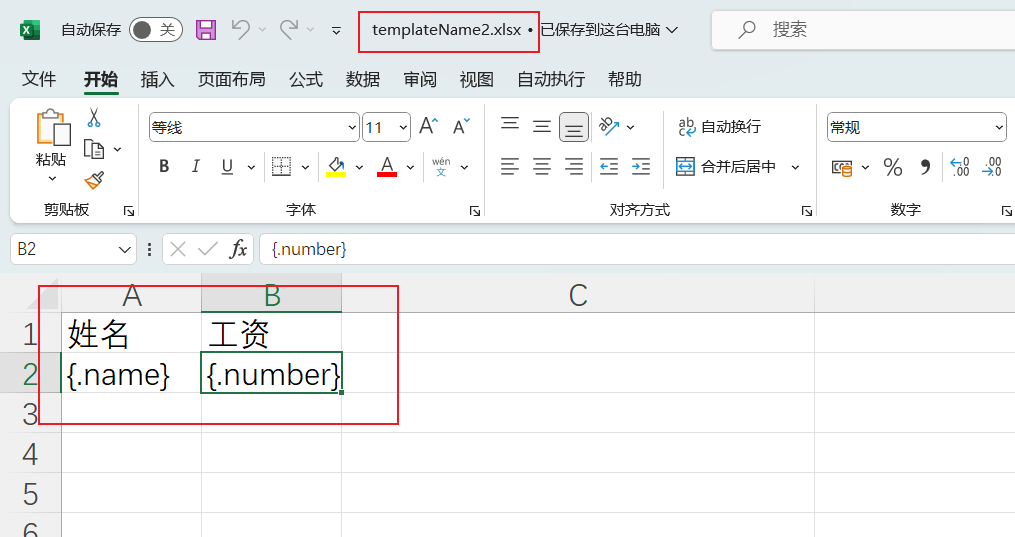
3.2 填充列表数据
excel填充模板
测试方法
1
2
3
4
5
6
7
8
9
10
11
12
13
14
15
16
17
18
19
20
21
22
23
24
25
26
27
|
@Test
public void test02() {
String templateName = PATH + "templateName2.xlsx";
String fullName = PATH + "fullFileName2.xlsx";
List<FillData> list = new ArrayList<>();
FillData data1 = new FillData();
data1.setName("小白");
data1.setNumber(1111.22);
FillData data2 = new FillData();
data2.setName("小红");
data2.setNumber(11312.22);
FillData data3 = new FillData();
data3.setName("小王");
data3.setNumber(123124.123);
list.add(data1);
list.add(data2);
list.add(data3);
EasyExcel.write(fullName).withTemplate(templateName).sheet().doFill(list);
}
|
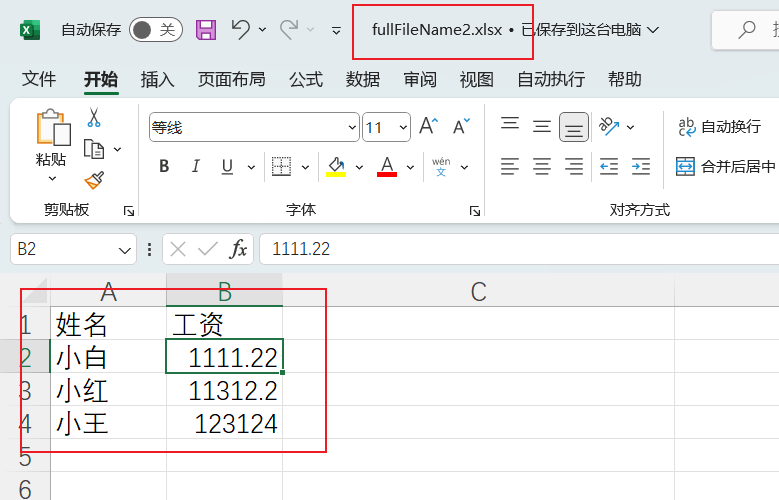
测试结果
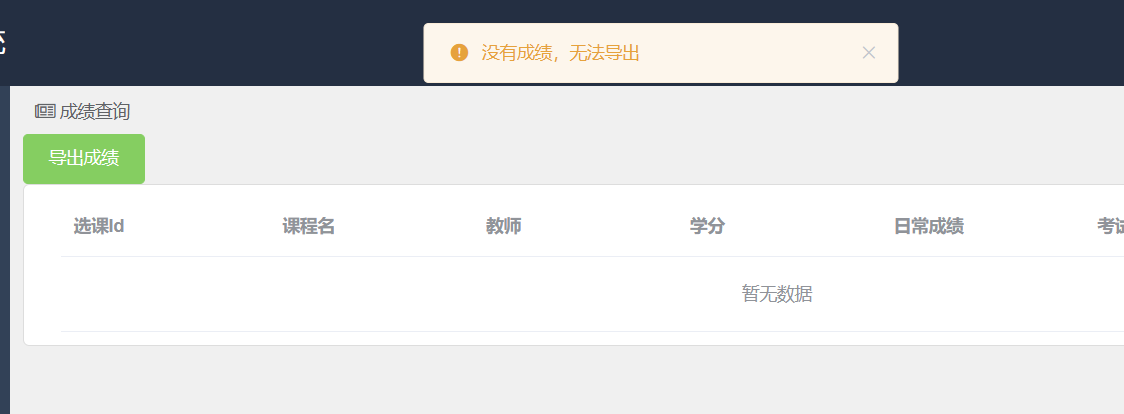
4.Web操作
4.1 文件下载
这里是我在完善个人学习项目功能时写的,这里只截取了一部分前端代码,通过前端处理来导出excel
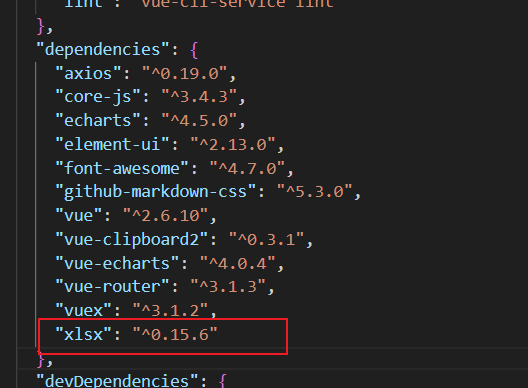
导入xlsx插件
在package.json中导入依赖
拉取依赖,npm insatll 或者 npm install xlsx –save
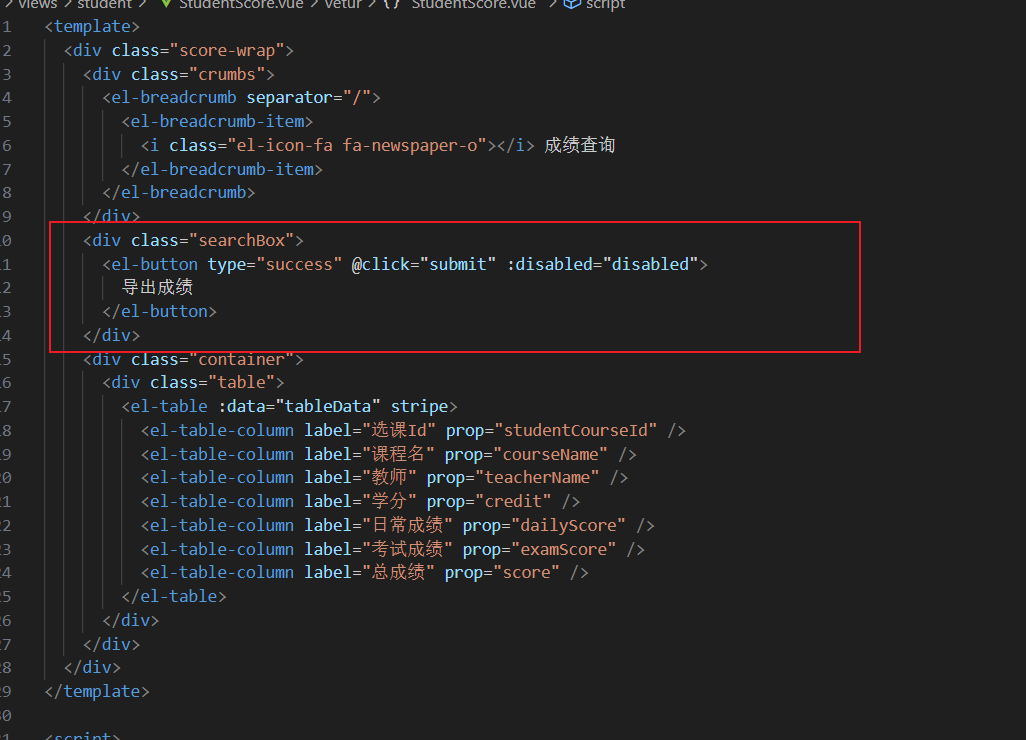
写导出按钮
写函数
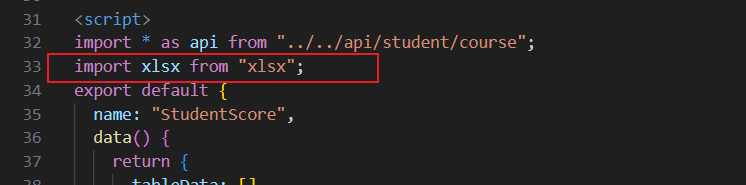
先在script中引入xlsx
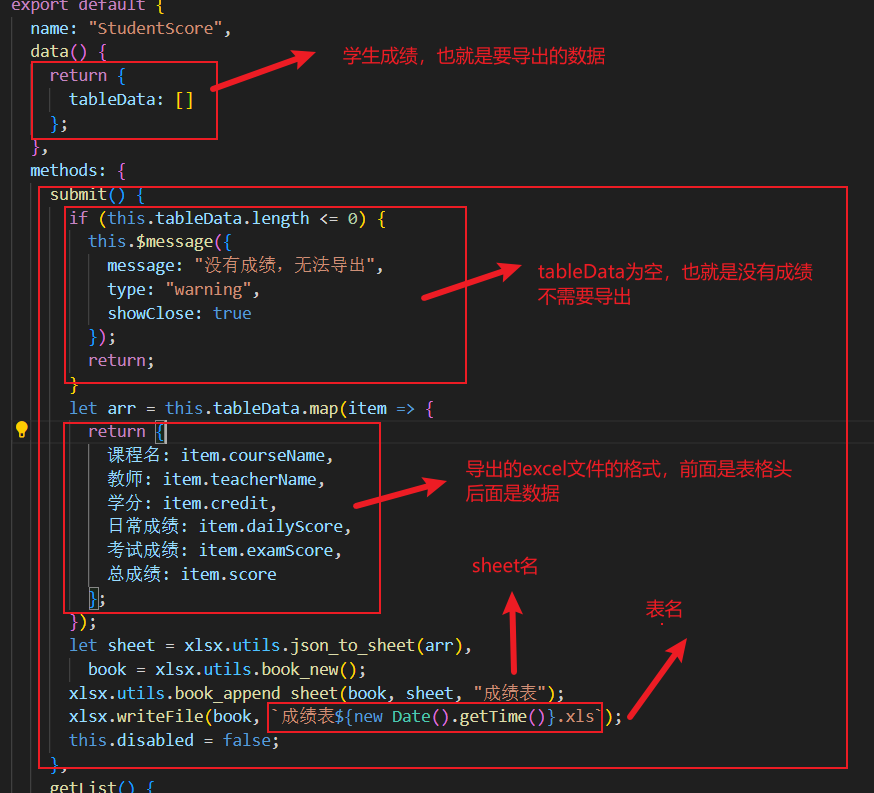
submit函数
1
2
3
4
5
6
7
8
9
10
11
12
13
14
15
16
17
18
19
20
21
22
23
24
25
| submit() {
if (this.tableData.length <= 0) {
this.$message({
message: "没有成绩,无法导出",
type: "warning",
showClose: true
});
return;
}
let arr = this.tableData.map(item => {
return {
课程名: item.courseName,
教师: item.teacherName,
学分: item.credit,
日常成绩: item.dailyScore,
考试成绩: item.examScore,
总成绩: item.score
};
});
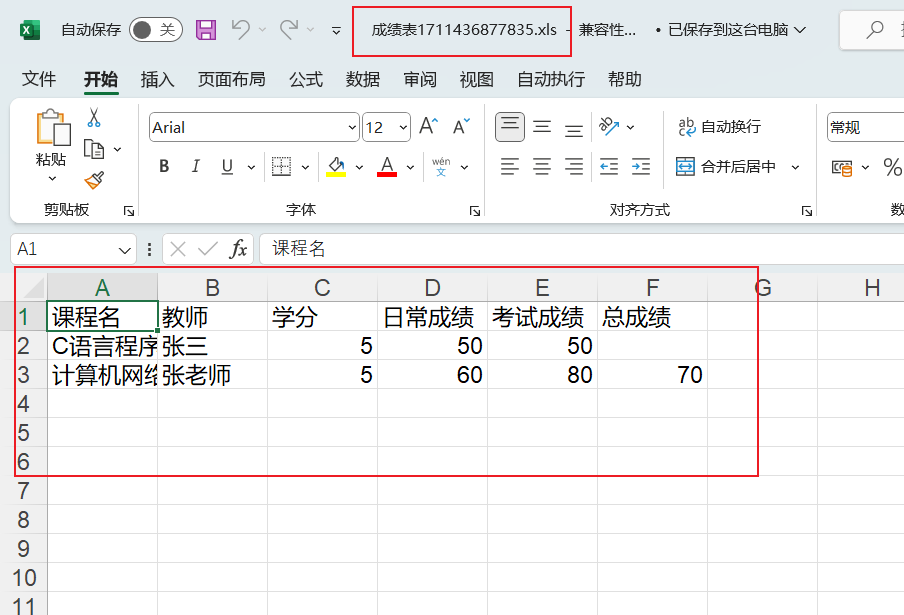
let sheet = xlsx.utils.json_to_sheet(arr),
book = xlsx.utils.book_new();
xlsx.utils.book_append_sheet(book, sheet, "成绩表");
xlsx.writeFile(book, `成绩表${new Date().getTime()}.xls`);
this.disabled = false;
}
|
数据
我这里只有成绩数据,并且不需要经过筛选,所以直接全部导出查询到的成绩数据,也就是tableData
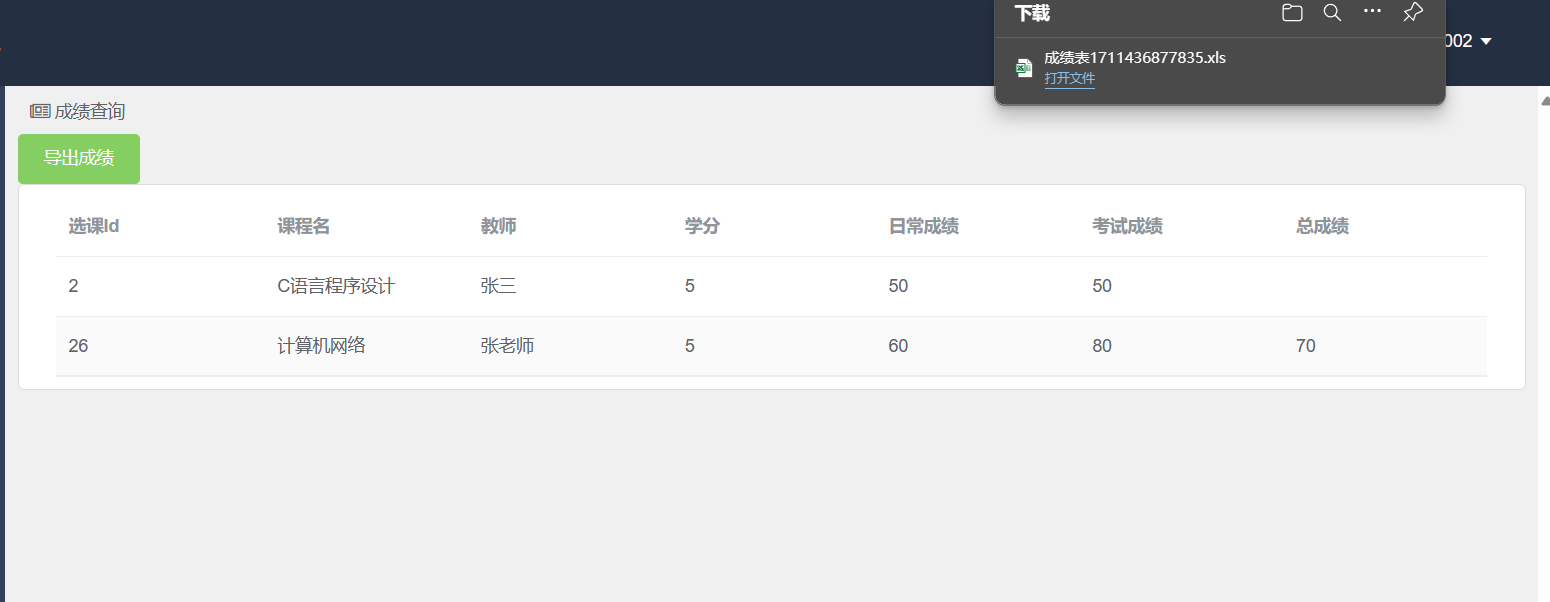
测试
前端效果
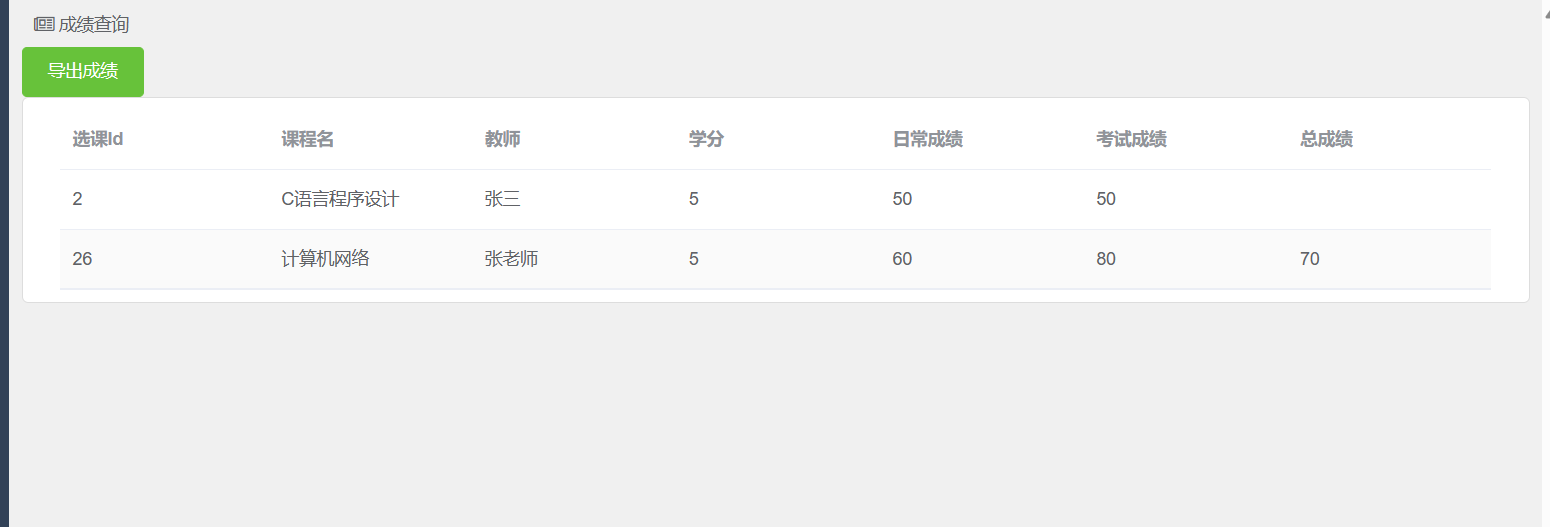
导出成绩
如果不存在成绩